72
OBJECTIVE OPERATIONS
Setting the picture position
If necessary, you can change the default picture position, which is set according to the selected cap-
ture icon, to the external fixation target.
There are the following three changing methods. Please change the picture position by your desired
method.
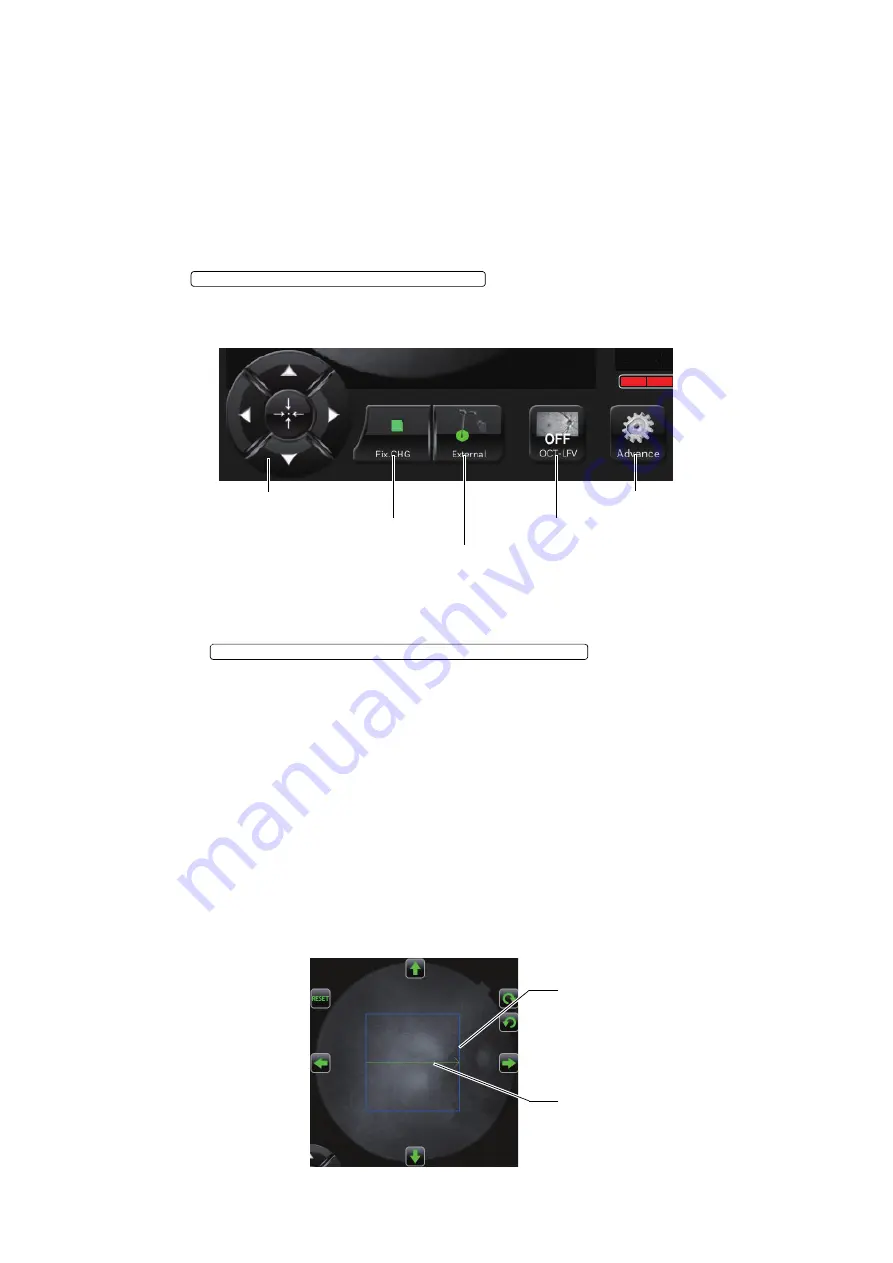
Changing by using the internal/external fixation target selector button
Change the internal fixation target to the external fixation target.
1
Tap the
on Area 3 of photography screen (OCT pho-
tography), and the target is changed to the external fixation target. Change to the desired picture
position. For the details of display, refer to P.29.
Changing by using the internal fixation target position adjustment button (control panel)
Change the picture position by adjusting the internal fixation target position finely.
1
Press the
on Area 3 of the photography
screen (OCT photography) to access the internal fixation target adjustment mode. The internal
fixation target is displayed on Area 2. Perform adjustment by pressing the upper, lower, right and
left arrow buttons. For the details of display, refer to page 33.
How to adjust the scan position
Use this method when changing the scan position in a large degree or changing it with fine adjust-
ments.
1
Tap the fundus/anterior segment live image area on Area 2 of the photography screen (OCT pho-
tography) to access the scan position adjustment mode. On Area 2, the graphic image of the
selected scan shape and range is displayed with a solid line. Perform adjustment by pressing
the upper, lower, right and left arrow buttons or the rotation buttons. For the details of the display,
refer to page 31.
EXTERNAL FIXATION TARGET SELECTOR BUTTON
OCT-LFV image ON/OFF
External fixation target selector button
Fixation target shape selector button
Internal fixation target adjustment button
[Advance] button
INTERNAL FIXATION TARGET POSITION ADJUSTMENT BUTTON
Scan position adjustment range (blue)
Scan pattern display


