71
OBJECTIVE OPERATIONS
Operation on the manual adjustment screen
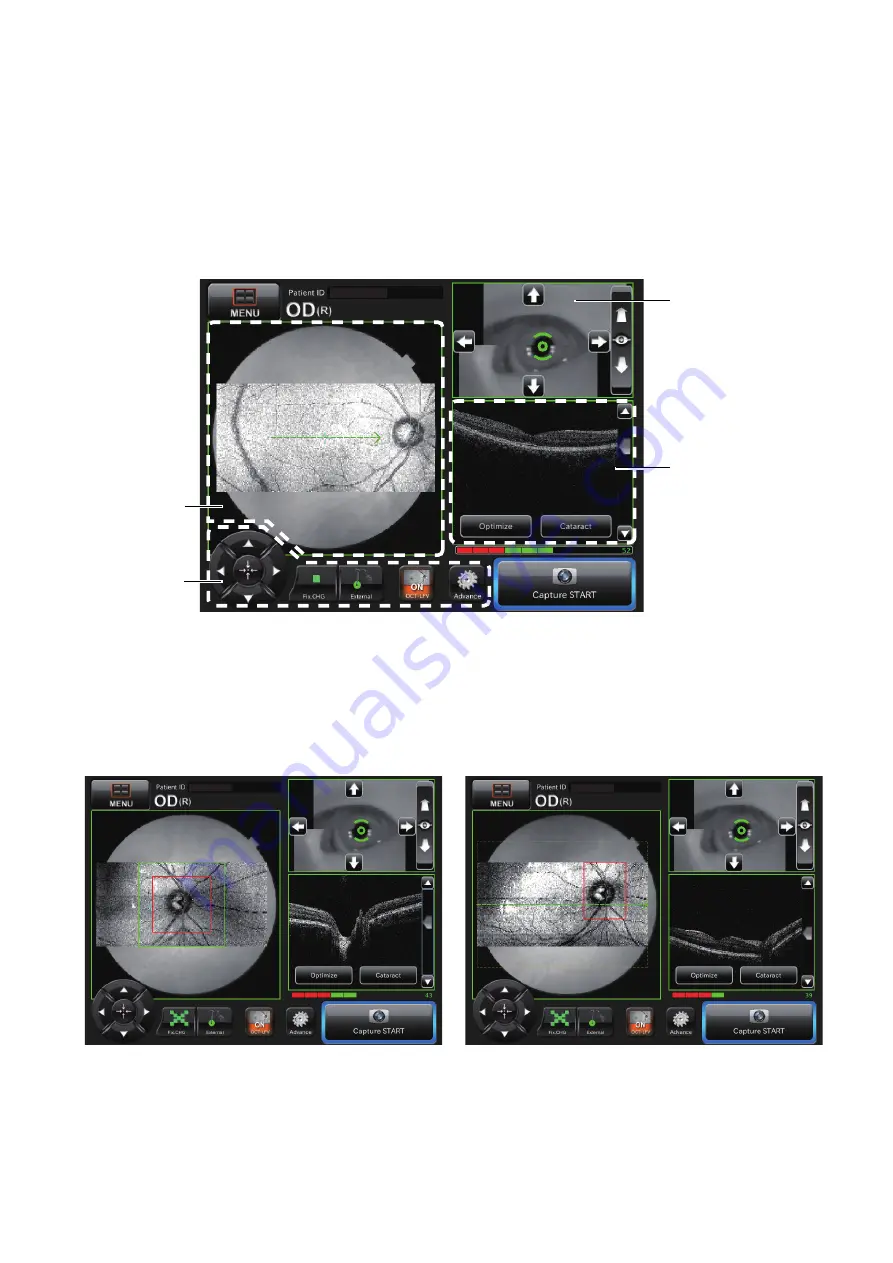
During manual adjustment, the photography screen is shown below. See P.23.
For details of each operation, refer to each photography screen.
For setting the flash level, refer to "Photography screen (Manual adjustment mode)" (P.23).
For adjusting the scan position, refer to "Photography screen (Tomogram scan position: Manual adjustment)"
(P.31).
For changing the internal/external fixation target, refer to "Photography screen (Internal fixation target position:
Manual adjustment)" (P.33).
For changing the diopter compensation lens, refer to "Photography screen (Focus: Manual adjustment)" (P.34).
Photography with "3D: Optic disc" and "3D: Wide"
When you perform the photography with "3D: Optic disc" and "3D: Wide", the following screens appear.
Make sure that the optic disc is within the red frame on the screen. If the optic disc is not so, by using
the internal fixation position adjustment button on Area 3 and the external fixation target, adjust the fix-
ation position to place the patient's optic disc within the red frame.
1234ABCD
Tomogram live
image area
Area 1
Area 2
Area 3
1234ABCD
1234ABCD
3D: Optic disc photography
3D: Wide photography


