


TonerRefillKits.com
RechargX™ RX139
Mon - Fri 8am - 5pm ET
© 1995-2014 ReChargX™, EmptyX, TonerRefillKits and TonerRefillKits.com, the TonerRefillKits logo, the
2014.07.30
800.527.3712 or 352.343.7533
ReChargX™ and EmptyX logos are trademarks owned by TonerRefillkits, LLC. All rights reserved.
Page 10 of 12
Note
: Only use the toner grabber cloth on the
exterior of the cartridge. Do not use the cloth
to clean any of the internal components, toner
covered roller or the drum unit.
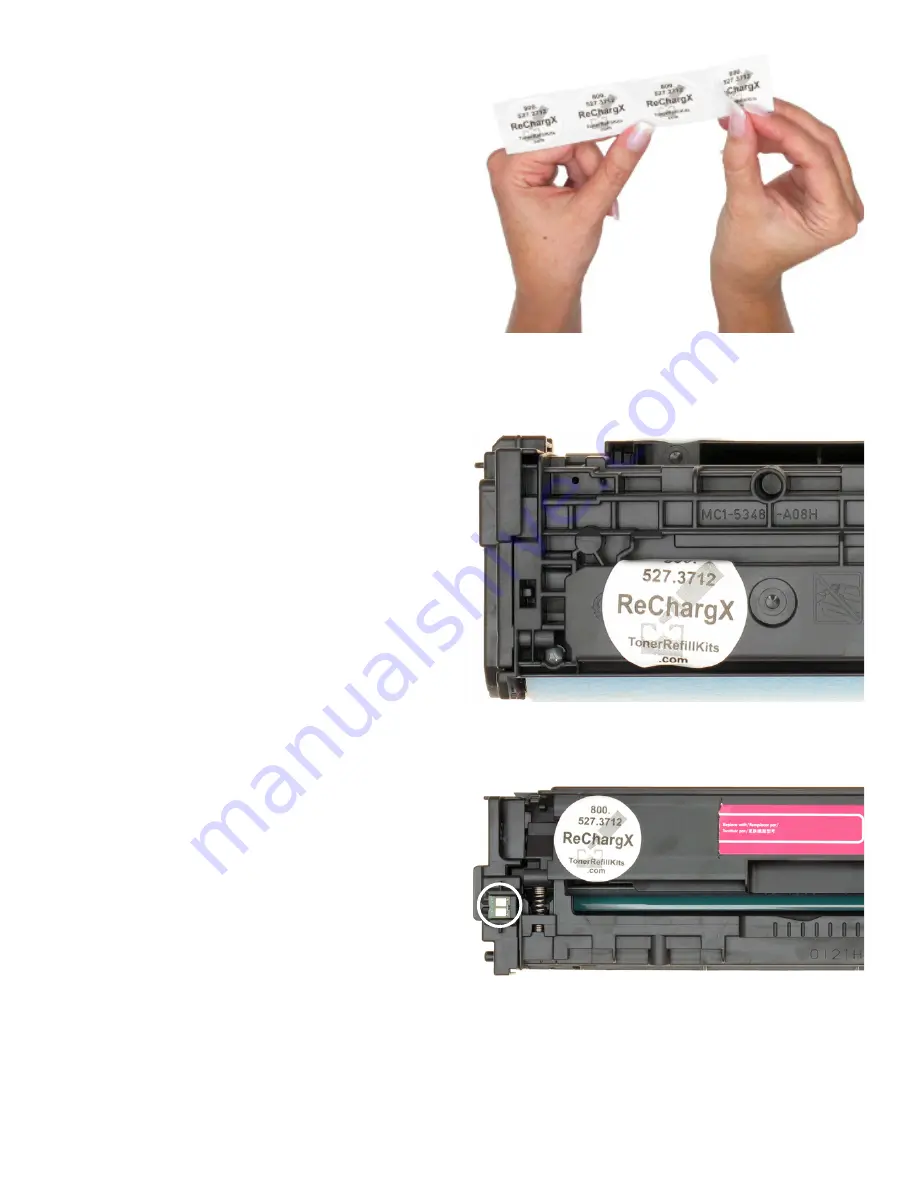
Step 22: Remove the ReChargX™ Seal
from the Protective Backing
Remove the ReChargX™ leak-proof seal from the
protective backing, included in the ReChargX™
RX139 Toner Refill Kit (figure 22).
Step 23: Apply the Leak-Proof Seal
Press firmly around the entire seal to ensure
the seal securely sticks to the toner cartridge,
shown in figure 23.
Step 24: Reset Chip Location
In this step we will replace the toner cartridge
reset chip located on the left of the cartridge
shown by the white circle in figure 24.
Figure 22
: Removing the ReChargX™ leak-proof seal
from the protective backing
Figure 23
: Sealing the waste hopper hole
Figure 24
: Locate the cartridge reset chip


