TonerRefillKits.com
RechargX™ RX139
Mon - Fri 8am - 5pm ET
© 1995-2014 ReChargX™, EmptyX, TonerRefillKits and TonerRefillKits.com, the TonerRefillKits logo, the
2014.07.30
800.527.3712 or 352.343.7533
ReChargX™ and EmptyX logos are trademarks owned by TonerRefillkits, LLC. All rights reserved.
Page 9 of 12
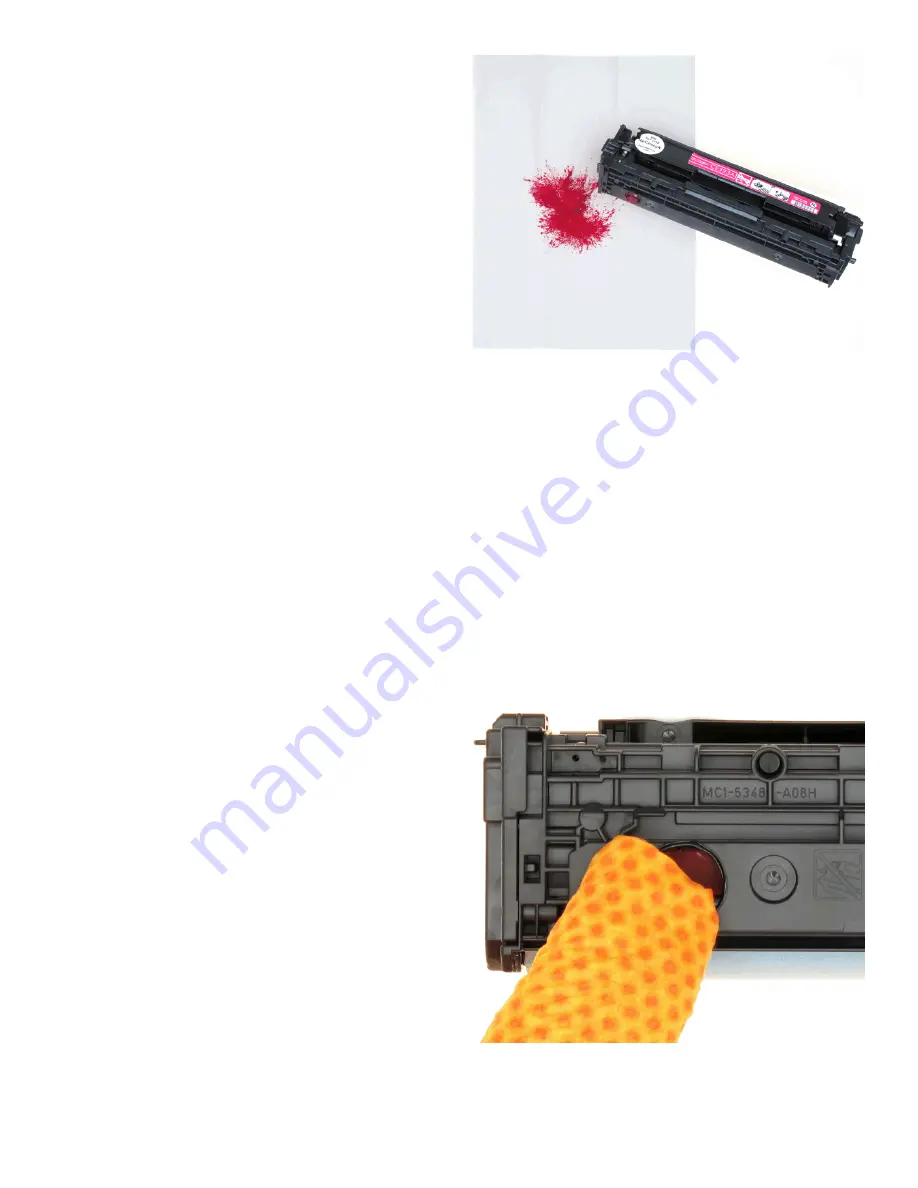
Step 20: Empty the Waste Hopper
In this step we will remove any toner that is still
in the waste hopper.
Prior to emptying the waste hopper, locate the
newsprint, included in the ReChargX™ RX139
Toner Refill Kit, and fold the paper both ways to
create a ridge in the center for toner to collect
during the emptying process.
Slowly turn the toner cartridge over placing
the hole within an inch or two of surface of the
newsprint.
Carefully pour out as much of the waste toner
as possible (figure 20).Shaking the toner car-
tridge up-and-down is not recommend as it
normally creates an unnecessary toner mess.
If the toner stops flowing, stand the cartridge
up and then re-lower the hole over the paper
(gently tapping along the side of the cartridge
helps to keep the toner flowing).
With the majority of the toner removed,
carefully fold the newsprint over and tape
each end to prevent accidental spills while
discarding the newsprint and toner.
Step 21: Clean the Area Around the Waste
Hopper Hole Before Sealing
Unfold the orange “toner grabber” cloth from the
ReChargX™ RX139 Premium Print Toner Refill
Kit and stretch it along both dimensions (it will
stretch considerably in one dimension and not
the other).
Stretching the orange toner grabber cloth
activates the toner retaining substance that
is embedded within the cloth.
You will be using this cloth to clean the outside
of the waste hopper hole to ensure the Re-
ChargX™ leak-proof seal will be applied firmly
to the cartridge (figure 21).
Figure 20
: Empty the Waste Hopper
Figure 21
: Cleaning the area around the waste hole