background image

OPERATION

USING  MANUAL  SWITCH

Use  this  switch  to  activate  the  output  relay  regardless  of  the  timer  program.  Pressing  the  switch  causes  the

output  relay  to  connect  for  five  seconds.  This  is  possible  for  each  individual  output.  Use  this  switch  when
performing  a  test  at  time  of  equipment  installation  or  for  other  purposes  that  necessitate  the  manual  relay

activation regardless of the timer program.

The switch does not work during  power outage.

The switch works regardless of the front-mounted output AUTO/OFF switch.

USING  REAR-MOUNTED  CHANNEL ASSIGNMENT

This switch  is  used to switch over from the B,  C or D channel to the A channel. When the  B channel switch  is

set to ON, the B program output is delivered from the A channel, with the A program output delivered from the A

channel. In this event, no output is delivered from the B channel.

Example 1

Given that each of the output channels is programed

as Example 1, the output is delivered from each
channel as follows.

A

8:30
9:30

10:30

B

9:00

10:00
11:00

C

12:00

If all the switches are set to OFF.

A channel: Output is delivered at 8:30, 9:30 and 10:30.

B channel: Output is delivered at 9:00,10:00 and 11:00.

C channel: Output is delivered at 12:00.

If both the B and C switches are set to ON.

A channel: Output is delivered at 8:30, 9:00, 9:30,10:00,

10:30,11:00, and 12:00.

No output is delivered from both the B and C channels.

1.  Rear-mounted  CHANNEL  ASSIGNMENT  switch  vs.  front-mounted  AUTO/OFF  switch.  The  AUTO/OFF

switch is effective for the program registered into each output.

AUTO 

OFF

If the CHANNEL ASSIGNMENT switch  of B

channel is set to ON and the AUTO/OFF switch
of A channel to OFF in Example 1.

A

B

C

D

A channel delivers output at 9:00, 10:00 and 11:00.

B channel delivers no output.
C channel delivers output at 12:00.

Since the A AUTO/OFF switch is set to OFF, the output is not delivered from the A
channel at 8:30, 9:30 and 10:30 as programed.
Since the B channel is switched over to the A channel, the A channel delivers output at
9:00,  10:00 and  11:00, the hours programed into the B channel.

14

Summary of Contents for TT-104

Page 1: ...ancellation can be performed easily and precisely through individual key operation and display Setting the pause mode allows no program output to be delivered Output is a no voltage make contact that...

Page 2: ...Program registration 4 Program check correction and cancellation 5 Entire program cancellation 6 Program operation 7 Pause mode 8 Using front mounted AUTO OFF switch 9 Using manual switch 10 Using rea...

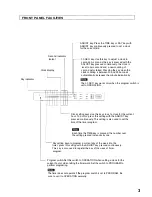
Page 3: ...icator Clock setting keys Use this keys to set a clock for the current hour To do this press this setting with the ADJUST key pressed continuously This setting is also used to set the time of the time...

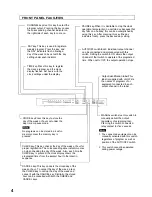
Page 4: ...n label This label is supplied with unit Write the names of programs of or equipment connected to each output channel in the label STORE key Press this key to store the day of the week or hours set un...

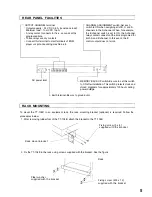
Page 5: ...art terminals of BGM player or spot announcing machine etc MEMORY BACK UP switch Be sure to set this switch to ON after installation This switch protects clock and stored programs for approximately 10...

Page 6: ...ed If the unreal hour is set which is not in a range from zero hour 00 00 to 23 hundred 59 hours 23 59 both the date indicator and clock display flash and at the same time a warning tone beeps In such...

Page 7: ...programs together per equipment connected and assign the output channel to each equipment If the same equipment are used but their programs are not the same assign different output channels Example If...

Page 8: ...setting Its indicator comes on Press the THU setting Its indicator comes on Press the FRI setting Its indicator comes on MON TUE WED THU FRI When the wrong day setting has been pressed press the same...

Page 9: ...9 00 to 17 30 Pressing the STORE key to register the unreal hour other than one from 00 00 to 23 59 causes characters Err to appear in the clock display and the attempt of its registration is refused...

Page 10: ...day of the week To step 10 to cancel the day of the week Press the TIME mode key The time mode indicator comes on and at the same time a dotted line flashes in the clock display Check the hour Each t...

Page 11: ...till that hour appears in the display Press the CANCEL key for cancelling the indicated hour and then set the new hour using the clock settings Register the new hour with the STORE key Be sure to canc...

Page 12: ...ION PROGRAM PAUSE MODE The PAUSE key is used to temporarily make the timer not to function on particular days This is possible for up to the 7th day from the day of registration No output is delivered...

Page 13: ...nt day is set after the pause registration perform the new pause registration Set the program switch to OPERATION after finishing programing USING FRONT MOUNTED AUTO OFF This switch is used to stop ac...

Page 14: ...t is delivered from each channel as follows A 8 30 9 30 10 30 B 9 00 10 00 11 00 C 12 00 If all the switches are set to OFF A channel Output is delivered at 8 30 9 30 and 10 30 B channel Output is del...

Page 15: ...chool hour program 4 Examination day program 1 register the ordinary school hour program into the A channel Register Monday through Friday 2 register the Saturday program into the B channel Register S...

Page 16: ...dications go out at time of power outage However a clock works normally and stored programs are protected No relay output is produced After power restoration the timer works normally and indicates the...

Page 17: ...50 60 Hz 3 watts 100 hours 30 steps per channel Day of the week hour minute output channel 4 channels A B C D No voltage dry make contact 5 seconds make output 24 V DC 0 5 A 5 seconds per month 25 C...

Page 18: ...TOA Corporation Printed in Japan 133 05 276 50...

Reviews: