7
discharge.
An integrated protective circuit automatically
Warning!
Do not press the ON/OFF switch any
more if the protective circuit has actuated. This
may damage the battery.
1. Check that your mains voltage is the same as
that marked on the rating plate of the battery
charger. Plug the battery charger in the plug
socket and connect the charging cable to the
charging connection. The charging process
starts as soon as the charging cable is
connected to the charging adapter.
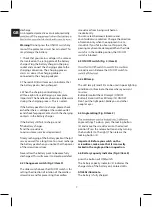
2. The red LED (6) will come on to indicate that
the battery pack is being charged.
3. When the charging control lamp (6)
all three lights lit, said charging is complete.
Important! The handle may become a little warm
during the charging process. This is normal.
If the battery pack fails to charge, please check
whether there is voltage at the socket-outlet
and check for proper contact with the charging
contacts in the battery charger.
If the battery still fails to charge, send
the battery charger
and the screwdriver
to our customer services department.
Timely recharging of the battery pack will help it
serve you well for a long time. You must recharge
the battery pack when you notice that the power
of the screwdriver drops.
Never allow the battery pack to become fully
discharged. This will cause it to develop a defect.
6.2 Changeover switch (Fig. 2/Item 9)
The slide switch above the ON/OFF switch is for
setting the direction of rotation of the cordless
screwdriver and for preventing the cordless
screwdriver from being switched on
inadvertently.
You can select between clockwise and
counterclockwise rotation. Change the direction
of rotation only when the equipment is at a
standstill. If you fail to observe this point, the
gearing may become damaged. When the slide
switch is in the middle position, the ON/OFF
switch is blocked.
6.3 ON/OFF switch (Fig. 2 / Item 8)
screwdriver on. Release the ON/OFF switch to
6.4 LED lamp
The LED lamp (2)and(14) can be used in poor lighting
conditions to illuminate the area where you want
to screw.
Button(8)control the LED lamp(2) ON/OFF
Button(13)control the LED lamp(14) ON/OFF
Don't put the light point-blank you and other
people's eyes
6.5 Angle setting (Fig. 3/Item 3)
angle settings. To do so, press the locking button
(3) and move the screwdriver into the desired
position (Press the release button and by turning
the handle (5) to the right). Then release the
locking button (3).
Important. Before you switch on the
screwdriver, make sure that it is correctly
locked in the angle position in question.
6.6 Battery capacity indicator (Fig. 4/Item 8)
press the button auf ON/Switch.
The battery capacity indicator (4) indicates the
charge state of the battery on 3 colored LEDs.
All LEDs illuminate:
The battery is fully charged.
GB


