background image

36


-  visual inspection of connecting, network and earthing cables condition;

-  verification of the turnstile performance during manual control in the modes specified in Table

   9 or as part of ACS when pendants, identification cards are used;

-  verification of reliability of the turnstile screw joints and earthing connections - to be tightened,

   if applicable;

- lubrication of all rubbing stop levers, wheel and pinion teeth of the turnstile control mechanism

  at least monthly with lubricant OKB-122-7 according to GOST 18179-72 or LITOL 24, Ciatim

  or engine

 oil.

Table 13

 - Periodic maintenance by technical staff

WARNING

:

The turnstile should not be washed with water under pressure.

There  are  no  user-serviceable  parts  inside  the  turnstile.  Do  not  attempt  to 

perform  repair  such  as  lubrication,  component  replacement  and  adjustment 

inside the device. All such works to be performed only by the qualified technical 

personnel!

Fixation screws

   6 months  

      Checking/Tightening

Mechanical screws

6 months  

      Checking/Tightening

Actuator

12 months 

        Control

Controller

12 months            Ch Cleaning

Component 

 Period 

 Action

Position sensors 

 6 months 

 Ch Cleaning

Cable joints and sockets 

 12 months 

 Control

Locking device 

 6 months 

 Ch Cl

 Lubrication

     ROUTINE MAINTENANCE

4.1  

General guidelines

Minor  malfunctions  of  the  turnstile  are  listed  in 

Table  9

  and  to  be  remedied  by  the  customer. 

More complicated malfunctions to be remedied by the manufacturer’s representative. 

IMPORTANT: INSPECTION, CLEANING, REPAIR OF THE TURNSTILE 

COMPONENTS TO BE PERFORMED ONLY AFTER THE TURNSTILE IS 

DEENERGIZED!

4.2 

Possible malfunctions

Possible malfunctions of the turnstile and their remedies are listed in 

Table


12

.

Summary of Contents for BASTION-M

Page 1: ...SERVO OPERATED TRIPOD TURNSTILES CENTURION M BASTION M SKULL M TWIX M OPERATION MANUAL 2018 TiSO PRODUCTION LTD...

Page 2: ...OSAL 39 7 MANUFACTURER S WARRANTY AND TERMS OF WARRANTY MAINTENANCE 39 Annex 41 Annex B Control panel and connection diagram 45 Annex C Wiring diagram of the servo operated tripod type turnstile 47 An...

Page 3: ...k with electrical facilities with voltage up to 1000 V and scrutinizing this Operation Manual obtaining safety instructions and trained for operation and maintenance of the turnstile Reliability and d...

Page 4: ...on CENTURION M T3 TCC E AUIA 095 OM BASTION M T3 TCY E AUIA 097 OM SKULL M T3 TCG E AUIA 096 OM TWIX M T3 TYK E AUIA 137 OM Example of reference designation of the servo operated turnstile with solid...

Page 5: ...to AC network with parameters specified in paragraph 1 2 Specifications inspection adjustment and repair should be performed only after the turnstile is deenergized After purchasing of the turnstile...

Page 6: ...Ambient air temperature MC4 1 to 40 Relative air humidity Ambient air allowable pressure Transportation temperature range Storage temperature range Group of mechanical application L3 Altitude above se...

Page 7: ...st 10 years 1 2 Specifications The key parameters of the turnstile are specified in Table 4 Table 4 Parameter description Unit measure Parameter value Minimum traffic flow capacity in free access mode...

Page 8: ...l reference designation T3 TCC SE carbon steel painted in any colour according to RAL reference designation T3 TCC E The turnstile basic modification is made of brushed stainless steel CENTURION M BAS...

Page 9: ...stall with dismounted barrier rods See Fig 2 Fig 2 Tripod turnstile scope of delivery 1 3 3 The turnstile design overall and installation dimensions See Fig 3 Fig 3 Tripod turnstile dimensions 1 Is no...

Page 10: ...positioned horizontally barring the turnstile access 1 4 1 3 The plates on which power supply unit controllers terminal blocks for connection to 220 V network and control panel are mounted are fixed...

Page 11: ...n is shown in Figure 5 Top view Front view 6 hub shaft 1 gear motor 2 position sensor 7 mechanism body 3 antipanic device 8 hub with barrier rods 9 stop catches 4 locking solenoid 5 driving belt 10 me...

Page 12: ...the relevant angle is reached they are locked by means of two stop catches of the actuating mechanism The mechanism powerful controllable ratchet system does not allow to return a barrier rod in the...

Page 13: ...he turnstile scope of delivery extension cord kit of end and pin wrenches kit of hexagons kit of screwdrivers hammer multimeter tester measuring tape marker pliers side cutters builder s level 13 Afte...

Page 14: ...0 1 7 V Maximum peak voltage applied to inputs IN1 IN8 15 V Peak voltage switched by outputs GRN1 RED1 GRN2 RED2 30 V Peak current switched by outputs GRN1 RED1 GRN2 RED2 2 Peak voltage switched by ou...

Page 15: ...d into program depending on incoming commands rotor position rotation speed and motor current It provides rotor locking in initial state maintaining rotor rotation speed in access mode as well as moto...

Page 16: ...X2 9 MOT1 EXIT Motor connection X2 10 MOT2 EXIT X2 11 GND X2 12 24 V ENTRY 3 3 ENTRY EXIT power supply common wire power supply common wire Communication port power supply controller energization 1 0...

Page 17: ...uts for acquisition of control commands 5 Number of signal outputs 7 Type of inputs logical Type of outputs open collector Logical 1 voltage 3 5 V Logical 0 voltage 0 2 2 V Maximum peak voltage applie...

Page 18: ...or unlocking in one direction with the possibility of its revolving to 120 It provides access of one pedestrian through the turnstile Fig 10 Appearance of the turnstile controller 112 21 20 00 SINGLE...

Page 19: ...T1 or OUT2 is removed Delay of WAITING FOR START OF ACCESS is reset When rotor is rotated to 64 ACCESS DETECTION OUT3 or OUT4 signal is generated When rotor is rotated to 120 OCCUPIED ACCESS and ACCES...

Page 20: ...e to the angle more than 6 the controller is switched to the INITIAL STATE 1 6 2 3 5 PANIC FUNCTION The turnstile is switched to PANIC state After the active state is held on input INP5 PANIC for more...

Page 21: ...otor reaches the angle 120 1 5 INP5 TO BE OPENED B ENTRY 1 6 GND common power supply common wire 2 1 GND common 2 2 OUT1 START OF ACCESS EXIT Signal is generated by controller when rotor revolves from...

Page 22: ...3 5 SGN2 ENTRY Selection of turnstile modification 3 6 SGN3 ENTRY Not applicable 3 7 SGN4 ENTRY Not applicable 3 8 INDAR EXIT It is used for the turnstile LED display control 1 Type of output open col...

Page 23: ...ctor 2 Peak voltage on public key 50 V 3 Peak current of public key 9A 4 Resistance of public key 0 11 Ohm 4 3 MGB EXIT Not applicable 4 2 MGA Not applicable 4 4 MGB Not applicable 5 1 GND common powe...

Page 24: ...e turnstile when metalwork of the turnstile and its components and accessories are mechanically damaged 2 1 3 List of special operation conditions Mean time of the turnstile access in single access mo...

Page 25: ...turer s warranty liabilities 2 2 3 Safety Measures Installation to be performed only by the persons briefed on safety and studied this manual Only serviceable tools to be used during installation of t...

Page 26: ...26 Side view Top view Fig 12 Tripod turnstile layout conditionally ENCLOSURE ENCLOSURE...

Page 27: ...rding to the turnstile data sheet WARNING When the turnstile damages are detected or in case of shortage of delivery installation work to be stopped and the turnstile supplier to be referred to The tu...

Page 28: ...28 BASTION M TWIX M SKULL M Fig 13 Tripod type turnstile installation marking...

Page 29: ...he turnstile mechanism 4 During installation attention to be paid that the mechanism fixation holes to be aligned with the hub holes c The hub 1 to be secured with three screws 3 Fig 14 Installation o...

Page 30: ...nstalled 5 To be secured with anchors Fig 15 General view of the CENTURION M and BASTION M tripod turnstiles assembly 9 The screws on the turnstile rack lid butt ends to be unscrewed and the lid to be...

Page 31: ...to be pulled through available service hole in the turnstile rack bottom butt end part by reclining the turnstile Fig 12 Fixation holes at the turnstile bottom plate to be aligned with prepared surfac...

Page 32: ...ed in the removal reverse sequence WARNING During the turnstile installation it should be taken into account that horizontally positioned barrier rod must be at a distance not more than 50 100 mm from...

Page 33: ...tions Both FREE buttons to be pushed for access in both directions A and B FREE button to be pushed for access in selected direction A or B Green arrow of authorized free access is lit in selected dir...

Page 34: ...on during the active panic mode Barrier rod is dropped and access way is cleared when the PANIC button is pushed on control panel and hold for more than 7 seconds or when signal is sent to the relevan...

Page 35: ...d in instrumentation instruction manuals 3 3 Maintenance procedure 3 3 1 The turnstile maintenance includes preventive measures which are taken according to the established frequency to maintain the t...

Page 36: ...o perform repair such as lubrication component replacement and adjustment inside the device All such works to be performed only by the qualified technical personnel Fixation screws 6 months Checking T...

Page 37: ...Table 12 Make sure that ACS provides proper activation signal...

Page 38: ...38 Continued Table 12 1 2 3 4 3 Postrepair checkout The turnstile performance to be checked after repair according to paragraph 2 3 2 of this OM...

Page 39: ...ontain materials environmentally hostile and hazardous to human health and special measures are not required for its disposal 7 MANUFACTURER S WARRANTY AND TERMS OF WARRANTY MEAINTENANCE 7 1 The manuf...

Page 40: ...f Ukraine concluded purchase contracts and these warranty liabilities TiSO PRODUCTION LTD 14 Promyshlennaya str 02088 Kiev Ukraine Tel 38 044 291 21 01 Tel Fax 38 044 291 21 02 E mail trade tiso globa...

Page 41: ...Annex mandatory Design overall and installation dimensions of the ENTURION M type turnstile Figure 1 Tripod turnstile ENTURION M...

Page 42: ...42 Continued Annex mandatory Design overall and installation dimensions of the turnstile BASTION M Figure 2 Tripod turnstile BASTION M...

Page 43: ...43 Continued Annex mandatory Design overall and installation dimensions of the turnstile SKULL M Figure 3 Tripod turnstile SKULL M...

Page 44: ...44 Continued Annex mandatory Design overall and installation dimensions of the turnstile TWIX M Figure 4 Tripod turnstile TWIX M...

Page 45: ...rol panel housing 2 SINGLE ACCESS mode control button 3 front plate 4 LOCK mode control button 5 FREE ACCESS mode control button 6 PANIC mode control button 7 access direction LED display 8 controller...

Page 46: ...46 P G A B Continued Annex B Control panel and connection diagram Figure B 2 Control panel AUIA 114 02 00 00 connection diagram...

Page 47: ...X3 RX X1 1 10 7 4 1 GND 24V GND MOT1 MG 2 MG 1 MG 1 GRN2 RED 1 X2 12 5V 11 GND 9 GND 8 IN 8 6 IN 6 5 IN 5 3 IN 3 2 IN 2 MOT2 MG 2 RED 2 GRN1 10 GND 7 IN 7 4 IN 4 1 IN 1 3 1 2 GRN XP1 12V RED PCB 121...

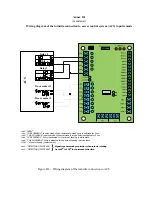
Page 48: ...nd is issued entry is activated for 5 sec inp3 TO BE OPENED B in pulse mode When command is issued entry is activated for 5 sec inp4 TO BE OPENED A Entry is activated for the time of keeping in active...

Page 49: ...B in pulse mode When command is issued entry is activated for 5 sec inp4 TO BE OPENED A Entry is activated for the time of keeping in active state inp5 TO BE OPENED B Entry is activated for the time o...

Page 50: ...ntry is activated for 5 sec inp3 TO BE OPENED B in pulse mode When command is issued entry is activated for 5 sec inp4 TO BE OPENED A Entry is activated for the time of keeping in active state inp5 TO...

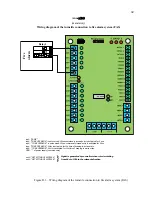
Page 51: ...ated for 5 sec inp4 TO BE OPENED A Entry is activated for the time of keeping in active state inp5 TO BE OPENED B Entry is activated for the time of keeping in active state GND of power supply common...

Page 52: ...52 Annex D 5 mandatory Wiring diagram of the turnstile connection to control panel Figure D 5 Wiring diagram of the turnstile connection to control panel...

Reviews: