


10
Palm Desktop Software Installation and Configuration
The following section will help you to install the
Palm Desktop
software and
Palm
/PC
Inspection Manager FLX
application. All installation sections may not
apply to your site. Please review Symbol’
s
Palm
manual before beginning the
installation.
If you have any problems or questions, contact TISCOR Technical Support at 1-800-553-1234. If
you find that your
Palm
is not operating properly, you may wish to consult the
Symbol
Palm
manual that accompanied the device (manual also found at
www.symbol.com/services/manuals
).
The following steps will install and configure the
Palm Desktop
software on your PC:
Step 1.
Unpack the
Palm
and cradle
from the shipping container
Step 2.
Install the battery
Step 3.
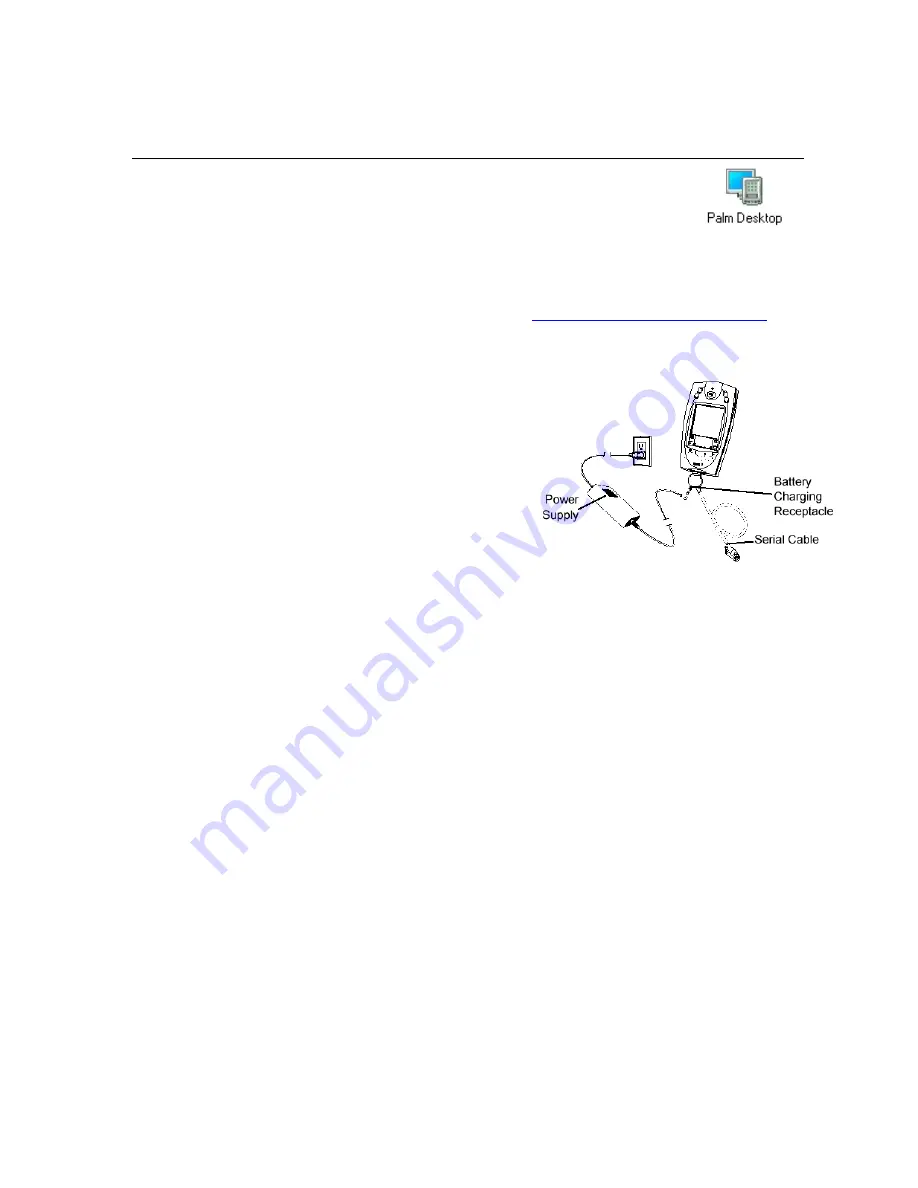
With your PC turned off, connect
your
Palm
cable or cradle to
your PC workstation. To establish
a communication link between
the
Palm
and your PC:
a.
Connect a serial cable to the
RS-232 connector on the charger/interface, or cradle, and to the
communications port on the PC. Use either a 9-9 pin or a 9-25-pin serial
cable, depending on your PC's communications port
b. Plug the AC adapter into the charger/interface, or cradle
c.
Plug the AC adapter into a wall outlet
d.
Place the
Palm
in the charger/interface, or cradle
Step 4.
Turn on the
Palm
’
s power switch and follow the on-screen instructions to
align the touch screen with the stylus, and set the date and time. Repeat
steps 1 through 4 for each additional
Palm
.
Step 5.
Install the
Palm Desktop
software onto your PC from the
SPT Desktop
Installation
CD
that came with the
Palm
. This installs the
HotSync
Manager
that stays active in your PC’
s system tray.
Step 6.
Close the
Palm Desktop
window on the PC
Step 7.
From the Applications screen, tap the
HotSync
icon on the
Palm
. The name
of the
Palm
is in the upper right-hand corner of the
HotSync
screen. If the
Palm
is not named, the upper right-hand corner will be blank.*
a.
If the
Palm
is named: write down the name for the next step
b.
If the
Palm
name is blank: the application will guide you through the
naming process
NOTE:
When asked for a name, use the name you wrote down in the previous step. If your
Palm
is not
named, we suggest using generic names such as
Palm1
,
Palm2
,
Fire1
,
Fire2
, or use your facility
initials
(TISCOR) T1, T2
.


