


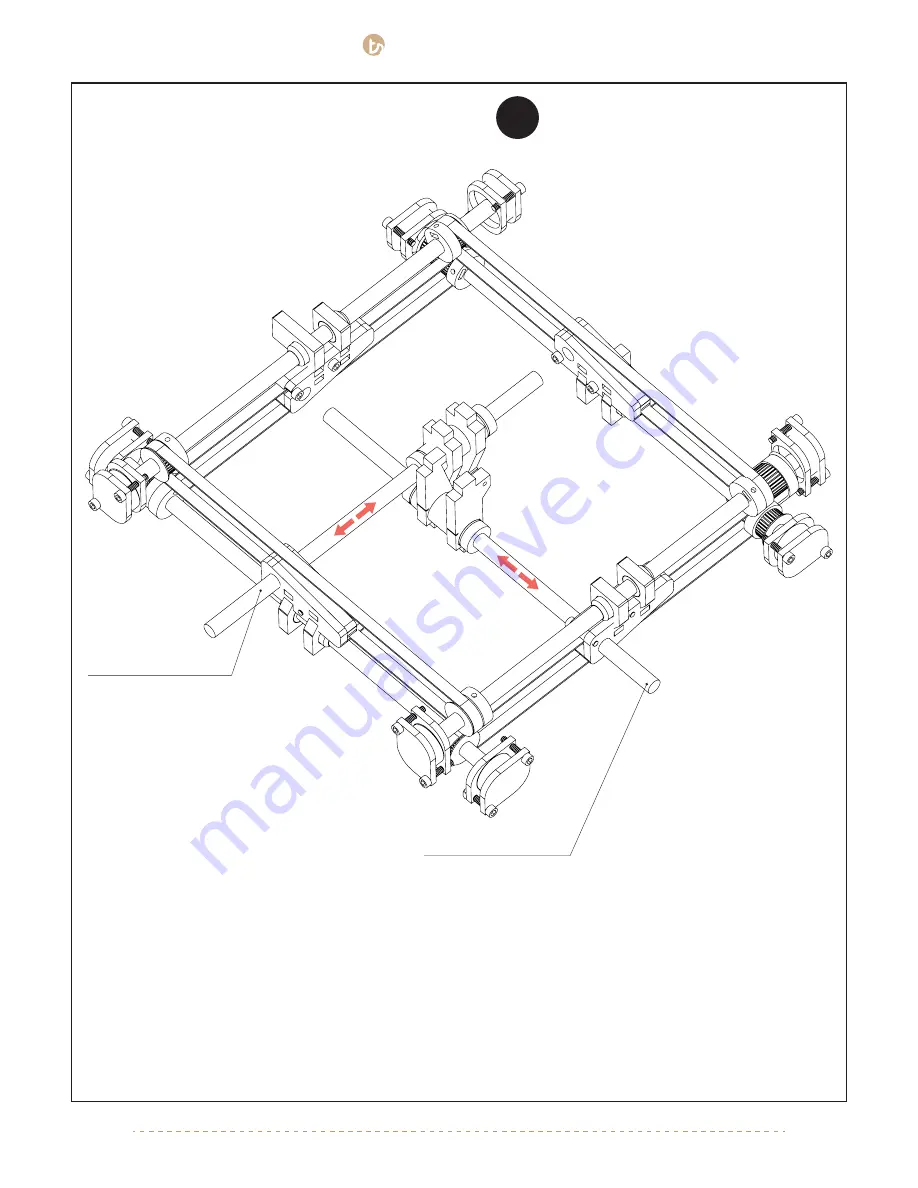
X-Axis Cross Rod (225mm)
Y-Axis Cross Rod (225mm)
TINKERINE
STUDIO
STUDIO
[email protected] | 1-604-288-8778
41
5.
B
A
A
C
The frame has been hidden to give you a clearer view. To insert the cross rods, one by one take the rods and
insert it into one end of the slider. Push the rod into the first slider to give you enough room to bring the rod up
into the gantry so it becomes leveled with the second slider. Then retract the rod so it can be inserted into the
second slider.
For Pre-Assembled Carriage:
Position the carriage in the right direction (Arrow on assembly pointing toward back of printer), take any of the
two rods and insert it carefully into the respectively linear bearing. Bring the rod and carriage into the gantry
space, and insert one end of the rod into the slider, twist the rod while supporting the slider will help you move
the rods easier. Once you have enough clearance to insert the other of the rod into the slider, twist the rod again
to insert into the slider on the opposite side. Repeat with second rod.
Take extra care when inserting the smooth
rod into the linear bearing. Go at it slowly
and make sure to not force the rod into
the bearing to prevent the ball bearings
from dislodging.
!


