THOMSON ETC310 Manual Download Page 20

20

EN

Sound setting - 

O

Virtual Dolby Surround

Dolby Virtual is a technology certified by Dolby Laboratories, that creates a virtualized surround sound experience from two 
speakers.The Virtual Dolby Surround function works in multi-channel and Dolby Surround encoded audio sources.
Virtual Dolby Surround retains all of the original multichannel audio information and provides the listener with the sensation of
being surrounded by additional speakers.

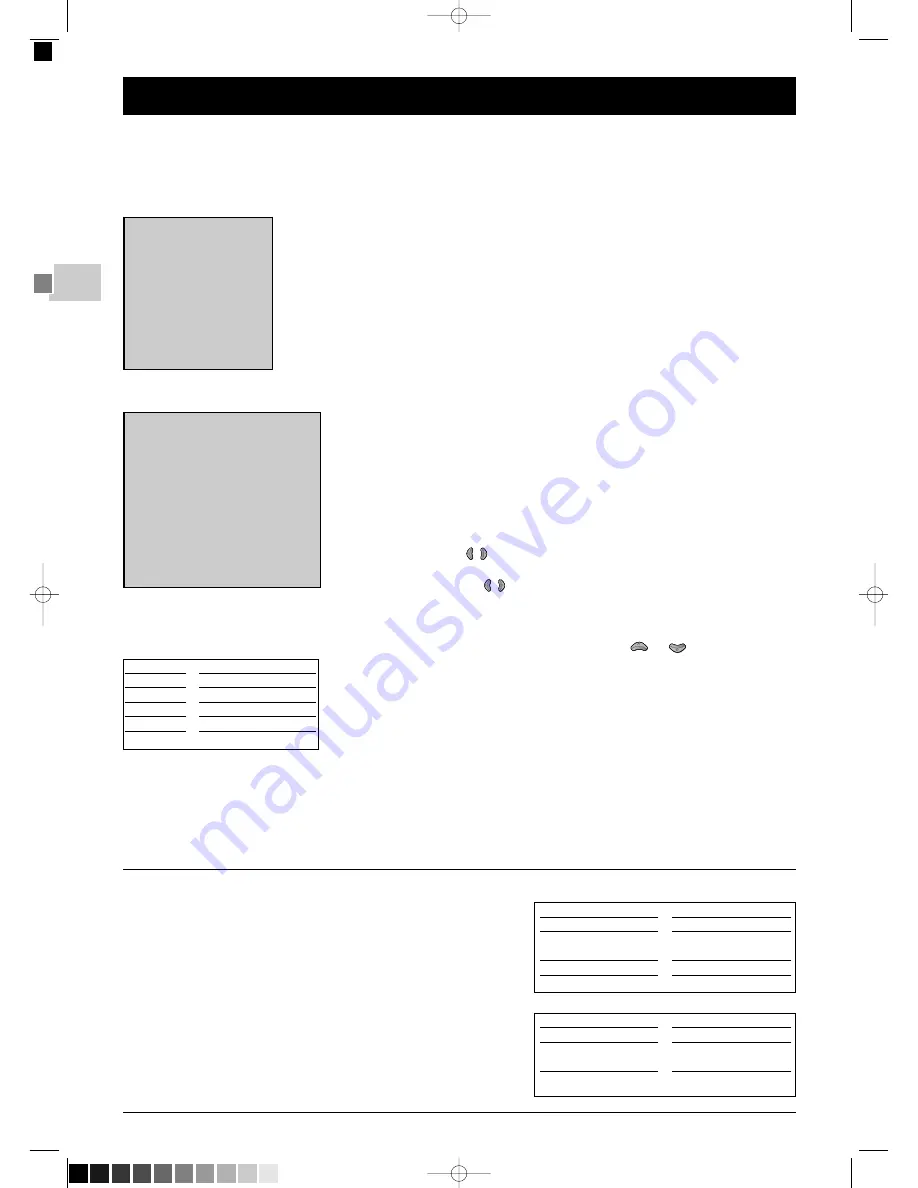
Display the OVERVIEW by pressing MENU button.
Select the Sound line. Confirm with OK.
The SOUND menu appears with the following options.

Return: returns to the OVERVIEW menu.

Sound type: select the relevant sound type.
The available options depend on the programme you are watching. Refer to the table opposite to find
out about the various options available according to the type of sound transmitted by the channel.

Note: in digital reception, only the options StereoSound 1 and Sound 2 are available.

Sound Mode: select a mode.The available modes depend on the sound type selected.
See «More info» below.

Magic and Dolby Virtual modes are only available for stereo audio sources.

Surround effect: adjust the surround effect using the bargraph.
This line only appears if you have selected Dolby Virtual under the Sound mode line.

Balance L/R: balance the sound between the Left and Right speakers.

Dynamic Bass : using

buttons, select the Bass dynamic amplification level.

O

Sound preset: use the 

buttons to select the appropriate setting 

(Standard, Film,Voice, Music, Flat, Personal) for the programme you are watching.

The Personal setting stores your graphic equalizer settings.

O

Graphic equalizer: select each band in turn using the 

or 

button and  make the 

necessary adjustments.
Once you have set the equalizer, the Sound Preset option goes automatically to Personal.
Your settings are stored as the new personal settings.

Leave the menu with 

EXIT

.

Manufactured under licence from Dolby Laboratories. Dolby” and the doubles D symbol are tra-

demarks of Dolby Laboratories.

Sound type

BROADCAST

Mono

Stereo

Dual

NICAM - 3

AV

CHOICE 

Automatic - Mono

Mono - Stereo

Sound 1 - Sound 2

Sound 1 - Sound 2 - Sound 3

Stereo - Sound 1 - Sound 2

More info

Nicam
The NICAM process consists of sending digital stereo sound
comparable to that from an audio CD via a land based transmitter
in addition to its usual mono equivalent. So by means of the NICAM
process, you can get digital sound with the quality of a compact
disc.

Mode

SOUND TYPE

Mono 

Stereo 

Sound 1

Sound 2

MODES

Normal - Wide 

Normal - Magic 

Dolby Virtual 

Normal - Wide 

Normal - Wide 

Explanations

Normal

Wide

Magic

Dolby Virtual

original sound 

stereo effect for mono sound

accentuated stereo

surround effect

Virtual Dolby Surround.

SOUND

Return

Sound type

<I> Stereo

Sound mode

Dolby Virtual

Surround effect

.............

Balance L/R

.............

Dynamic bass

Off

Sound preset

Film

10 kHz Treble

..............

5 kHz

.............

1,5 kHz Medium

..............

500 Hz

.............

100 Hz Bass

.............

OVERVIEW

Exit

Program Info

> Sound

Picture

Time

Preferences

Installation

04_ETC_310_EN1  13/07/05  11:50  Page 20    (Noir/Process Black film)

Summary of Contents for ETC310

Page 1: ...must not under any circumstances open the television yourself You are at risk of electrocution if you do so The set is provided with adequate shielding to avoid the emission of X rays Work by unqualified persons modifications to the high voltage or replacement of the tube by a model not complying with the manufacturer s recommendations may cause a sharp increase in X ray emissions A set modified i...

Page 2: ...ng at up to an 80 angle from the centre of the screen see below However to ensure your maximum enjoyment it is recommended that you sit directly in front of the television with your eyes level with the centre of the screen at a distance of no less than 3 metres Screen In order to ensure long performance of your set and reduce the risk of screen burning please observe the following precautions Do n...

Page 3: ...els or radio stations 17 Electronic Programme Guide EPG Digital reception 17 Zoom 17 Access to audiovisual programmes 17 Setting the time List of programmes 18 Timers Analogue reception only 18 List of programmes Analogue reception 18 Channels list Digital reception 18 Picture and Preferences 19 Picture 19 Preferences 19 Customizing 19 Sound setting OVirtual Dolby Surround 20 Teletext 21 O Program...

Page 4: ...XT Teletext see page 21 With digital reception the colour keys allow access to the specific functions of certain menus The colour keys are also used with teletext operations Selection of options in menus Adjusting functions modifying values activating and de activating functions tick boxes in menus Selecting the picture format or zoom OK Confirming a selection activating and de activating function...

Page 5: ... standby There are around 20 sets of codes 4 When the device goes on standby turn it on without using the remote control Press the REV key as many times as necessary to put the device on standby 5 Press the STOP key and hold it down until the light or the keys go out Remark You can cancel programming at any time by pressing the EXIT key Video recorder DVD player Satellite receiver Stereo amplifier...

Page 6: ...s that are most suited When you change the batteries in your remote control remember to program it again Programming the volume adjustment function If you program the remote control of the television set to control other devices and they are connected to an amplifier you can also program the remote control to adjust the volume when you use one of these devices The following description is an examp...

Page 7: ...ctors RF out and RF in We recommend that you do not initially connect other equipment to your TV VCR decoder etc so as not to complicate the set up procedure with additional factors Connect them up when you have finished setting up the channels by referring to page 23 of the manual 4 Switch the TV on by pressing the on off button A Depending on the model this button is located on the front or side...

Page 8: ...elect the Installation line and display the menu by pressing OK The PIN code may be requested Select the Channels line Confirm with OK to display the Channels menu In the Channels menu select Install and press the OK key a new menu is displayed Scan type Using the Left Right keys select the type of scan required Automatic Scans for all the digital channels broadcast in your region Press OK to star...

Page 9: ...ss on the DIGITAL key of the remote control Using the MENU key display the OVERVIEW then select the Installation line and confirm with OK The INSTALLATION MAIN MENU is displayed Select the installation line and display the menu by pressing on OK The PIN number may be asked for Select the PIN Code line Confirm with OK to display the menu 1 Using the numeric keys enter the present PIN code and press...

Page 10: ...order select the required standard CVBS SECAM or PAL 2 Press the EXIT key to return to the previous menu Note When a Dolby digital signal has been selected in the language menu and the SPDIF out put has been activated no sound is available on the other connectors SCART RCA etc Time By default GMT time is displayed The time will only be displayed if your television set is receiving a digital signal...

Page 11: ...T to quit 2 Select channels and press the OK key This screen allows you to lock or unlock the Channels The list of channels is displayed 1 Using the Up Down keys select the channel to be locked 2 Press the Green key to lock or unlock the channel a symbol is displayed in front of the chan nel name when it is locked Press EXIT to quit To access the locked channels the PIN number will be requested if...

Page 12: ...set start time and stop time see below A message informs you one minute before the imminent turning off of the television set Press the EXIT key to halt the automatic stop VCR ON OFF The timer will turn the TV tuner on and off the screen remains blank and without sound at the programmed time the user must program their video casset te recorder to record the broadcast via the Peritel socket day of ...

Page 13: ...bottom of the screen Identify the channels with the aid of aTV program me magazine To sort the channels select the Select program line Find the channel to which you wish to allocate a new number using the PR and PR keys or keys using the channel logos as a guide The number already allocated appears in the Select program line Select the Swap with PR line enter the selected number and press OK The c...

Page 14: ...o ajust red convergence Usings Up Down Left Right buttons superpose red crosses with green crosses Press Blue button to ajust blue convergence Usings Up Down Left Right buttons superpose blue crosses with green crosses Once the settings have been configured press EXIT button to close this screen More info During initial set up the Centre convergence menu appears automatically at the end of automat...

Page 15: ... Scroll the alphabet with the 1 and 2 keys Once the name is changed repeat the Store on PR number step Decoder if the channel is encrypted and if you want to connect a decoder to the AV1 socket see page 23 tick the box with the buttons and repeat the Store on PR number step External sound path this option is only available if you have ticked the box under the Decoder option Switch the decoder on U...

Page 16: ...ences see page 19 Digital reception You can access basic channel information via a banner Press the INFO key to display the basic information about the channel While this information is displayed Using the keys select the options displayed Then using keys Scroll through the channels then press OK key to display the desired channel Select the desired sound type Select the desired language depending...

Page 17: ...exit press the EXIT key The week s programmes Press the GUIDE key to display the programme guide 1 Using the Green key select the following day Red key allows to return to previous day 2 Select the programme for which you want to obtain information 3 Press the Yellow key to display the programme overview Pressing again Yellow key returns to channels list Note while Programme guide is displayed you...

Page 18: ...ke up timer has been programmed Put the TV set into standby mode using the B button on the remote control The indicator on the front panel starts flashing slowly TheTV set will automatically switch on at the programmed time and for 1 hour duration if you do not interrupt it by using the remote control Excepted volume buttons keyboard is locked until you change channel List of programmes Analogue r...

Page 19: ...function to fill the screen In case of subtitles it is recommended to set the zoom manually see page 17 Format control choose the format for the on screen picture Auto theTV 16 9 adapts to the broadcast picture format if the broadcaster or equipment connected via a Euro AV scart socket provides a control signal 16 9 or 4 3 choose the format if the picture is not automatically adapted The format re...

Page 20: ...ion level O Sound preset use the buttons to select the appropriate setting Standard Film Voice Music Flat Personal for the programme you are watching The Personal setting stores your graphic equalizer settings O Graphic equalizer select each band in turn using the or button and make the necessary adjustments Once you have set the equalizer the Sound Preset option goes automatically to Personal You...

Page 21: ...sired time Example dial 1530 as a sub page number for 15 30 then press EXIT The unit should be on tuned at the station transmitting the warning page The display of the last line differs according to the type of teletext received YourTV automatically detects the type of teletext received Direct access the yellow and blue buttons allow direct access to the pages whose numbers are displayed in yellow...

Page 22: ...n press OK to access menu PROGRAM INFO SET UP Select line TV guide page number and with the number keys of your remote control enter the number of the programme page which you have previously searched for in the teletext Confirm with OK and leave the menu with EXIT Your TV set should now display the Program Info REVIEW This menu lists programmes chosen for an alarm call or for a start of programme...

Page 23: ...inside cover at the end of the manual illustrates how this is done If you connect a video recorder only via the aerial socket without any AV socket connection switch it on and play a cassette Then use the Auto update option of the Install menu to search for the video recorder signal refer to the Manual channel set up section on page 9 A video recorder connected by aerial socket should be stored on...

Reviews: