33
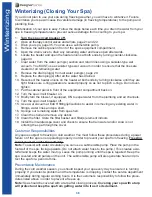
C. Top Mount Filter Cleaning Procedure - Concord, and
Park Avenue Series (Do not use a pressure washer):
:
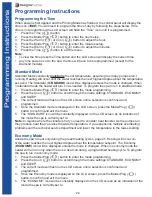
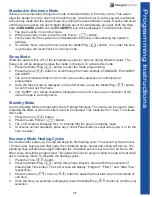
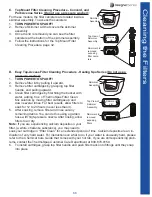
For these models, the filter canisters are located inside a
skimmer assembly. To access the canisters:
1.
TURN POWER TO SPA OFF!
2. Remove Skimmer Lid that covers the skimmer
assembly.
3. Once the lid is removed you can see the filter
canisters at the bottom of the skimmer assembly.
4. Follow the instructions for the Top Mount Filter
Cleaning Procedure, page 32.
D. Easy Top-Access Filter Cleaning Procedure - Healing Spa Series (Do not use a
pressure washer):
1.
TURN POWER TO SPA OFF!
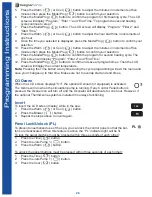
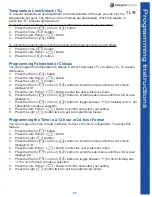
2. Remove filter lid by pulling it upward.
3. Remove filter cartridges by grasping top filter
handle, and pulling upward.
4. Clean filter cartridges by first filling the bucket with
water, adding 8 oz. of ThermoSpas Filter Clean.
Mix solution by moving filter cartridges up and
down several times. For best results, allow filters to
soak for 12 to 24 hours (never less than 3).
5. After soaking, remove filter and rinse out any
remaining debris. You can do this using a garden
hose with high-pressure nozzle. After rinsing, allow
filters to air dry.
Note:
If you are experiencing calcium deposits on your
filter, (a white, chalk-like substance), you may need to
soak your cartridge in “Filter Clean” for an extended period of time. Calcium deposits are an in-
dication of very hard water. For instructions on what to do if your water is unusually hard, please
refer to the Chemical Care Guide that comes with your hot tub. If you are still experiencing prob-
lems, contact the ThermoSpas Customer Care Department at 800.876.0158.
6. To install cartridges, grasp top filter handle and push filter back onto fittings until they snap
into place.
Skimmer
Assembly
Top View of
Skimmer
Assembly
Skimmer Lid
removed
exposing
filter canis-
ters
Skimmer
Lid
Skimmer
Assembly
Top View of
Skimmer
Assembly
Skimmer Lid
removed
exposing
filters
Skimmer
Lid
Cleaning the Filters
Summary of Contents for Atlantis Gold
Page 1: ...ThermoSpas Designer Series Owner s Manual Safety Maintenance and Technical Information ...
Page 6: ......
Page 65: ......
Page 66: ......
Page 67: ......

