background image

24

Programming Instructions

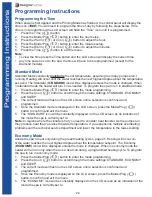
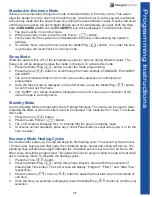
Programming the Time

When power is first applied and the Priming Mode has finished, the control panel will display the 

time icon (

TIME

). You will need to program the time of day by following the steps below. If the 

time is not programmed the LCD screen will flash the “Time” icon until it is programmed.

1.  Press the Time ( 

 ) button.

2.  Press the Mode/Prog ( 

 ) button to enter the hour setup.

3.  Press the Warm ( 

 ) or Cool ( 

 ) button to adjust the hour.

4.  Press the Mode/Prog ( 

 ) button to enter the minutes setup.

5.   Press the Warm ( 

 ) or Cool ( 

 ) button to adjust the minutes.

6.  Press the Time ( 

 ) button to exit the menu.

Note:


•  To view the time press the Time button and the LCD screen will display the current time.

•  Any time power is cut to the spa, the time will have to be reprogrammed (except for the 

Diamond models).

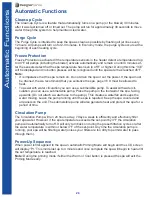
Standard Mode

Standard Mode constantly 

maintains

 the set temperature, assuming too many pumps aren’t 

running. Heating will occur until the water reaches the next highest degree about the temperature 

set-point. The Standard (

STANDARD)

 icon will be displayed unless the mode is changed. When 

in standard mode the heater will turn on as needed. To program the spa to run in standard mode:

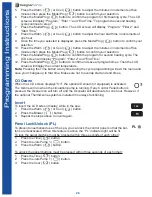
1.  Press the Mode/Prog ( 

 ) button to enter the mode programming.

2.  Press the Cool ( 

 ) button to scroll through the mode settings: STANDARD, ECONOMY 

and SLEEP.

3.  The current mode will flash on the LCD screen until a selection is confirmed and 

programmed.

4.   Once the Standard mode is displayed on the LCD screen, press the Mode/Prog ( 

 ) 

button to confirm and exit the menu.

5.  The “STANDARD” icon will be constantly displayed on the LCD screen as an indication of 

the mode the spa is currently set to.

Note:

 In regions where the climate is hot you need to consider heat transfer. As the pumps run 

they produce heat that can raise the water temperature. If you experience multiple overheating 

problems call the technical service department and lower the temperature to the lowest setting.

Economy Mode

Allows the spa to heat only during the preset heating cycles, page 25. Heating will occur un-

til the water reaches the next highest degree about the temperature set-point. The Economy 

(

ECONOMY)

 icon will be displayed unless the mode is changed. When in economy mode the 

heater will turn on only when there is a heat call during a programmed heating cycle. To program 

the spa to run in economy mode:

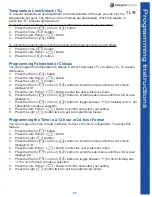
1.  Press the Mode/Prog ( 

 ) button to enter the mode programming.

2.  Press the Cool ( 

 ) button to scroll through the mode settings: STANDARD, ECONOMY 

and SLEEP.

3.  The current mode will flash on the LCD screen until a selection is confirmed and 

programmed.

4.   Once the Economy mode is displayed on the LCD screen, press the Mode/Prog ( 

 ) 

button to confirm and exit the menu.

5.  The “ECONOMY” icon will be constantly displayed on the LCD screen as an indication of the 

mode the spa is currently set to.

Programming Instructions

Summary of Contents for Atlantis Gold

Page 1: ...ThermoSpas Designer Series Owner s Manual Safety Maintenance and Technical Information ...

Page 2: ...ow happy they are with their spa and what a positive difference it has made in their lives Our Quality ThermoSpas emphasis on quality will become crystal clear with each passing day you own your spa We make our spas from only the highest quality materials inside and out Your spa was test ed with hot water to meet our quality assurance standards Our Customer Service Our Customer Care Department is ...

Page 3: ... Start Up 12 Spa Diagram 16 Equipment Diagram 17 Topside Control Panel 18 Main Control Panel 18 Auxiliary Pump Control Panel 19 Wave Lounge Pump and Valve Control Panel 19 Operating Instructions 20 Setting the Temperature 20 Circulation Pump 20 Jets Pump 1 20 Jets Pump 2 20 Jets Pump 3 to 5 If equipped 21 How To Contact Us Office 800 876 0158 Fax 203 303 0029 Customer Care Department 800 876 0158 ...

Page 4: ...t 26 Panel Lock Unlock PL 26 Temperature Lock Unlock TL 27 Programming Fahrenheit or Celsius 27 Programming the Time in a 12 hour or 24 hour Format 27 Automatic Functions 28 Clean up Cycle 28 Purge Cycle 28 Freeze Protection 28 Circulation Pump 28 Power Up Sequence 28 Basic Spa Maintenance 29 Changing Cleaning Filters 31 Cleaning The Filter 31 Spas with ThermOzone 34 Components 34 Operation 34 Che...

Page 5: ...Park Avenue Series 40 Spa Light Assembly 40 Common Diagnostic Messages 41 Common Reminder Messages 42 Troubleshooting Water Chemistry 43 Troubleshooting Mechanical Systems 44 Water Chemistry Maintenance 46 Glossary 47 F A Q s 52 Floor Load Determination 55 Electrical Requirements Chart 56 Spa Measurements Chart 57 Water Capacity Chart 58 ...

Page 6: ......

Page 7: ...TIONS CAREFULLY DANGER RISK OF SEVERE INJURY OR DROWNING Extreme caution must be exercised to prevent unauthorized access by children To avoid accidents ensure that children do not use this spa unless supervised at all times Adult supervision is a critical safety factor in preventing children from drowning Use the straps and clip tie downs to secure the spa cover when not in use This will help dis...

Page 8: ...into the spa or slipping and falling which could result in unconsciousness drowning or serious injury Remember that wet surfaces can be very slippery Never stand walk or sit on the top railing of the spa WARNING RISK OF HYPERTHERMIA OVER HEATING CAUSING SEVERE INJURY BURNS WELTS OR DEATH Water temperature in excess of 104 F 40 C may be injurious to your health Refer to the Hyperthermia for specifi...

Page 9: ...es should not use a spa to avoid water contamination which could result in spreading infections to others Always shower before and after using your spa Maintain water chemistry in accordance with manufacturer s instructions Failure to do so may result in contracting a waterborne illness e g an infection bacteria or virus WARNING In addition to maintenance of filters and water chemistry proper vent...

Page 10: ...ds and specifica tions outlined in the Virginia Graeme Baker Pool and Spa Safety Act VGB Safety Act Entrap ment risk can be minimized if proper precautions are taken NOTE SUCTION COVERS MUST BE REPLACED EVERY FIVE YEARS DANGER RISK OF PERSONAL INJURY OR DEATH Never operate the spa if a suction fitting suction cover filter filter lid or skimmer assembly are broken damaged or missing DANGER RISK OF ...

Page 11: ...t near the suction fittings suction covers filter filter lid or skimmer assembly DANGER RISK OF SEVERE INJURY OR DROWNING Mechanical entrapment May occur when jewelry swimsuit or hair accessories become entan gled knotted or snagged in a drain suction or skimmer assembly Never allow your jewelry swimsuit or hair accessories to come close to the suction fittings suction covers or skimmer assembly N...

Page 12: ...rflow and other casual water to flood the equipment and create a wet condition in which it would sit in For spas which will be recessed into a floor or deck install so as to permit access to the equipment either from above or below for servicing Make certain that there are no obstructions which would prevent removal of all side cabinet panels and access to the jets components especially on the sid...

Page 13: ... recommended to reduce the risk of contracting a waterborne illness e g an infection bacteria or virus and or respiratory ailments that could be present in the air or water Consult a licensed architect or building contractor to determine your specific needs if installing your spa indoors PROPER FOUNDATION Consult a Structural Engineer when considering a foundation that will adequately support the ...

Page 14: ...o escape Take into consideration that these fumes could enter other indoor areas When the spa is installed indoors adequate room must be provided to allow the cover and lifter to operate and function properly Depending of the lifter used up to 50 of the cover is exposed There should be sufficient room accounted for the spa height plus cover lifter measurement Figure 1 Consult your local state or c...

Page 15: ...fety hazard Improper electrical installation may also damage the inner workings of a spa and void your warranty WARNING If your electrician is not absolutely sure how to correctly connect your system call the ThermoSpas Technical Service Department at 800 876 0158 option 2 Mistakes may be costly and will invalidate your equipment warranty Before beginning the wiring process turn off the circuit br...

Page 16: ...sub panel is rated for copper CU The length of the wiring from the panel or feed to your spa also has to be determined If the total run exceeds 75 feet the wire size must be increased by one wire size to adjust for the corre sponding voltage drop To make future service work easier we recommend leaving at least 6 of slack in the main electrical wire which may be coiled inside the cabinet Ground Fau...

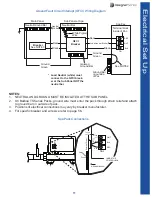
Page 17: ... Neutral Ground Bar See NOTE 3 See NOTE 2 GFCI Breaker Spa Pac Terminal block inside of Pac Breaker Neutral Bar Ground Green Ground Green Load Neutral white must connect to the GFCI break er at the Sub Panel NOT the neutral bar Load Neutral White White Pigtail Wire Isolated Ground Bar Ground Bar on outside of Pac Red Black Red Black Neutral White Spa Pack Connections RED BLK WHT TB1 TB1 Black Whit...

Page 18: ...1 Incoming water temperature and water pressure fill rate 2 Size and type of spa 3 Water characteristics hardness mineral content 4 Desired final water temperature 5 Ambient conditions Inspect and Filling you spa Once your spa is in its final location it is time to inspect it to ensure it is ready to be filled Gently remove all packing and crating materials from the spa Step 1 Remove the panels in...

Page 19: ...h to be sure unions are tight and not leaking Note Unions are located on both the spa s water pump s and heater It is imperative that they are checked and tightened before filling the spa Although every spa is thoroughly tested twice in our factory during final inspection some connections may loosen during transport from the factory to your home Initial Preparation Step 1 Starting the spa with ins...

Page 20: ...ended by ThermoSpas and may void your warranty CAUTION RISK OF PERSONAL INJURY OR SPA DAMAGE Never add chlorine tablets trichlor or acid to your hot tub for any reason These chem icals may damage components within your hot tub burn or irritate your skin create a rash and void the manufacturer warranty for your spa Proper Handling of Chemicals 1 Keep all chemicals out of reach of children 2 Always ...

Page 21: ...hrough the skimmer 3 Only add one chemical at a time Unless otherwise specified always wait at least 10 minutes after adding chemicals to your spa before adding more chemicals Note Depending on the metals or mineral content of your tap water one of the chemicals in the treatment may react to cause a discoloration or formation of a precipitate In this event you should not have to drain your spa The...

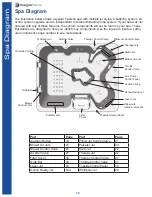
Page 22: ...Jets Throttle Control Valve Aux Pump Control Panel Laser Jets Filter Cover Pulsator Jets Grab Bar Blower Control Valve Whirlpool Jet Diverter Valve Therapy Control Valve Suction Fitting Ozone Ready Jet Circulation Fitting Pillow Jet Control Valve Therapy Jets Swirl Jets Pillow Jets pillows removed Topside Control Panel Part Page Part Page Auxiliary Button 19 Pillow Jet Control Valve 21 Blower Air ...

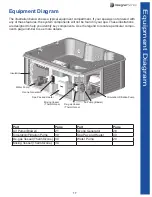
Page 23: ...ey components Use the legend to locate a particular compo nent s page number to see more details Water Pump Ozone Generator Spa Pac and Heater De gas Vessel ThermOzone Air Pump Blower Circulation Filtration Pump Insulation Mixing Vessel ThermOzone Part Page Part Page Air Pump Blower 21 Ozone Generator 28 Circulation Filtration Pump 39 Spa Pac and Heater 40 De gas Vessel ThermOzone 34 Water Pump 20...

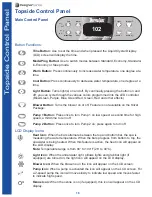
Page 24: ... a third time to turn off Pump 2 Button Press once to turn Pump 2 on press again to turn off LCD Display Icons Heat Icon When the bars alternate between the top and bottom bar the spa is measuring the water temperature When the bars progress from bottom to top the spa water is being heated When this feature is active the heat icon will appear on the LCD display Note Temperature range is from 80 to...

Page 25: ...ps will have an auxiliary control panel that will operate the pump Press once to turn the pump on and press again to turn the pump off Wave Lounge Pump and Valve Control Panel This feature is exclusive to the Park Ave Diamond mod els 1 The Wave Lounge pump button will activate the high speed pump on and off The pump runs for a 15 minute cycle and then shuts off To reactive the pump press the Wave ...

Page 26: ...ning your spa will be filtering water unless your filters are too dirty to permit water to pass through them Jets Pump 1 Jets pump 1 is a 2 speed pump To operate Jets pump 1 1 Press Jets pump 1 button once to activate low speed The pump icon will move slowly to indicate low speed Figure 2 Note Pump 1 will automatically turn off after 15 minutes when in low speed You can press the Jets pump 1 butto...

Page 27: ...utton To resume the massaging action push the button again Blower Gold Platinum and Diamond Models The blower activates all blower air jets Figure 6 The blower introduces air into the air jets for a bubbling affect 1 Press Blower button once to turn on The blower icon will display on the LCD screen Figure 7 Note The Blower will automatically turn off after 15 minutes You can press the blower butto...

Page 28: ... interchange able and allow you to customize the feel of your water therapy To remove the Jet from the Jet Body turn the Jet counter clockwise until you feel resistance Continue turning counter clockwise and pull until the Jet pops out When inserting the Jet into the Jet Body you must align the On Off Stop with the middle of the On Off Stop Track to insure proper seating of the Jet Simply push the...

Page 29: ...lders The smart design of this jet helps to reduce splash out by 75 over other directional shoulder jets Apply massaging pressure in the direction you choose or turn off the jet by pushing the center nozzle in to its closed position Patented Pillow Jets Give an unbeatable neck massage and include a control valve to adjust the intensity This is a favorite feature among many ThermoSpas customers Not...

Page 30: ...EEP 3 The current mode will flash on the LCD screen until a selection is confirmed and programmed 4 Once the Standard mode is displayed on the LCD screen press the Mode Prog button to confirm and exit the menu 5 The STANDARD icon will be constantly displayed on the LCD screen as an indication of the mode the spa is currently set to Note In regions where the climate is hot you need to consider heat...

Page 31: ...e Prog button to confirm and exit the menu 5 The SLEEP icon will be constantly displayed on the LCD screen as an indication of the mode the spa is currently set to Standby Mode Use the Standby Mode to temporarily shut off all spa functions This mode can be used to when replacing the filters or when the filters need to be cleaned This mode last for 1 hour To activate this mode 1 Press the Cool butt...

Page 32: ... Note Pressing the Time button at any time during the cycle programming will exit the menu and save your changes up to that time Make sure not to overlap start and end times O3 Ozone When the LCD screen displays O3 the optional Ozonator if equipped is activated The Ozone will run when the circulation pump is running If any Control Panel button is pressed the Ozone Icon will turn off and the Ozonat...

Page 33: ...s Pump 1 button to enter the user preference menu 6 Press the Warm or Cool button to scroll the sub menus until the LCD screen displays tc 7 Press the Warm or Cool button to toggle between Y for Celsius and n for Fahrenheit to make a selection 8 Press the Jets Pump 1 button to confirm and select your setting 9 Press the Light button twice to exit to programming menus Programming the Time in a 12 h...

Page 34: ...circulation you can use a submersible pump To assist with water cir culation you can use a submersible pump Place the pump in the footwell of the spa facing upwards Do not attach a water hose to the pump This creates a waterfall and keeps the water moving Leave the pump running until the spa is repaired Keep the spa covered and all panels on the unit The submersible pump will also generate heat an...

Page 35: ... Scheduled Maintenance A Clean the shell above the water line with ThermoSpas All Purpose Cleaner once a week All Purpose Cleaner will not alter the water chemistry or scratch the acrylic shell Thermospas does not recommend the use of household cleaners on the spa shell Most will alter the water chemistry and some contain abrasives that will scratch and dull the spa shell The Scum Mitt offered by ...

Page 36: ...rmoGloss as outlined in the procedure in this manual The filter s should be cleaned with each drain and refill Spas that are used heavily will require more frequent drain and refill cycles Conditioning the Cover Monthly The cover should be thoroughly cleaned and conditioned once a month using ThermoSpas Cover Conditioner Cleaning and Protecting the Cabinet Cabinets constructed of ThermoBoard requi...

Page 37: ...n fittings and suction covers in this spa are sized to match the specific water flow created by the pump s If it is necessary to replace the suction fittings suction covers or pump s be sure that the flow rates are compatible and are in compliance with the VGB Safety Act Never replace a suction fitting or suction cover with one rated less than the flow rate marked on the original suction fitting U...

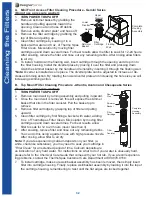
Page 38: ... upward 3 Once the round weir is removed this will expose the skimmer basket that sits in the filter canister Pull the basket up to remove 4 Remove filter cartridge by grasping top of filter and pulling upward 5 Clean filter cartridge by first filling a bucket with water adding 8 oz of ThermoSpas Filter Clean Mix solution by moving filter cartridge up and down several times For best results allow ...

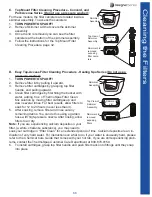
Page 39: ...veral times For best results allow filters to soak for 12 to 24 hours never less than 3 5 After soaking remove filter and rinse out any remaining debris You can do this using a garden hose with high pressure nozzle After rinsing allow filters to air dry Note If you are experiencing calcium deposits on your filter a white chalk like substance you may need to soak your cartridge in Filter Clean for ...

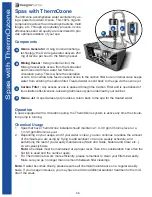
Page 40: ...th your cabinet D Ozone Jet A special laser jet provides a return back to the spa for the treated water Operation In spas equipped with a circulation pump the ThermOzone system is active any time the circula tion pump is running Chemical Usage 1 Spas that have ThermOzone installed should maintain a 1 0 3 0 ppm Chlorine level or a 1 0 3 0 ppm Bromine Level 2 Depending on your usage and if your wate...

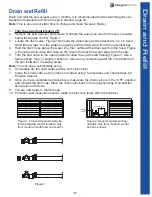
Page 41: ...open position to allow the spa to start draining Figure 3 Use a foam sponge mop or wet dry vacuum to remove any remaining water left in the bottom of the spa footwell or in seating areas Note You can use a submersible pump 6 Completely dry the shell surface with a soft clean cloth 7 Clean the shell surface of any debris or mildew using ThermoGloss and ThermoSpas All Purpose Cleaner 8 Once you have...

Page 42: ... at ThermoSpas online store at http online ThermoSpas com Flushing Lines There are many plumbing lines in a spa No matter how clean you keep the water chemicals clean only the water not the plumbing lines Bacteria and mildew attracting scum can accumulate in the vast number of spa plumbing lines and fittings You need to flush and clean them to prolong the life of your spa and keep it running smoot...

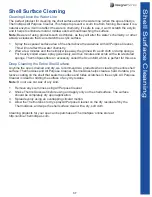
Page 43: ...minutes and scrub with a two textured sponge ThermoSpas offers an accessory called the Scum Mitt which is perfect for this use Deep Cleaning the Entire Shell Surface Anytime the spa is drained and dry we recommend two products when cleaning the entire shell surface ThermoGloss and All Purpose Cleaner ThermoGloss helps create a hard durable pro tective coating on the shell that seals the surface an...

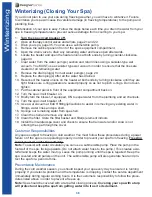
Page 44: ...water from the plumbing and air channels 14 Turn the spa circuit breaker off 15 Use a wet vacuum at EACH fitting jet suctions to assist in removing any existing water in fittings water lines and spa shell 16 Sponge out remaining water from spa shell 17 Clean the shell and remove any debris 18 Clean the filter Store the filter basket and filter s element indoors 19 Install the insulated spa cover a...

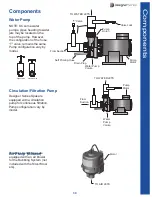
Page 45: ...otor Water Pump Volute Self Priming Hose From Suction T Valve Drain Plug Open Valve Closed Valve Circulation Filtration Pump Designer Series Spas are equipped with a circulation pump for continuous filtration Pump configuration vary by model Air Pump Blower Designer Series Spas are equipped with an air blower for the Bubbling System not included with the Silver Mod els Motor TO AIR JETS Pump Motor...

Page 46: ...o remove the Bulb Socket Spa Light Assembly The LED light is attached to the light lens by screwing on to it The light housing is accessible from underneath the skirt panel for ease of replacement Spa Pack and Heater Electronic Center of Spa Heater Union Heater Union hand tighten only by turning clockwise Heater Bulb Housing Bulb Socket Twist Lock Path Bulb Housing Acrylic Grab Bar Lens packed sep...

Page 47: ... persists contact Thermo Spas Service Department 800 876 0158 This may appear temporarily in an over heat situation and disappear when the heater cools SnB Spa is shut down The sensor that is plugged into sensor B Jack is malfunctioning or not working If the problem persists contact Thermo Spas Service Department 800 876 0158 This may appear temporarily in an over heat situation and disappear when...

Page 48: ...ean and reinstall filter s Refer to the manufac turers instructions rtg Every 30 days Test and reset GFCI per man ual instructions rdr Every 90 days Test Total Dissolved Solids levels Spa might need to be drained and refilled rCO Every 180 days Clean and condition cover Refer to page 36 for instruc tions rtr Every 180 days Clean and condition wood per manufacturers instructions rCH Every 365 days ...

Page 49: ...contaminant level Test and add Liquid Calcium Drain and refill the hot tub Add one capful of Foam Away Waterline Scum Ring Inadequate filtration High content of oils Check and clean filter s Add Natural and Clear Pitting of Metal Fixtures Low alkalinity or pH Check and add pH Alkalinity Up Erratic pH Test Results Low alkalinity Sanitizer level too high Old pH indicator strip Add pH Alkalinity Up R...

Page 50: ...hirlpool jet or valve to divert water Turn on correct pump Refer to pump s will not start above Water temperature is 3 or more above set temperature wait to cool Turn jets counter clockwise to open Spa Not Heating Heat Icon On Pump s not on Closed T Valve open to allow water to go through it Spa maybe in Economy Mode Icon Bulb Not On Dirty Filters Pump Malfunction Inadequate Water Level Heater Mal...

Page 51: ...ervice 800 876 0158 to order a new pump or to set up a service appointment Remove and clean filters or replace with new ones OHH Overheat The spa has shut down One of the sensors has detected that the spa water is 110 F Approximately 43 3 C Partially closed T Valve Outside temperature is at or around 110 F 43 3 C Dirty filters old filters Lift T Valve all the way up Remove some hot water and add c...

Page 52: ...ermoSpas Customer Care Department for a free analysis For weekly water maintenance add 1 oz of Stain and Scale 5 Treatment of Oils and Organics Weekly Bathers bring lotions skin hair and other organics into spas Using a natural enzyme that breaks down and devours oils and other organics that sanitizers cannot destroy is essential to maintaining clear water Natural and Clear immediately breaks down...

Page 53: ... the killing form of bromine After destroying bacteria algae and other organisms it can become bromide once again The oxidizer shocks the water and off gases the physical waste Adding additional oxidizer can start the pro cess all over converting bromide into a sanitizer This cycle can occur repeatedly Bromine Liquid Salts Advantages Does not create an offensive odor Is pH neutral If tub is not in...

Page 54: ... out of your water Foaming A term used to describe surface foam on your water especially in spas hot tubs Foaming is caused by high TDS levels working in combination with soft water and oils Certain low grade algaecides can foam when added to the spa Use enzymes for foam control Iron An element often found discolored in ground water in the form of ferrous iron in concen trations usually ranging fr...

Page 55: ... all the dirt and inorganic or dead organic matter in the water A sanitizer can oxidize materials such as ammonia nitrogen containing contaminants and swimmer waste Ozone is active oxygen nature s special molecule an ozone molecule consists of three ox ygen atoms It is created in nature by the combination of oxygen in the air and ultraviolet rays or by the electrical discharge during a lightning s...

Page 56: ...t through the water tearing apart molecules and slashing through cell walls Skimmer A surface skimmer is a plumbing fitting set at water level containing a weir mecha nism and a debris basket The skimmer is part of the suction side circulation system Skimmer Basket Beneath the lid the basket strains debris as the first line of defense in filter ing the water Sodium Bicarbonate Another base however...

Page 57: ...solved solids increase in the spa as water evaporates over time Tubs that have a high TDS level means that the water is over satu rated and cannot receive any more chemicals TDS should never be higher than 3000 ppm The water needs to be drained at this point and the tub cleaned and refilled Water Hardness A characteristic of natural water due to the presence of dissolved calcium and magnesium wate...

Page 58: ...s has led people to add more Spa Activator which can make matters worse Q How can I reduce my sanitizer level A There are two simple methods to reduce sanitizer levels 1 Drain 1 2 of your water and refill the hot tub or 2 Remove the cover and turn on the air bubbling system Monitor the sanitizer level with test strips until the recommended level is achieved Q Why does ThermoSpas recommend against ...

Page 59: ... times 4 Upon completion of Step 3 if the pH is still high contact ThermoSpas Customer Care Dept Q Why do I need any chemicals if Ozonators work so well A Ozone is a powerful oxidizer and is considered to be 25 times more effective and works 100 times faster than traditional sanitizers like Chlorine or Bromine However ozone only lasts about 20 minutes in a hot tub when the filtration pump shuts of...

Page 60: ...ter pumps blowers and ozonator if spa has one Then turn GFCI breaker back on If breaker does not hold the only components that are still connected is the heater since heater wires are inside spa pac If breaker does hold replug in components one at a time and which ever one is failing will trip breaker when you plug it in At this point second third forth pump can be left unplugged Also if blower or...

Page 61: ...represent maximum spans for decking floor joints shown in feet and inches assuming the following Modulus 0 9 MM psi represents the majority of wood species Static Load 10psf standard for decking design Moisture Load 19 0 standard for pressure treated wood Deflection L 360 standard for building codes NOTE These specifications are subject to change without notice and are for refer ence only 100 poun...

Page 62: ... GFCI 4 Wire 6 4 Chesapeake Gold 240V 50A GFCI 4 Wire 6 4 Chesapeake Silver 240V 50A GFCI 4 Wire 6 4 Gemini Platinum 240V 60A GFCI 4 Wire 6 4 Gemini Gold 240V 50A GFCI 4 Wire 6 4 Gemini Silver 240V 50A GFCI 4 Wire 6 4 Healing Spa Diamond 240V 60A GFCI 4 Wire 6 4 Healing Spa Gold 240V 50A GFCI 4 Wire 6 4 Healing Spa Silver 240V 50A GFCI 4 Wire 6 4 Park Ave Diamond 240V 60A GFCI 4 Wire 6 4 Park Ave ...

Page 63: ...m 3174 lb 1429 1 kg 4 in 102 mm Chesapeake Silver 79 in 200 7 cm 87 in 221 0 cm 38 in 88 9 cm 3174 lb 1429 1 kg 4 in 102 mm Gemini Platinum 45 5 in 115 6 cm 81 in 205 7 cm 31 in 78 7 cm 1765 lb 802 3 kg 4 in 102 mm Gemini Gold 45 5 in 115 6 cm 81 in 205 7 cm 31 in 78 7 cm 1765 lb 802 3 kg 4 in 102 mm Gemini Silver 45 5 in 115 6 cm 81 in 205 7 cm 31 in 78 7 cm 1765 lb 802 3 kg 4 in 102 mm Healing S...

Page 64: ... Liters Gemini Platinum 150 US gal 567 8 Liters Gemini Gold 150 US gal 567 8 Liters Gemini Silver 150 US gal 567 8 Liters Water Capacity Chart Model Approximate Aver age Fill Healing Spa Dia mond 290 US gal 1097 7 Liters Healing Spa Gold 290 US gal 1097 7 Liters Healing Spa Silver 290 US gal 1097 7 Liters Park Ave Diamond 290 US gal 1097 7 Liters Park Ave Platinum 290 US gal 1097 7 Liters Park Ave...

Page 65: ......

Page 66: ......

Page 67: ......

Page 68: ...Designed to Improve Your Life 10 Research Parkway Suite 300 Wallingford CT 06492 www ThermoSpas com SAVE THESE INSTRUCTIONS 6530 916 Rev D 01 28 2020 ...

Reviews: