13
Step 9:
Ensure your water source is safe for spa use. Water may contain minerals that may
cause stains or deposits. Water with a high mineral count, such as iron or copper, may
discolor the water once a sanitizer is added. If you have any doubt, visit http://online.
ThermoSpas.com or call our Customer Care department during our normal business
hours.
Note:
In certain situations, if your water is extremely “hard,” it is preferable to fill half-way with
hard water and the rest of the way with softened water. Water that is too soft can be corrosive to
metal components.
Step 10:
Let the water run out of your garden hose for several minutes before filling the spa. This
will flush out stagnant water in the line that may cause bacteria.
Note:
We suggest putting a sock over the end of your hose to act as a strainer and protect the
spa shell acrylic from the hose.
Step 11:
Begin filling your spa. The actual water level may vary depending on the bather load.
When there are no bathers in the spa, the water must be high enough to prevent pump
surge and low enough that when the recommended number of bathers are in the tub
that the water is not overflowing out of the spa. The recommended water level is half
way up the filter area with no bathers. While spa is filling periodically check underneath
to be sure unions are tight and not leaking.
Note:
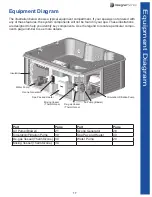
Unions are located on both the spa’s water pump(s) and heater. It is imperative that they
are checked and tightened before filling the spa. Although every spa is thoroughly tested twice in
our factory during final inspection, some connections may loosen during transport from the
factory to your home.
Initial Preparation
Step 1
: Starting the spa with insufficient water can damage the pump and heater. Once your
spa is sufficiently filled (half way up the filter), turn the circuit breaker on.
Step 2:
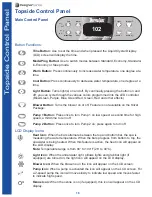
After turning on the circuit breaker, your spa will cycle through a series of self-diagnostic
codes as indicated on the topside control panel.
Step 3:
Wait 5 minutes so the spa can complete self-priming and diagnostic self-checks.
Step 4:
If your topside control panel display shows the temperature, the temperature flashing or
“--”; this is normal. If any other codes are shown, refer to troubleshooting guide located
in the appendix or visit http://online.ThermoSpas.com and click on Customer Center for
more information.
Step 5:
Activate the pumps to make sure they work and there are no leaks. Carefully inspect the
spa for any leaks by checking the hoses and plumbing connections. Check the unions
on the pumps and heater. If a leak is detected, stop the filling process and contact
ThermoSpas Service Department. If everything checks out proceed to step 6.
Note:
The spa should be inspected periodically for leaks.
Step 6:
Reinstall the panels.
Spa Start Up
Summary of Contents for Atlantis Gold
Page 1: ...ThermoSpas Designer Series Owner s Manual Safety Maintenance and Technical Information ...
Page 6: ......
Page 65: ......
Page 66: ......
Page 67: ......

