13
12
MINI CHARGE –
Digital alarm clock with USB charging function
Thank you for choosing this instrument from TFA.
1. Before you use this product
•
Please make sure you read the instruction manual carefully.
This information will help you to familiarize yourself with your new device, to learn all of its functions and parts, to find out important details
about its first use and how to operate it and to get advice in the event of a malfunction.
•
Following and respecting the instructions in your manual will prevent damage to your instrument and loss of your statutory rights aris-
ing from defects due to incorrect use.
•
We shall not be liable for any damage occurring as a result of non following of these instructions.
•
Please take particular note of the safety advice!
•
Please keep this instruction manual safe for future reference.
2. Delivery contents
• Alarm clock
• Power adaptor
• Instruction manual
3. Range of application and all the benefits of your new instrument at a glance
• Digital alarm clock with date and weekday
• Colour display with two brightness levels
• Charging function for mobile devices via two USB ports (max. 1A/2A)
• Two alarm times
• Three different alarm functions (single, working days, weekend)
• Adjustable snooze interval
• NAP timer
• Indoor temperature and humidity
• Display in German, English and Spanish
• Non-slip stand with 4 rubber pads
4. For your safety
• This product is exclusively intended for the range of application described above. It should only be used as described within these instructions.
• Unauthorized repairs, alterations or changes to the product are prohibited.
MINI CHARGE –
Digital alarm clock with USB charging function
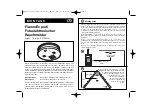
Caution!
Risk of electrocution!
• Plug the device only into a mains socket installed within electrical safety regulations and with a 240V mains voltage!
• The mains socket must be located near the equipment and it must be easily accessible.
• The device and the power adapter must not come into contact with water or moisture. Only suitable for indoor use.
• Do not use the device if the housing or the power adapter are damaged.
• Keep the device out of reach of persons (including children) who cannot fully appreciate the potential risks of handling electrical equipment.
• Unplug the device immediately if any fault occurs or if the device is not to be used for a long period of time.
• Only use the supplied power adapter.
• Connect the lead to the device first and then plug the power adapter into the socket.
• Do not pull the plug out of the socket by its cable.
• Route the mains cable so it does not come into contact with sharp-edged or hot objects.
Caution!
Risk of injury:
• Keep this instrument and the batteries out of reach of children.
• Batteries may be hazardous if swallowed. If a battery is swallowed, this can lead to serious internal burns and death within two hours. If you
suspect a battery could have been swallowed or otherwise caught in the body, seek medical help immediately.
• Batteries must not be thrown into a fire, short-circuited, taken apart or recharged. Risk of explosion!
• Batteries contain harmful acids. Low batteries should be changed as soon as possible to prevent damage caused by leaking. Never use a
combination of old and new batteries together, nor batteries of different types. Wear chemical-resistant protective gloves and safety glasses
when handling leaking batteries.
Important information on product safety!
• Do not expose the device to extreme temperatures, vibrations or shocks.
• Protect it from moisture.
• Do not apply excessive force when connecting a USB cable. The USB plug fits only one way into the USB port.
TFA_No. 60.2020_Anleitung 17.10.2017 10:13 Uhr Seite 7