!
!
!
!
!
!
!
!
!
!
!
Press
Press
to select a Program Number
Press
to move to the Track Column
Press
to select a Track Number
Press
to select the track and enter it into the Program
Repeat the process to make up the Program.
Re-enter the new track number
Press
Navigate to the
Icon. Press
Press
Press
twice to stop the disc and exit all menus. Now remove
the disc,
PROGRAM
ENTER
T
ENTER or PLAY/PAUSE
Clear
STOP
STOP
twice.
STOP
o modify a program entry:
To play a program:
To cancel a program:
To cancel a program when it is playing:
When you have finished play:
!
Press
to open the drawer
Load a disc. Press
to close the drawer.
If there is a
menu the player will auto-detect this and flash an
indication on the screen.
Some VCD discs will not have a suitable menu. In this case the disc may
begin playing. Other discs will stop after loading.
Some VCD discs (mainly VCD2.0 and SVCD1.0) feature a menu set similar
but simpler than DVDs. These are accessed as follows:
Press
to toggle the PBC menu on and off.
In all other respects playing a VCD is similar to a CD but most of the
advanced features are unavailable. Feature sets differ widely between the
different VCD formats and individual discs.
Repeatedly pressing
will bring up the Time Elapsed and the Time
Remaining displays if these are supported by the disc.
Functions such as search, track selection, repeat etc. work similarly to CD.
Pressing the
key brings up the same
choices as for CD play.
Press the
key to select the language desired.
Press
twice to stop the disc and exit all menus. Now remove
the disc,
OPEN/CLOSE
PBC
PBC
DISPLAY
The L/R key
On a single language VCD:
L/R
On a bilingual VCD:
L/R
STOP
!
!
!
!
!
VCD MENUS
When you have finished play:
18
PROGRAMMING AN AUDIO CD
PROGRAM
1
2
3
4
5
6
7
01
02
03
04
05
Track
Select
Play
Clear
Press or
to select an item
Press
to go to the item choice
Press or to choose an item
Press ENTER to confirm
07
PLAYING A VCD DISC
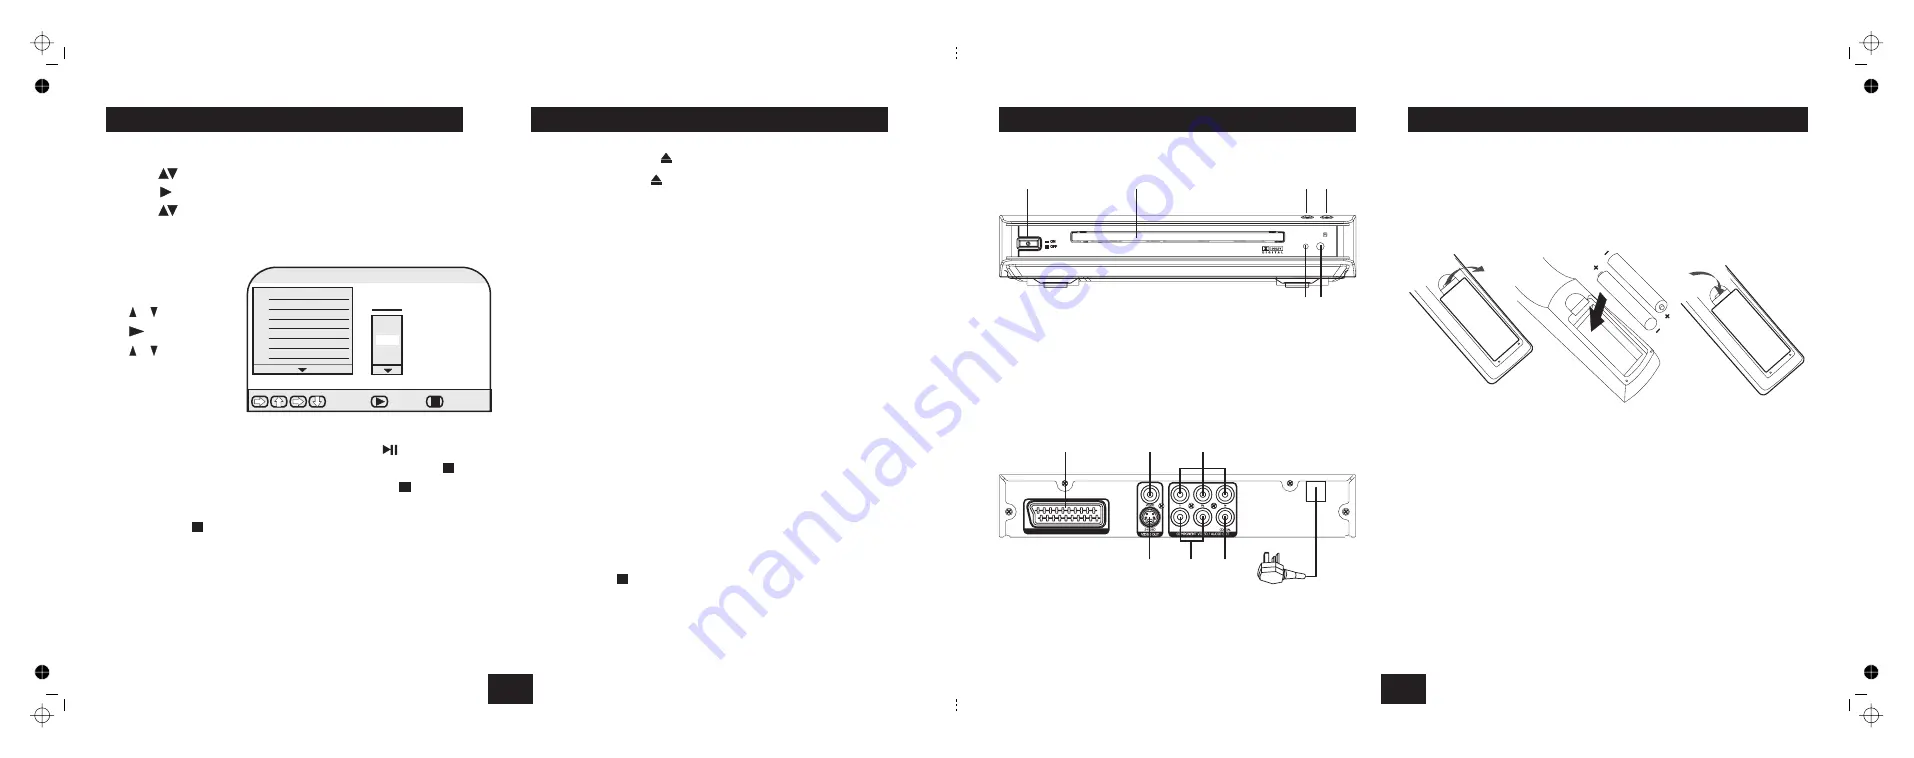
CONTROLS AND CONNECT0RS
FRONT PANEL CONTROLS
3.
Open/Close Key
1.
ON/OFF Switch
4.
Play / Pause Key
2.
Disc Tray
5.
Remote Sensor
6.
Power Indicator
b
c
d e
f
g
REAR PANEL CONNECTIONS
1.
SCART Output
4. Power Cord
2.
Composite Video Output
3.
Component Video outputs
g
h
SCART OUT
b
c
d
e
f
6.
Analogue Audio Outputs
7.
S-Video Output
5.
Digital Audio Output
FITTING HANDSET BATTERIES
Open the cover of the battery compartment.
Unwrap the supplied AAA batteries and place them in the battery
compartment with the polarity as shown.
Replace the compartment cover
Always use AAA batteries and always replace them in pairs. Never mix old
and new batteries. Dispose of used batteries with regard to the recycling
regulations in your area. Do NOT short circuit batteries or throw batteries into
water, the general rubbish or in a fire.
Very weak batteries can leak and damage the handset. Replace in good time!
O
P
EN
O
P
EN
3


