Compact Track Loader
13. Loader Disassembly and Assembly
13-5
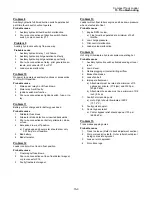
Figure 13-15
9.
Remove the back-up ring on the inside of the
end gland with a small blade type screwdriver.
Figure 13-16
10.
Remove piston seal and wear ring from piston
using a blade type screwdriver.
Figure 13-17
11.
To remove cylinder bushings, place cylinder in
vice and find a socket the same diameter as the
bushing. Remove the bushing with a rubber
mallet and the socket. You may need to use a
punch tool to complete the removal of the
bushing.
12.
Thoroughly clean and dry all parts prior to
installation of new seals to prevent
contamination of hydraulic oil when cylinders are
reassembled and installed.
Lift Cylinder/Tilt Cylinder Seal Kit Install
Note
: The procedures for installing the seal kits on the lift
cylinders and tilt cylinders are similar, only the lift cylinder
procedure is described below.
Lift Cylinder Seal Kit: P/N 2010-552
Tilt Cylinder Seal Kit: P/N 2010-548
1.
Reverse the cylinder seal removal procedure to
install seal kits on both the lift and tilt cylinders.
2.
Make sure your work area is clean and that all
tools are clean before beginning seal install.
Lubricate all seals with new hydraulic oil prior to
install.
Figure 13-18
3.
Use a rubber mallet and a socket or section of
pipe with the same outside diameter as the seal
to drive into place.
4.
Reverse steps 1-6 of the seal removal
procedure to reassemble the cylinder.
5.
Add removable locktite to the nut and torque to
75 ft. lbs.
6.
Torque the cap gland to 100 ft. lbs.
Back-up ring
Piston
Piston seal
Wear ring
Wiper
Socket
Summary of Contents for PT-30
Page 1: ...PT 30 Part Number 2010 513 Printed 1 11 Service Manual Compact Track Loader ...
Page 2: ......
Page 3: ......
Page 7: ......
Page 13: ...1 6 ...
Page 15: ......
Page 19: ......
Page 35: ......
Page 51: ......
Page 65: ......
Page 73: ......
Page 85: ......
Page 99: ......
Page 103: ......
Page 115: ......


