User Guide - 2.20 Disk modes
Teenage Engineering
– User Guide (LD)
Janvier 2019
48/59
Any changes you do to the files on the OP-Z disk are reflected on the unit after you eject the
disk. Wait for the unit to synchronize the content and restart in normal mode.
If any content was rejected, it will end up in a folder named 'rejected' on the OP-Z disk the
next time content mode is entered.
Note: please see the how_to_import.txt and how_to_dmx.txt files, both found on the content
disk, for further reference.
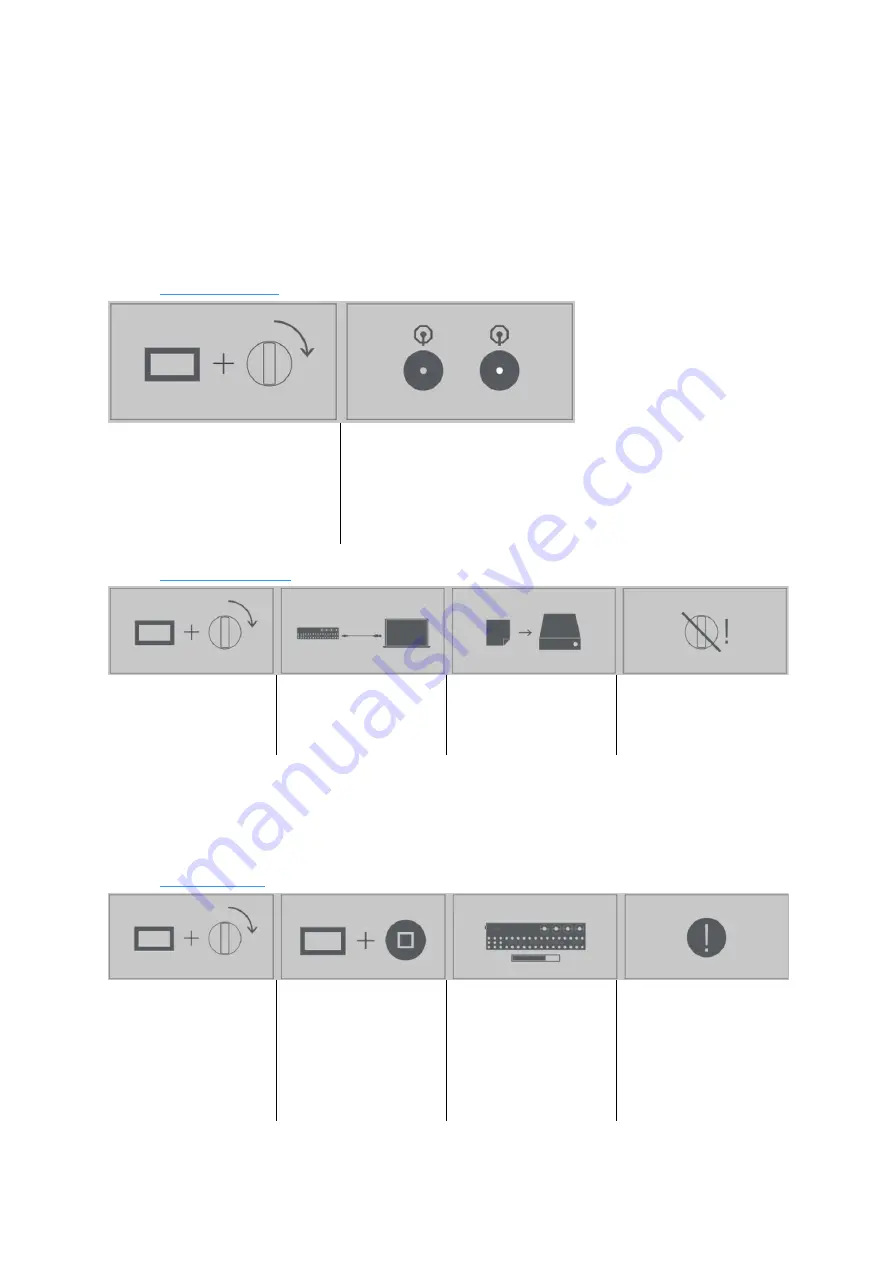
2.20.6 Upgrade mode
Upgrade mode is used for
updating the OP-Z firmware and
for initiating a factory reset
Press and hold the SCREEN
button while turning on the unit
OP-Z will start in upgrade mode, the kick led will be blinking
white and the parameter dial LEDs will all be white
2.20.7 Software update
To update the OP-Z
firmware, make sure
OP-Z is in upgrade mode
Connect the unit to a
computer using USB
OP-Z will show up in the
computer as an external
removable USB disk
Drag and drop the
firmware file onto this
disk and make sure it's
copied in full
Note: the latest firmware file can be downloaded here.
Safely eject the USB disk. OP-Z will update and restart in normal mode when ready.
Note: do not power off your device during this update process.
2.20.8 Factory reset
Upgrade mode can also
be used to initiate a
factory reset, restoring
OP-Z to its original
factory settings.
Make sure OP-Z is in
upgrade mode. press
and hold SCREEN and
stop for a second
This triggers a factory
reset
The process is finished
when you see a blinking
white led and four green
LEDs. Safely eject the
unit and then power
cycle it. OP-Z is now
ready
Note: any custom user content will be removed when a factory reset is performed.


