3. Installation
2022-01
HYDROFLEX PLUS No. 30199906 Rev. No. 1.1
27
3.3
Installation Procedure
After the instrument has been unpacked and the contents of the transport
container have been checked for damages and completeness (see
3.2 Unpacking and Inspection), the instrument can be installed using the following
procedure:
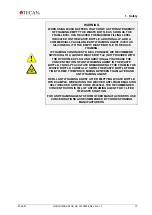
CAUTION
BEFORE THE INSTRUMENT IS INSTALLED AND SWITCHED ON,
IT SHOULD BE LEFT TO STAND FOR AT LEAST THREE HOURS, SO
THERE IS NO POSSIBILITY OF CONDENSATION CAUSING A SHORT
CIRCUIT.
CAUTION
IF THE LIQUID BOTTLES ARE ATTACHED IMPROPERLY OR
TO THE WRONG CONNECTOR ON THE BACK PANEL OF THE
INSTRUMENT, THE WASH PERFORMANCE CAN BE SERIOUSLY
AFFECTED.
•
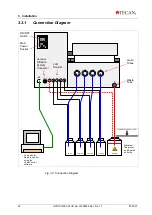
Connect the solution tubes (L1
– L4) to the inlet connectors on the rear
panel of the instrument (see 3.3.1 Connection Diagram). The instrument is
supplied with one, two, or four 1-meter lengths of tubing (depending on
instrument configuration). Connect the solution tubes to the corresponding
liquid bottles. Connect the waste tube to the waste bottle (be aware of not
kinking the tube!).
•
Connect the Liquid Level Sensors, if available.
•
Setup instrument options, if available.
•
Ensure that the on/off switch in the rear panel of the instrument is in the off
position, then connect the instrument to the power supply: insert the main
power cable into the main power socket on the rear of the instrument.

