background image

33

Troubleshooting

In case you experience any problem with this unit, please take
the time to look through this chart and see if you can solve the
problem yourself before you call your dealer or a TEAC service
center.

No power

e

Check the connection to the AC wall outlet. Make sure the
outlet is not switched by a lamp switch by plugging in
another electrical device to see if the outlet is “live”.

PROHIBIT icon "

" appears on the screen

e

The operation is not permitted by the disc or the unit.

e

Note that during playback of a title part (cautions, software
maker's logo, etc.), most operations are prohibited by the
disc. 

e

If another operation is still in process, wait a moment and try
again. 

Picture playback stops and operation buttons do not work.

e

Turn the unit off and back on again and restart the playback.

No picture.

e

Turn on the TV.

e

Check that the system is connected properly.

e

Make sure you have selected the proper video input on the
TV so that you can view the pictures from the DVD player.

Picture noise.

e

If video from this system has to go through your VCR to get
to your TV, the copy-protection applied to some DVD
programs could affect picture quality. Please connect the
unit directly to your TV.

The image is distorted or monochromatic.

e

The color system selected does not match your TV. Press
the PAL/NTSC button of the remote control unit once or
twice, and then select correct color system in the SETUP
menu (see page 9 and 27).

e

Select the aspect ratio to match your TV.

The aspect ratio of the screen cannot be changed.

e

The aspect ratio might be fixed by the disc.

e

Depending on the TV, you may not be able to change the
aspect ratio.

There is no sound or only a very low-level sound is heard.

e

Check the audio output setting (see page 29).

e

Adjust the volume by pressing the VOLUME buttons.

e

Check that the speakers and components are connected
securely.

e

Check the operation of the connected component.

e

The sound is muted during pause, slow-motion, fast
forward/reverse, and stepping playback. Press the PLAY
button to resume normal playback.

e

Select the proper source using the FUNCTION button.

e

Select the proper surround mode (see page 16).

No sound from surround or center speakers.

e

Check the channel level setting (see page 15).

e

Select the proper surround mode (see page 16).

e

Play a multi-channel source.

Beware of condensation

When the unit (or a disc) is moved from a cold to a warm place, or
used after a sudden temperature change, there is a danger of
condensation; vapor in the air could condense on the internal
mechanism, making correct operation impossible. To prevent this,
or if this occurs, leave the unit for one or two hours with the
power turned on. Then the unit will stabilize at the temperature of
its surroundings.

Maintenance

If the surface of the unit gets dirty, wipe with a soft cloth or use
diluted neutral cleaning liquid. Be sure to remove any fluid
completely. Do not use thinner, benzine or alcohol as they may
damage the surface of the unit.

Severe hum or noise is heard.

e

Check that the speakers and components are connected
securely.

e

Make sure the line cords and speaker cables are as far
away from the AC supply as possible.

e

This unit cannot play such discs as CD-ROMs. Use a
playable disc.

Remote control doesn't work.

e

If the batteries are dead, change the batteries.

e

Use remote control unit within the range (5m /15ft) and point
at the front panel.

e

Clear obstacles between the remote control unit and the
main unit.

e

If a strong light is near the unit, turn it off.

Cannot play.

e

Load a disc with the playback side facing down.
If the disc is dirty, clean the surface of the disc.

e

A blank disc has been loaded. Load a prerecorded disc.

e

Check the region code of the DVD.

Sound skips.

e

Place the unit on a stable place to avoid vibration and shock.

e

If the disc is dirty, clean the surface of the disc.

e

Don't use scratched, damaged or warped discs.

Cannot listen to any station, or signal is too weak.

e

Make sure the antenna is properly connected.

e

Tune in the station properly.

e

If a TV is near the unit, turn it off.

e

Install the antenna again after relocating it to a better
reception position.

Though the broadcast is stereo, it sounds monaural.

e

Press the FM MODE button.

If normal operation cannot be recovered, unplug the power cord
from the outlet and plug it in again.  This resets the internal
micro-computer which can be disturbed during electrical
storms, power interruptions, et cetera.

Summary of Contents for PL-D2100

Page 1: ...OWNER S MANUAL 9A09877100 PL D2100 DVD Home Theater System Z...

Page 2: ...TEILY ADVARSEL USYNLIG LASERBESTR LING N R DENNE DELEN ER PEN OG SIKKERHETSSPERREN ER UTKOBLET UNNG UTSETTELSE FOR STR LING IMPORTANT for U K Customers DO NOT cut off the mains plug from this equipme...

Page 3: ...panel If you are in any doubt regarding this matter consult an electrician Choose the installation location of your unit carefully Avoid placing it in direct sunlight or close to a source of heat Also...

Page 4: ...O CD CD ROM SACD DVD Audio DVD RAM and DVD ROM discs discs recorded in a color system other than PAL or NTSC illegally produced discs scratched discs discs that are dusty soiled or marked with fingerp...

Page 5: ...CD RW discs aren t recommended as the label side might be sticky and damage the unit Do not stick papers or protective sheets on the discs and do not use any protective coating spray Use a soft oil ba...

Page 6: ...ct positive and negative _ polarities Use batteries of the same type Never use different types of batteries together Rechargeable and non rechargeable batteries can be used Refer to the precautions on...

Page 7: ...equipment before making connections Read the instructions of each component you intend to use with this unit Be sure to insert each plug securely To prevent hum and noise avoid bundling the signal int...

Page 8: ...th a S VIDEO cable 3 Turn the unit and TV on and select S VIDEO in the SETUP menu See page 27 4 Turn the unit off and disconnect the RCA video cable from the VIDEO jacks Changing the Color System NTSC...

Page 9: ...are distinguished by colors Be sure to match the color of the cables with the color of the terminals The metal portions of the two separate wires should not touch or an electrical short can occur Shor...

Page 10: ...d image Surround Left and Right speakers Install these speakers above the level of the listener s ears directly to the left and right or slightly behind of your listening position Subwoofer When all t...

Page 11: ...d close the disc tray STOP H In DVD mode use this button to stop playback SKIP TUNING In DVD mode use these buttons to skip chapters or tracks In TUNER mode use these buttons to tune in a station REMO...

Page 12: ...s button to select an audio language SLEEP Use this button to set sleep timer LISTENING Use this button to select a listening mode Q P O N M L K J I H G F E D C B A DOLBY PL II MODE Use this button to...

Page 13: ...turn up the volume to the required level by pressing the VOLUME buttons 3 Each time the SELECT button is pressed the mode is changed as follows To adjust the level of high frequency sound range select...

Page 14: ...to change the level 2 Muting The power can be switched off after a specified amount of time Press the SLEEP button repeatedly until desired time appears on the display The sleep time can be changed b...

Page 15: ...U PL II MODE button doesn t work during playback of a DVD disc recorded in DTS or DOLBY DIGITAL 5 1 format Each time the LISTENING button is pressed the mode is changed as follows Normal mode Select...

Page 16: ...track When the PBC function is on If you press the PLAY PAUSE button y J in the stop mode a menu will appear on the screen Select an item by pressing the numeric buttons to start playback If you pres...

Page 17: ...C button in the stop mode to turn on or off the MP3 MENU Press the g t buttons to rotate the picture Press the 5 b buttons to mirror the picture If you press the STOP button H during playback of DVD P...

Page 18: ...want to listen to is found Each time the SCAN button is pressed the scan speed is incremented FF 1XqFF 2XqFF 3XqFF 4Xq normal play FR 1XqFR 2XqFR 3XqFR 4Xq normal play DVD VCD CD MP3 Search for a part...

Page 19: ...om To zoom the picture press the ZOOM button during playback Each time the ZOOM button is pressed the magnification level changes You can shift the zoom point by pressing the 5 b g t buttons during zo...

Page 20: ...ged Example VCD CD MONO LEFT MONO RIGHT STEREO Up to 99 tracks can be programmed in the desired order Note that the total time of the programmed tracks cannot exceed 1 hour 39 minutes 59 seconds Press...

Page 21: ...O TO button 1 This function doesn t work in the RESUME mode Press the STOP button to cancel the resume mode When no button is pressed for 10 seconds chapter select mode will be cancelled When you don...

Page 22: ...s the ENTER button 5 Playback starts from the selected part If you select the numbers which doesn t exist on the disc PROHIBIT icon will be displayed DVD Press the GO TO button during playback 1 VCD C...

Page 23: ...TER REPEAT TITLE REPEAT OFF REP ONE CD VCD MP3 MP3 REP ALL OFF REP ONE FOLDER REPEAT OFF Repeat Playback of CD VCD MP3 Each time the REPEAT button is pressed the mode is changed as follows Repeat One...

Page 24: ...the following buttons is pressed A B repeat mode will be cancelled STOP CD VCD STOP in the stop mode DVD SKIP A B OPEN CLOSE POWER FUNCTION 2 1 Repeat Playback of a Designated Section A B Repeat This...

Page 25: ...limit playback by children et cetera Notes Some settings cannot be selected during playback and RESUME mode In that case press the STOP button once or twice to stop playback completely MAKE SURE YOUR...

Page 26: ...9 content will appear distorted during playback objects look thin TV Type GENERAL PAGE SET TV STANDARD TV DISPLAY TV TYPE VIDEO OUTPUT ANGLE MARK OSD LANG SCREEN SAVER MAIN PAGE PAL NTSC MULTI PAL de...

Page 27: ...n the listening mode is set to LT RT STEREO or VSS In this case press the SETUP button to exit the setup menu press the LISTENING button repeatedly to select PRO LOGIC and then press the SETUP button...

Page 28: ...the DIGITAL OUT terminal ANALOG default Select this when you don t use the DIGITAL OUT terminal No signal will be output from the DIGITAL terminal When SPDIF RAW or SPDIF PCM is selected no sound is...

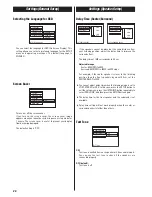
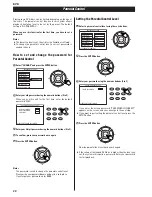
Page 29: ...X Notes The password is used to change the parental control level Please write your password down and put in a safe place If you forget your password enter 3308 Setting the Parental Control Level Sele...

Page 30: ...is pressed momentarily 0 5 second or less the frequency changes by a fixed step FM 50 kHz steps AM 9 kHz steps Press the TUNING button repeatedly until the station you want to listen to is found FM MO...

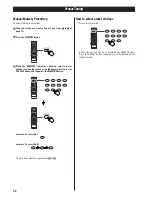
Page 31: ...g select a preset channel to store the station using the numeric buttons or the PRESET buttons and then press the MEMORY button 3 example To select No 5 example To select No 25 To store more stations...

Page 32: ...elect the proper surround mode see page 16 No sound from surround or center speakers eCheck the channel level setting see page 15 eSelect the proper surround mode see page 16 ePlay a multi channel sou...

Page 33: ...requirements 230V AC 50Hz Europe model 240V AC 50Hz Australia model Power consumption 120 W STANDBY less than 0 5 W Dimensions WxHxD 430 x 348 x 48 mm Weight 4 1 kg Operating temperature 5 C 35 C 40 F...

Page 34: ...90 8008 TEAC MEXICO S A De C V Campesinos N 184 Colonia Granjas Esmeralda Delegacion Iztapalapa CP 09810 M xico DF Phone 525 581 5500 TEAC UK LIMITED 5 Marlin House Croxley Business Park Watford Hertf...

Reviews: