Teac PL-D2100 Owner'S Manual Download Page 3

4

“DTS” and “DTS Digital Surround” are trademarks of Digital Theater
Systems, Inc. ©1996 Digital Theater Systems, Inc. All rights reserved.

Manufactured under license from Dolby Laboratories. “Dolby”, “Pro Logic”
and the double-D symbol are trademarks of Dolby Laboratories. 

This product incorporates copyright protection technology that is protected
by method claims of certain U.S. patents and other intellectual property
rights owned by Macrovision Corporation and other rights owners. Use of
this copyright protection technology must be authorized by Macrovision
Corporation, and is intended for home and other limited viewing uses only,
unless otherwise authorized by Macrovision Corporation. Reverse
engineering or disassembly is prohibited.

Kodak is a trademark of Eastman Kodak Company.

Before Use 

Conventions about This Manual

<

Instructions in this manual describe the controls on the remote
control. You can also use the buttons on the front panel if they
have the same or similar names as those on the remote.

<

The types of functions and operations that can be used for a
particular disc vary depending on the features of that disc. In
some cases, these functions and operations may differ from
the descriptions given in this Owner's Manual. In this event,
follow the instructions given on the screen. This Owner's
Manual only covers basic disc operations.

<

For some operations, the PROHIBIT icon "

" may appear on

the screen. This indicates that the operation described in this
Operations Manual is not permitted for the current disc.

<

The drawings about the TV screen and front panel display
used in this Operations Manual are purely for the purposes of
explanation. The actual displays may differ slightly from what
are shown here.

Read this before operation

<

As the unit may become warm during operation, always leave
sufficient space around the unit for ventilation. 

<

The voltage supplied to the unit should match the voltage as
printed on the rear panel. If you are in any doubt regarding this
matter, consult an electrician.

<

Choose the installation location of your unit carefully. Avoid
placing it in direct sunlight or close to a source of heat. Also
avoid locations subject to vibrations and excessive dust, heat,
cold or moisture.

<

Do not place the unit on the amplifier/receiver.

<

Do not open the cabinet as this might result in damage to the
circuitry or electrical shock. If a foreign object should get into
the unit, contact your dealer or service company.

<

When removing the power plug from the wall outlet, always
pull directly on the plug, never yank the cord.

<

To keep the laser pickup clean, do not touch it, and always
close the disc tray.

<

Do not attempt to clean the unit with chemical solvents as this
might damage the finish. Use a clean, dry cloth.

<

Keep this manual in a safe place for future reference.

DO NOT MOVE THE UNIT DURING PLAYBACK

During playback, the disc rotates at high speed. Do NOT lift or
move the unit during playback. Doing so may damage the disc
or the unit.

WHEN MOVING THIS UNIT

When changing places of installation or packing the unit for
moving, be sure to remove the disc and return the disc tray to
its closed position in the player. Then, press the power switch
to turn the power off, and disconnect the power cord. Moving
this unit with the disc loaded may result in damage to this unit.

CAUTION

The product shall not be exposed to dripping or splashing and
that no object filled with liquids, such as vases, shall be placed
on the product.

Do not install this equipment in a confined space such as a
book case or similar unit.

What's in the box 

Please confirm that the following accessories are in the box
when you open it.

Front speaker x2
Center speaker x1
Surround speaker x2
Subwoofer x1
Front/Center speaker cable (5 m x 3)
Surround speaker cable (10 m x 2)
Subwoofer RCA pin cord (5 m)
AM loop antenna x 1
FM antenna x 1
RCA video cable x 1
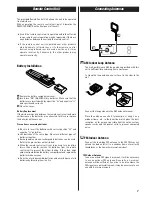
Remote control unit x 1
Batteries (AA, R6, SUM-3) x 2

Memory Backup

Settings (such as preset stations, speaker configuration, DVD
settings) are stored almost permanently, even when power is
turned off and the unit is unplugged. 

Summary of Contents for PL-D2100

Page 1: ...OWNER S MANUAL 9A09877100 PL D2100 DVD Home Theater System Z...

Page 2: ...TEILY ADVARSEL USYNLIG LASERBESTR LING N R DENNE DELEN ER PEN OG SIKKERHETSSPERREN ER UTKOBLET UNNG UTSETTELSE FOR STR LING IMPORTANT for U K Customers DO NOT cut off the mains plug from this equipme...

Page 3: ...panel If you are in any doubt regarding this matter consult an electrician Choose the installation location of your unit carefully Avoid placing it in direct sunlight or close to a source of heat Also...

Page 4: ...O CD CD ROM SACD DVD Audio DVD RAM and DVD ROM discs discs recorded in a color system other than PAL or NTSC illegally produced discs scratched discs discs that are dusty soiled or marked with fingerp...

Page 5: ...CD RW discs aren t recommended as the label side might be sticky and damage the unit Do not stick papers or protective sheets on the discs and do not use any protective coating spray Use a soft oil ba...

Page 6: ...ct positive and negative _ polarities Use batteries of the same type Never use different types of batteries together Rechargeable and non rechargeable batteries can be used Refer to the precautions on...

Page 7: ...equipment before making connections Read the instructions of each component you intend to use with this unit Be sure to insert each plug securely To prevent hum and noise avoid bundling the signal int...

Page 8: ...th a S VIDEO cable 3 Turn the unit and TV on and select S VIDEO in the SETUP menu See page 27 4 Turn the unit off and disconnect the RCA video cable from the VIDEO jacks Changing the Color System NTSC...

Page 9: ...are distinguished by colors Be sure to match the color of the cables with the color of the terminals The metal portions of the two separate wires should not touch or an electrical short can occur Shor...

Page 10: ...d image Surround Left and Right speakers Install these speakers above the level of the listener s ears directly to the left and right or slightly behind of your listening position Subwoofer When all t...

Page 11: ...d close the disc tray STOP H In DVD mode use this button to stop playback SKIP TUNING In DVD mode use these buttons to skip chapters or tracks In TUNER mode use these buttons to tune in a station REMO...

Page 12: ...s button to select an audio language SLEEP Use this button to set sleep timer LISTENING Use this button to select a listening mode Q P O N M L K J I H G F E D C B A DOLBY PL II MODE Use this button to...

Page 13: ...turn up the volume to the required level by pressing the VOLUME buttons 3 Each time the SELECT button is pressed the mode is changed as follows To adjust the level of high frequency sound range select...

Page 14: ...to change the level 2 Muting The power can be switched off after a specified amount of time Press the SLEEP button repeatedly until desired time appears on the display The sleep time can be changed b...

Page 15: ...U PL II MODE button doesn t work during playback of a DVD disc recorded in DTS or DOLBY DIGITAL 5 1 format Each time the LISTENING button is pressed the mode is changed as follows Normal mode Select...

Page 16: ...track When the PBC function is on If you press the PLAY PAUSE button y J in the stop mode a menu will appear on the screen Select an item by pressing the numeric buttons to start playback If you pres...

Page 17: ...C button in the stop mode to turn on or off the MP3 MENU Press the g t buttons to rotate the picture Press the 5 b buttons to mirror the picture If you press the STOP button H during playback of DVD P...

Page 18: ...want to listen to is found Each time the SCAN button is pressed the scan speed is incremented FF 1XqFF 2XqFF 3XqFF 4Xq normal play FR 1XqFR 2XqFR 3XqFR 4Xq normal play DVD VCD CD MP3 Search for a part...

Page 19: ...om To zoom the picture press the ZOOM button during playback Each time the ZOOM button is pressed the magnification level changes You can shift the zoom point by pressing the 5 b g t buttons during zo...

Page 20: ...ged Example VCD CD MONO LEFT MONO RIGHT STEREO Up to 99 tracks can be programmed in the desired order Note that the total time of the programmed tracks cannot exceed 1 hour 39 minutes 59 seconds Press...

Page 21: ...O TO button 1 This function doesn t work in the RESUME mode Press the STOP button to cancel the resume mode When no button is pressed for 10 seconds chapter select mode will be cancelled When you don...

Page 22: ...s the ENTER button 5 Playback starts from the selected part If you select the numbers which doesn t exist on the disc PROHIBIT icon will be displayed DVD Press the GO TO button during playback 1 VCD C...

Page 23: ...TER REPEAT TITLE REPEAT OFF REP ONE CD VCD MP3 MP3 REP ALL OFF REP ONE FOLDER REPEAT OFF Repeat Playback of CD VCD MP3 Each time the REPEAT button is pressed the mode is changed as follows Repeat One...

Page 24: ...the following buttons is pressed A B repeat mode will be cancelled STOP CD VCD STOP in the stop mode DVD SKIP A B OPEN CLOSE POWER FUNCTION 2 1 Repeat Playback of a Designated Section A B Repeat This...

Page 25: ...limit playback by children et cetera Notes Some settings cannot be selected during playback and RESUME mode In that case press the STOP button once or twice to stop playback completely MAKE SURE YOUR...

Page 26: ...9 content will appear distorted during playback objects look thin TV Type GENERAL PAGE SET TV STANDARD TV DISPLAY TV TYPE VIDEO OUTPUT ANGLE MARK OSD LANG SCREEN SAVER MAIN PAGE PAL NTSC MULTI PAL de...

Page 27: ...n the listening mode is set to LT RT STEREO or VSS In this case press the SETUP button to exit the setup menu press the LISTENING button repeatedly to select PRO LOGIC and then press the SETUP button...

Page 28: ...the DIGITAL OUT terminal ANALOG default Select this when you don t use the DIGITAL OUT terminal No signal will be output from the DIGITAL terminal When SPDIF RAW or SPDIF PCM is selected no sound is...

Page 29: ...X Notes The password is used to change the parental control level Please write your password down and put in a safe place If you forget your password enter 3308 Setting the Parental Control Level Sele...

Page 30: ...is pressed momentarily 0 5 second or less the frequency changes by a fixed step FM 50 kHz steps AM 9 kHz steps Press the TUNING button repeatedly until the station you want to listen to is found FM MO...

Page 31: ...g select a preset channel to store the station using the numeric buttons or the PRESET buttons and then press the MEMORY button 3 example To select No 5 example To select No 25 To store more stations...

Page 32: ...elect the proper surround mode see page 16 No sound from surround or center speakers eCheck the channel level setting see page 15 eSelect the proper surround mode see page 16 ePlay a multi channel sou...

Page 33: ...requirements 230V AC 50Hz Europe model 240V AC 50Hz Australia model Power consumption 120 W STANDBY less than 0 5 W Dimensions WxHxD 430 x 348 x 48 mm Weight 4 1 kg Operating temperature 5 C 35 C 40 F...

Page 34: ...90 8008 TEAC MEXICO S A De C V Campesinos N 184 Colonia Granjas Esmeralda Delegacion Iztapalapa CP 09810 M xico DF Phone 525 581 5500 TEAC UK LIMITED 5 Marlin House Croxley Business Park Watford Hertf...

Reviews: