background image


Working with the Unit 

PowerBoot Module 

The PowerBoot includes the batteries to power the unit, the power 
port used to charge the unit, and the I/O ports that are used to 
communicate with other devices using a USB or serial cable.  

Battery Life: 

Battery life is dependent upon the application and 

operating environment. The PowerBoot contains 3800 mAh of 
battery power which typically translates to approximately 15 hours 
of battery life. Heavy usage of the 802.11g (WLAN), frequent 
backlight usage, high power consumption CF cards and cold 
temperatures can all significantly reduce the battery life.  

Tips for extending battery life: 

WLAN or Bluetooth: 

If your unit comes with these options 

installed, use ONLY when necessary. Turn off when not needed.  

Display backlight:

 Tap 

Start / Settings / System / Backligh

t to 

minimize the amount of time the backlight stays on, and dim it 
to only as bright as required to view the display. 

CF Cards:

 Select low-power consumption CF cards, and use 

them only when necessary. 

Cold Temperatures:

 Keep the unit as warm as possible. If 

feasible, keep it inside your coat or a vehicle when not in use.  

Auto features

: Tap 

Start / Settings / System / Power / 

Advanced. 

To conserve battery power, specify your unit to turn 

off in a short time if not in use.  

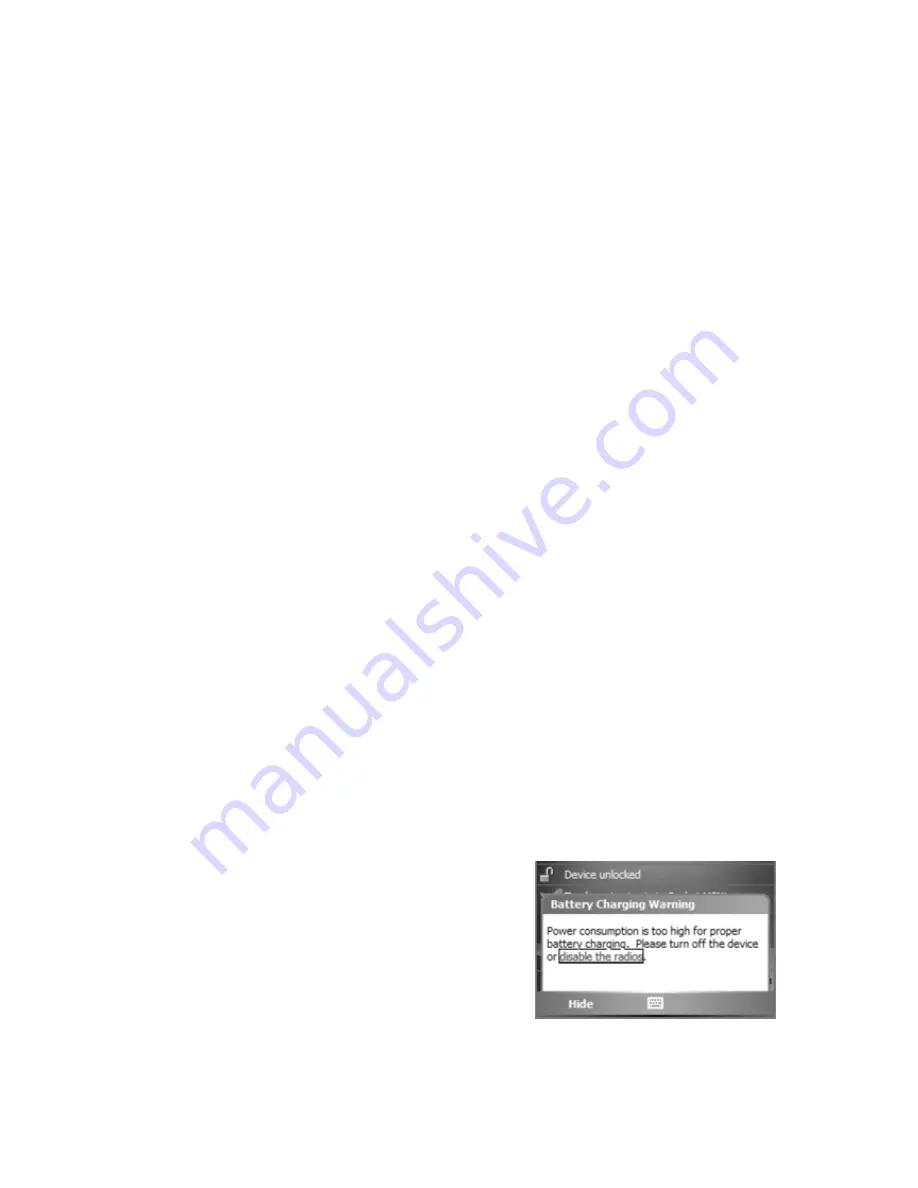
Charging the PowerBoot Module: It is highly recommended to 
turn off the unit while charging.

 If you use the WLAN while 

charging, you may actually drain the battery, in which case a battery 
charging screen warning will appear. 

If you need to use the unit and the 
battery is really low, you MUST turn 
off the WLAN. 

The PowerBoot can be charged when 
installed or separately from the main 
unit. Connect the appropriate AC plug to the AC adapter. Plug into 

Summary of Contents for Recon

Page 1: ...G e t t i n g S t a r t e d G u i d e TDS RECON...

Page 2: ...al speci cations for the product or e physical damage due to external causes including accident abuse misuse or problems with electrical power Water damage caused by improper installation of the CF Ca...

Page 3: ...ratulations on your purchase of one of the most advanced handheld computers available on the market today The rugged design of your handheld allows you to work in harsh outdoor environments You can op...

Page 4: ...Top View without Cap Bottom View CompactFlash card slots Some units do not have this feature NOTE Be sure to read the warranty and safety information in this manual prior to using your unit Stylus hol...

Page 5: ...er included with your unit Use of other adapters will void the product warranty 2 Attach the PowerBoot Module To attach the PowerBoot use a screwdriver or the flat head of the supplied stylus to turn...

Page 6: ...esume There is no waiting for the unit to boot up every time it is turned on Instant on does not occur on the first boot up When the unit first turns on the message Tap the screen to set up your Windo...

Page 7: ...ke sure the front of the card faces the display side of the unit Do not force the card into the slot The pins can be damaged if the card is not aligned correctly CF slot 1 supports Type I II cards CF...

Page 8: ...backlight Tap Start Settings System Backlight to minimize the amount of time the backlight stays on and dim it to only as bright as required to view the display CF Cards Select low power consumption...

Page 9: ...s on both PowerBoot Modules Use a screwdriver or the flat head of the supplied stylus to turn the latches counter clockwise until arrows point downward towards the I O ports on the PowerBoot 4 With th...

Page 10: ...rotect your data However you can lose data by accidentally deleting or overwriting it As with any computer system we recommend that you regularly backup your data to removable media or to a PC Speaker...

Page 11: ...en Align Touch Screen Repeats the alignment procedure if you are having trouble with the touchscreen Reset Stops all running programs and restarts the unit No file system data is lost only open or uns...

Page 12: ...ypad Communication Your unit may offer multiple methods of communication with other devices as described below Not all the features apply to every unit as some of the features are offered as options I...

Page 13: ...not recognize the serial port You must connect by either USB or Bluetooth IMPORTANT Do not connect your unit to the USB port on the PC until after you install connectivity software to your PC If you p...

Page 14: ...WLAN installed in your unit tap Start Settings System System Information Wireless The WLAN is off by default To turn the WLAN on or off tap WLAN from the Today screen or tap Start Settings Connections...

Page 15: ...llowing you to update calendars contacts tasks and the Inbox on your unit without directly connecting to a PC The server must be running Exchange Server 2003 SP2 or later To use Exchange ActiveSync co...

Page 16: ...equire a partnership If your PC does require a partnership 1 Confirm Bluetooth is enabled on both units and the receiving unit is visible 2 Tap Start Programs File Explorer on the unit that is sending...

Page 17: ...heck in the check box and tap Finish 5 Tap Start Programs ActiveSync Menu Connect via Bluetooth Bluetooth connection with a printer If the printer is Bluetooth enabled via Bluetooth serial profile it...

Page 18: ...Windows Mobile Most third party software is installed by running a setup program on the PC while the unit is connected with ActiveSync or the Windows Mobile Device Center Follow the setup instruction...

Page 19: ...are designed for indoor use only Avoid using the AC adapter in wet areas Unplug the AC adapter from power when not in use Do not short the output connector Carrying the unit Due to radio frequency em...

Page 20: ...ime you turn the unit on or resume operation WARNING BE CERTAIN TO REMEMBER THE PASSWORD The only way to recover from a forgotten password is to perform a Clean Boot However you will LOSE all applicat...

Page 21: ...Tap System Power to view the approximate battery power remaining in 20 increments This gauge may be inaccurate after first turning the unit on or inserting or removing the external AC adapter The batt...

Page 22: ...scratch and or damage the unit Keep the touchscreen clean by gently wiping the display using a soft cloth dampened either with clean water or glass cleaner Do not use abrasive cleaners or apply any cl...

Page 23: ...the contacts to see if they are wet If so dry the contacts on both the unit and the battery with a paper towel or clean cloth before storing for overnight or longer Temperature Range The operational...

Page 24: ...drop resistant dust proof see Environmental section INTEGRATED WIRELESS CONNECTIVITY Optional Integrated Bluetooth and WLAN capability Environmental Specifications TEMPERATURE Operation 22 F to 140 F...

Page 25: ...e display more viewable Tap Start Settings System Backlight Brightness and adjust the slider to increase display brightness however doing this will reduce battery life You can also change the backgrou...

Page 26: ...nd make simple changes on your unit However Mobile versions do not support all of the formatting and other features that are supported by the PC applications I see a low battery warning after using th...

Page 27: ...r may require certain modem initialization strings or APN Access Point Name strings If you try to establish the same connection from a PC typically you install software from the cellular provider whic...

Page 28: ...tion which can be determined by turning the equipment off and on the user is encouraged to try to correct the interference by one or more of the following measures Reorient or relocate the receiving a...

Page 29: ...EN 300 328 V1 6 1 EN 301 489 1 V1 4 1 EN 301 489 17 V1 2 1 Environmental EU Directive 2002 95 EC China RoHS Supplementary Information In addition to meeting the above EMC requirements during system t...

Page 30: ...rominated biphenyls PBB Poly brominated diphenyl ethers PBDE Printed Circuit Assemblies X O O O O O Display X O O O O O Keypad X O O O O O Housing O O O O O O Hardware O O O O O O Product Period does...

Page 31: ...urope To recycle TDS or Trimble WEEE Call 31 497 53 2430 and ask for the WEEE Associate Or Mail a request for recycling instructions to Trimble Europe BV c o Menlo Worldwide Logistics Meerheide 45 552...

Page 32: ...For more information visit tdsway com or call 541 753 9322 Tripod Data Systems A TRIMBLE COMPANY 345 SW Avery Avenue Corvallis OR 97333...

Reviews: