background image

I

NSTANT PLAYBACK

If you click on the waveform while keeping the <COMMAND> key
pressed, the playback will instantly start from the selected position. If 
you are in stop mode, the playback will only play as long as the mouse
button in pressed.Afterwards the playback cursor will jump back to the
previous position.

If you are in play mode, the playback will continue playing from the 
selected position.

H

OW TO MAKE A

S

ELECTION

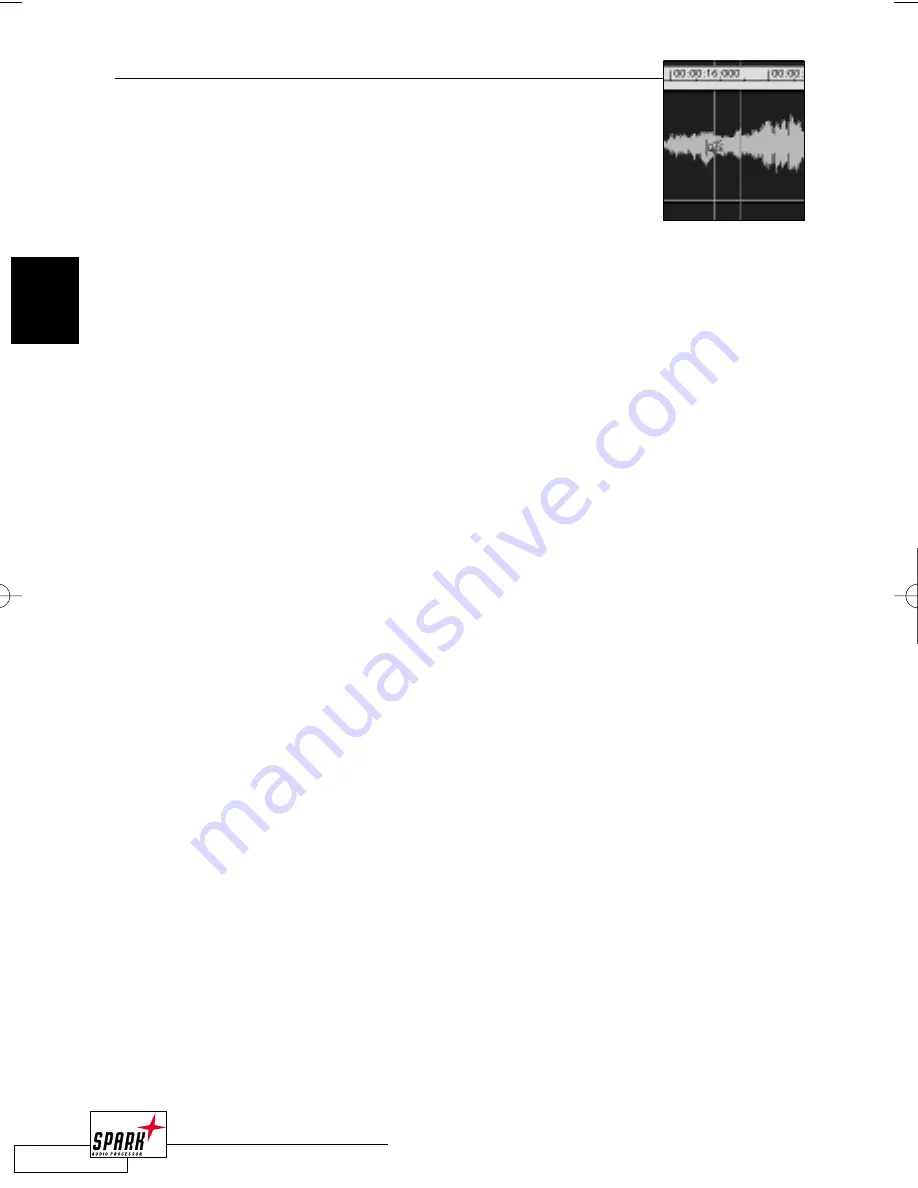
Making selections is the basic task before you can do further editing.There are different ways
to make selections:

1. Point and click with the mouse to the waveform to mark the selection’s start position.
Press and hold the mouse button and drag it to the left or right until you have marked the
desired area.

2.To make a selection in the waveform overview, keep the <OPTION> key pressed and mark
the seletion by clicking/moving the mouse on the waveform overview. Selections can be
made on single channels as well: If you select mark the selection in the upper part of the left
channel, only the left channel will be selected. If you mark the selection in the lower part of
the right channel, the right channel will be selected. If you mark the region in the middle
(between the two 0-lines of the channels), both channels will be selected.

3. During playback you can set the selection start by pressing < CURSOR UP >and
the end by pressing < CURSOR DOWN>.

4. Double-click inbetween two Markers will make a selection between these two Markers.

5.With a triple-click on the waveform, the whole file will be selected.Alternatively, press 
<C A>.

T

O TRIM A SELECTION

:

To trim the selection borders, it is quite helpful to zoom in first.To zoom to a selection,
press <CTRL + “+”>. <CTRL + “-”> will zoom out completely.

When you hold the <SHIFT> key while clicking left or right of the start or end of the 
selection, the cursor will get a small arrow and you can trim the seleciton. Hit <SPACE> 
to monitor it and to verify if start and end point are properly set. Now you can turn this
selection into a region(<COMMAND 

R>) or add processing.

The whole selection can be moved by pressing < SHIFT> and moving the 
selection with the mouse or with the <CURSOR LEFT/RIGHT> keys.

24

B R O W S E R   V I E W

2

2_BrowserView_neu  20.06.2002  13:58 Uhr  Seite 24

Summary of Contents for SPARK LE

Page 1: ...99 CD BURNING IN SPARK LEPLUS E N G L I S H U S E R M A N U A L LE LE ...

Page 2: ... BY TC WORKS SOFT HARDWARE GMBH 1998 2002 ALL PRODUCT AND COMPANY NAMES ARE TRADEMARKS OF THEIR RESPECTIVE OWNERS ALL SPECIFICATIONS SUBJECT TO CHANGE WITHOUT NOTICE ALL RIGHTS RESERVED ...

Page 3: ...ITECTURE VST ASIO 10 THE USER INTERFACE CONCEPT 10 B R O W S E R V I E W TRANSPORT WINDOW 11 INPUT OUTPUT SETTINGS 11 TRANSPORT CONTROLS 13 RECORDING DIALOG 14 THE BROWSER VIEW 16 ACTIVE PART OF THE WINDOW 18 FILE VIEW 18 FILE FORMATS 21 QUICKTIME IMPORT EXPORT 22 WAVE EDITOR 23 OVERVIEW 23 CURSORS 23 HOW TO MAKE A SELECTION 24 C h a p t e r 1 C h a p t e r 2 E n g l i s h ...

Page 4: ...V I E W MASTER FADER 44 LEVEL METERS 44 DRY 45 CREATE FILE 45 FX SLOTS 46 REALTIME EFFECTS 46 WHICH PLUG IN FORMATS CAN BE USED 47 NAVIGATION 47 MOVING PLUG INS 47 HOW TO COPY PLUG INS 48 REMOVING EFFECTS 48 LEVEL INDICATION FOR EACH PLUG IN 48 CONTEXT SESITIVE MENU 49 SYSTEM PERFORMANCE THE SYSTEM INFO SCREEN 50 PLUG IN EDIT VIEW 50 T A B L E O F C O N T E N T S C h a p t e r 3 ...

Page 5: ...E N T S P L U G I N ONE BAND EQ 53 DELAYIT 53 MAXIT 54 M I S C E L L A N E O U S PREFERENCES 55 SPARKLE FILE TYPES 60 HARDWARE SUPPORT 61 LOOPING 61 SAVE SAVE AS EXPORT OPTIONS 62 C h a p t e r 4 E n g l i s h C h a p t e r 5 ...

Page 6: ...6 T A B L E O F C O N T E N T S ...

Page 7: ...e you can find answers to specific questions regarding TC software All known issues are stored in a database searchable by product category keywords or phrases Under the section My Stuff you can login to check the status of your questions download materials such as product manuals software updates and new presets This site has been specifically designed to meet the needs of our users We constantly...

Page 8: ... Roxio Toast Jam or Apple iTunes software for CD recording INSTALLATION Run the SPARK LE installer and follow the instructions on screen 1 First you ll see this Welcome Screen Please click on Continue 2 On the Second screen you ll find the license agreement Before proceeding further make sure you read understand and agree to the terms Then click Accept 8 G E T T I N G S T A R T E D 1 G E T T I N G...

Page 9: ...nything SPARK LE will be installed to the root directory of your internal hard disk into a folder also named SPARK LE 5 Now the installation is performed and you ll be presented with the final dialog saying that installation was successful Click on Quit and you re done 6 Now you re ready to start using SPARK LE The Folder on your hard disk should contain the items you see pictured here Don t forge...

Page 10: ...FACE CONCEPT SPARK LE integrates the whole editing processing and mastering process into only two windows The BrowserView and the MasterView In the BrowserView you ll find the project file database the audio editor and the Play List all at one glance and with a fully customizable view Your window setting is saved with the Project file The MasterView includes all the realtime processing and mixing ...

Page 11: ...sport controls you need to navigate through your audio file or Play List as well as some basic audio output information INPUT OUTPUT SETTINGS On the left of the Transport Window you will find your current output setting and the currently active I O sampling rate If SPARK LE s real time resampling algorithm is active this will also be indicated here B R O W S E R V I E W File View Play List Wave Ed...

Page 12: ...mpling algorithm is active SELECTED OUTPUT Allows you to change the set of output channels used if multiple are available SETUP DIALOG Click on the Setup button to change your audio device settings If the audio device doesn t offer a setup page this button will be disabled For details on how to setup your audio device refer to the documentation of your audio card Selected Output Resampling Indicat...

Page 13: ...rent Time Right Selection Region position Out Time Active File Scroll Bar Transport Controls from left to right Cycle Switches automatic repetition of the current selection on off Alternatively press Stop One click stops Playback Pressing Play afterwards will play from the current cursor position Double click moves the cursor back to the start of the Region File Play Starts Playback Pressing the S...

Page 14: ...Indication the system displays a pop up menu with peak hold options SOURCE You can select your recording input device in the Source section The Clock indicates the input sampling rate Click the Setup button to display options for your audio device This settings dialog I O Setup Audio Device can also be accessed from the preferences dialog and the transport bar MONITOR The Monitor enables you to pr...

Page 15: ...Display supplies you with three different time read outs TotalTime Indicates the total length of your recording Disk Space Indicates the available disk space for recording in minutes If you change the file settings the available disk space will be recalculated according to the file attributes recording with higher bit depths and sample rates require more room on your hard disk Current This display...

Page 16: ...s user interface concept For the first time the File database Play List and Wave Editor are all integrated into one window The BrowserView features dynamic movable borders to adjust the section s sizes to your needs and an unparalleled level of transparency movable borders File View Time ruler Info Line ...

Page 17: ... three parts The FileView with all your audio files and Regions used in your Project the Play List where you arrange the Regions and define Crossfades and the Wave Editor to edit your audio and create Regions movable borders Wave Editor Playlist Zoom Tools ...

Page 18: ...uild your own hierarchical order by creating virtual folders for a better overview Of course SPARK LE also supports drag drop to and from the desktop making it really easy to load files or export regions into files When you need to cut one long track into many separate ones this feature will save you hours You can even import complete folders with audio files just by dragging and dropping them to ...

Page 19: ...your hard disk is not affected by this action only the reference in the FileView is removed However if you have applied any kind of processing to this file you will be asked if you want to save the changes to the file before it is deleted from the FileView Info This will open an info screen for the selected entry In this info screen you can for example change the region or folder name or lock the ...

Page 20: ... multiple files in the Add File dialog hold the shift key while selecting the files To select all files press COMMAND A REGIONS A Region marks a section of your audio file The borders marked with a small S and E define the start and end points for playback You can have as many regions referencing the same file as you like Regions do not affect your audio file By creating editing or deleting them t...

Page 21: ...orted by QuickTime All of the key formats may be used for professional recording there is no quality difference as you might be used to from having to choose the right kind of tape Let s have a look at the formats in more detail AIFF the Audio Interchange File Format was developed by Apple and is the most widely used on the Mac AIFF supports all of today s important sample rates and bit depths Not...

Page 22: ...rt QuickTime option in SPARK s File menu which will create an separate audio file 1 Select File Import QuickTime 2 Select the movie file you want to import into SPARK and press Convert 3 Select a destination file name and press Save 4 The movie will be imported and an extra audio file created in the specified folder 5 Now you can start editing the audio file of the QuickTime movie TO EXPORT FILES ...

Page 23: ...h your audio file You cannot make any changes or edits in the OVERVIEW except to move the cursor CURSORS SPARK LE features two cursors The red PLAYBACK CURSOR will show the current playback position and the green EDIT CURSOR displays the current edit position When you start playback the EDIT CURSOR will remain at the start position until you set it to a different location by single clicking elsewh...

Page 24: ...ft channel only the left channel will be selected If you mark the selection in the lower part of the right channel the right channel will be selected If you mark the region in the middle between the two 0 lines of the channels both channels will be selected 3 During playback you can set the selection start by pressing OPTION CURSOR UP and the end by pressing OPTION CURSOR DOWN 4 Double click inbet...

Page 25: ...e If you select the Use Pencil Use Eraser option from the Option menu you will get an automatic zoom in to drawing resolution ZOOMING Use the and zoom buttons in the lower right corner of the Edit Window to change the waveform display s zoom factor You have one set of buttons for the horizontal and one for the vertical dimension Horizontal zooming can also be done by pressing the and keys Horizont...

Page 26: ... Double clicking will bring up a numerical input field for editing This field can also be selected by pressing COMMAND SELECTION Displays the length of your selection Double clicking will bring up a numerical input field for editing This field can also be selected by pressing SHIFT COMMAND ZOOM FACTOR Displays the chosen zoom factor SAMPLING RATE Displays the audio s sampling rate BITS SAMPLE Disp...

Page 27: ...IONS In the Edit menu you will find besides the undo redo also the basic Cut Copy Paste functions Cut COMMAND X will cut the selection out of the file and keep it in the clipboard Copy COMMAND C will copy the selection to the clipboard Paste COMMAND V will paste the clipboard content to the current cursor position Paste Special gives you some extra options on how the clipboard content should be in...

Page 28: ...half of the file the fade will automatically be set to Fade Out FADE OPTIONS Offset Damping With the Offset and Damping controls you can adjust the fade curve Offset defines the position in the crossfade 0 is the beginning of the fade 100 is the end With Damping the damping at the position defined by Offset is set Direction lets you select if the fade should be a fade in or fade out There is also ...

Page 29: ...ss COMMAND OPTION N REVERSE Reverses the current selection INVERT Inverts the Phase of your selection This will invert the phase on all channels To invert just single channels use the Phase Shift in the FXmachine RESAMPLE Select the sample frequency the desired quality and press OK More information on the resampling algorithm below 29 B R O W S E R V I E W 2 ...

Page 30: ...get a stop band attenuation of around 60 dB at the highest quality level This is not good enough for critical masters As a rule of thumb an attenuation of 80 dB is required to avoid noticeable aliasing artifacts SPARK LE offers 3 quality modes for resampling and the good news is that all 3 of them have a stop band attenuation which is greater than 90 dB What does this mean in real life Simply put ...

Page 31: ...on during resampling Choosing good you ll get what the mode s name implies but you ll still lose a bit in the high end of the frequency spectrum which ideally should pass unaffected When Best is selected the transition looks almost like a square which means this is very close to the theoretical model of loss less sample rate conversion Of course we can t give you a totally loss less result but we ...

Page 32: ...6000 or vice versa then good will do the job When you convert a file in the upper end of the audible range for example from 48000 to 44100 then good will do the job in most cases however better reduces the risk of aliasing even more Those aliasing ghost tones are extremely annoying so better is safer When you want to preserve as much quality as possible when resampling even further down into the a...

Page 33: ...ture editings rearrangements would be almost impossible Copy Play List Entry Press this icon to add the currently selected Region to the Play List The region will be added at the current Play List position Alternatively you can drag and drop a Region from the FileView to the Play List Trash To delete the current Play List entry click on the Trash icon This will not delete any audio material on you...

Page 34: ...ex and selecting DISABLE from the pop up Sub sub index of a CD track Each track has at least two of these entries Start and Stop If there are markers set in the region they will also get a sub index When you click on the SubIndex of a track you will pre listen to that transition This is an easy way to check the Play List s transitions before you burn it on CD Pause Pause length According to the Re...

Page 35: ... fade out and fade in times Fast Slow This crossfade has a fast fade out time and a slow fade in time For example if the total crossfade length is set to 1 sec the fade out will have a duration of 0 5 sec and the fade in a duration of 1 sec Slow Fast This crossfade has a slow fade out time and a fast fade in time For example if the total crossfade length is set to 1 sec the fade out will have a du...

Page 36: ...or end or even both For example with an extending Crossfade and Center Place setting the first region will be extended at the end by half of the crossfade length the second region will be extended at the beginning by half of the crossfade length So if you have the same 3 and 4 second regions as before with the same crossfade of one second but in Extending mode you will get a 7 second playing time ...

Page 37: ...ing allows you to change the track index setting for CD Burning You can select between three settings Pre will set the index to the starting point of the crossfade Center will set it to the middle of the crossfade and Post finally will set it right behind the crossfade In Overlapping mode these settings will not influence the crossfade itself In Extending mode the Place parameter has a different f...

Page 38: ...the copy prohibit bit on the CD will be set This will allow only one digital copy stage of the CD track Emph The emphasis bit for this CD track will be set if this box is checked Comment In this field you can add comments for each Play List entry 38 B R O W S E R V I E W 2 REGION 2 REGION 1 ...

Page 39: ...en you have finished editing you should create one new audio file from the Play List To do so click on the Export Play List icon and select a location and name for the new file Building a CD Play List with several tracks and sub indices 1 Load the audio files for the CD you want to create into your SPARK LE project 2 Create the proper Regions for the songs In case you have prepared the material as...

Page 40: ... will not be active When you have finished building your Play List press the Create CD icon on top of the Play List Now you will be asked to enter a name and select a folder for the CD image Please choose a drive that has enough space available for a complete CD image Remember that a stereo track at 44 1 kHz will use approx 10 MB hard disk space per minute This means that a 45 minute image will re...

Page 41: ...aunched and the CD image will be automatically loaded Just check the CD burner settings and start burning the CD Note If you are using RoxioTOAST or Apple iTunes you should also check the Pause settings between the tracks asTOAST automatically sets a 2 second pause 41 B R O W S E R V I E W 2 ...

Page 42: ...42 B R O W S E R V I E W 2 ...

Page 43: ...u bar or by pressing COMMAND 3 The MasterWindow consists of two main parts on the left is the Master Section and on the right the four effects slots You can see the MasterView s signal flow in the following illustration Opens Create File dialog Master Section Effects Slots L R L R from Input FX processing Master Fader to Output ...

Page 44: ...METERS Watch the PPM Peak Program Meter Level Indication in the Master Section to avoid Output Clipping A numerical readout of the level appears right above the LED meters When you click on a meter you will get the Peak Hold Options for the meters The options range from Disable Peak Hold to Hold Forever Here you will also find the option to reset the Peak Clip indication Above the Level Meters you...

Page 45: ... with no plug in settings from the FX Slots Disabling your effects settings can be useful when you only wish to change a file type or bit depth for your new audio file For example to convert a 16 bit SDII file to a 32 bit WAV file ADD TAIL This option when selected will retain the ring out of effects such as reverb and delay To allow for this enable the add tail option and select the desired tail ...

Page 46: ... depth If the BrowserView focus indicates that you are in the Play List then it is only possible to Create New from Whole File This will render your entire Play List with the effects from the FXmachine to a new file on your hard drive You will still have the possibility to Add Tail for effects ring out and you will be able to have all of the location options such as file formats and bit depth opti...

Page 47: ...after loading you can freely move the effect to any other position in the matrix Alternatively hold down the CONTROL key while clicking on an empty slot to display a context sensitive selection menu right where you need it This way you won t even need to select the slot before loading Note Contextual Menu Extensions must be enabled to show context sensitive menus The first Plug In you load into th...

Page 48: ... button Click on the field while holding down the CONTROL key to display the context sensitive menu Then click the Remove button Alternatively press BACKSPACE To remove all Plug Ins from the FXmachine hold down the OPTION key and click the Remove button LEVEL INDICATION FOR EACH PLUG IN Each active slot indicates the input level of its Plug In with its own small input meters Small LED meters displ...

Page 49: ...In from the selected slot SHOW HIDE INFO This option will display additional info for all Plug In slots The Plug In delay in samples Latency will be indicated on top of each slot if this number is correctly reported by the Plug In Also you will get information about the number of input and output channels of each Plug In Mono nothing is indicated on the input output Stereo the common icon for ster...

Page 50: ...io playback has top priority to avoid audio dropouts If more than a few dropouts occur the CPU overload LED will light up and playback will stop PLUG IN EDIT VIEW To open a Plug In EditView double click on the desired Plug In in the FXmachine matrix This will open a screen with the Plug In user interface If the Plug In doesn t have its own interface you will get a Standard FXView with a fader cont...

Page 51: ...ot change or disappear when you choose a Plug In from another matrix slot Note Pressing COMMAND 0 will show hide the MasterView and all Plug In windows by just one single key stroke THE HEADER OF THE PLUG IN EDIT VIEW On top of each Plug In EditView you will find the Plug In header with Compare Bypass and Mute buttons as well as the preset management of the Plug In If you want to change to another...

Page 52: ...52 M A S T E R V I E W 3 ...

Page 53: ...r 12 dB Oct for shelving types 0 1 to 4 octaves for parametric and 1 to 100 for Notch NOTE Double clicking on a value field will bring up a dialog for numeric entry DELAYIT This stereo delay line is great for use in a musical context as you can set the delay time not only in milliseconds but also in Beats Per Minute BPM which makes it easy for you to match the delay time with the tempo of your mus...

Page 54: ...ocessing Of course you ll only hear an effect if the Energy fader is pushed up far enough so the algorithm is working Soft adjusts the algorithm to treat your material carefully with clean sounding results But if you d like even more level boost turn the knob towards Strong and you ll notice how the process will push the material even more However there s a trade off depending on your material you...

Page 55: ...PARK will use the internal CD Recordable drive to burn audio CDs SPARK supports the internal CD Recordable drives in all Apple models including the SuperDrive DVD R CD RW Other CD Recordable drives supported by OS X will also function NOTE SPARK cannot burn DVDs with the Apple SuperDrive You must use CD R media SUPPORTED CD RECORDABLE MEDIA SPARK supports both 74 and 80 minute CD R Media It is ver...

Page 56: ... no CD Recordable Media in your drive the tray will open Insert the CD R and close the tray Click Burn in the AudioCDBurn dialog to burn your CD CD burning is a background process allowing you to continue editing with SPARK or even working in other applications while your CD is being created YOUR 24 96 PLAYLIST Audio CDs only support 16 bit 44 1 kHz files As an added feature SPARK can handle 24 bi...

Page 57: ... is the file path of project letting you know where on the hard drive you have saved your project Saving Playlist Content from a project that has not been saved will result in a blank field DATE This is the date you saved the Playlist Content The format is MM DD YY INDEX This is the track index number START This field indicates the start time of the track NAME This field indicates the name of the ...

Page 58: ...RNING DIALOGS Many dialogs allow you to check a box titled Don t show again If you check that box the corresponding message won t show up again For example if you click on the Trash Icon in the FileView you will see the message Do you really want to delete this item If you feel that you don t need this warning every time you click on the Trash icon you can check the Don t show again box From now o...

Page 59: ...or valid Plug Ins If multiple instances of a Plug in were found in the defined Plug In folders only the first instance of the Plug In will show up in the Plug In list the Plug In won t show up multiple times I O This is probably the most important Preferences page Here you define SPARK LE s I O device File Caching and how temporary audio files are stored There are two ways to add an ASIO driver to...

Page 60: ...ge between different ASIO drivers without relaunching SPARK LE If this is not possible SPARK LE will request to be restarted Note If you select SoundManager as the default I O device you will not be able to record audio Please choose ASIO SoundManager instead Press the Setup button to get your audio hardware settings if applicable Please have a look in your audio hardware s documentation for more ...

Page 61: ...omputer isn t fast enough for waveform redraws in the clipboard try Normal or Fast Mode WHEN RESIZING THE WINDOW This option allows you to change the behaviour when you vertically resize SPARK LE s BrowserView Zoom my current view will show the same content as before Resize my current view will show less of the current waveform PROPERTY DIALOG ON REGION CREATION Check this option to get the Proper...

Page 62: ... Select Equal Power as Crossfade Type and set the Crossfade length to 10ms Please note that although you can set a Pause Length and a Crossfade Length time only the time belonging to the selected CrossfadeType will be used If the default Crossfade Type is Pause the Pause Length will be used otherwise the Crossfade length As the Hard Cut type has a length of zero by definition the Length settings w...

Page 63: ...ist entries To save a Worksheet select Export Worksheet from the File menu To load a Worksheet select Import Worksheet Worksheets do not include information about the MasterView i e no FXmachine and Plug In settings PLAY LIST You can export your Play List as a CD Image a single audio file Simply press the Export button This will create an Sounddesigner II file You can use it to burn a CD directly ...

Page 64: ...ne driver is required for compatibility with all applications that implement the ASIO interface Thanks to ASIO and the ASIO settings panel you can optimize the performance of your system In native audio systems there s a delay called latency between the input and the output You will notice this mainly when trying to record live How much or little latency you experience is primarily dependent on yo...

Page 65: ...ING WITH SPARKLE NATIVE AUDIO FILES AIFF WAV SDII In case you are working with audio files that SPARK LE can work on directly the Save behaviour is quite simple SAVE AUDIOFILE On files that are loaded into SPARK LE but are not modified you don t get the option of saving the file as no changes have been made As soon as you made changes to the file e g remove a part of the file this option will beco...

Reviews: