


Storing, importing and exporting loops
Ditto X2 Looper English Manual 16
Importing loops into Ditto X2
Looper from a computer
Did you find (or create) an insanely great song
that you would like to use on stage as a backing
track? Well, with Ditto X2 Looper, you can – with-
out having to schlep your notebook on stage. All
you have to do is transfer your backing track or
base loop from your computer to Ditto X2 Loop-
er using a USB connection.
1. Create a loop in your DAW and export it as an
audio file in either AIFF or WAV format.
2. Connect a USB port on your computer to the
USB port of Ditto X2 Looper using the sup-
plied USB cable. The LOOP footswitch LED
will start blinking orange, indicating that Ditto
X2 Looper now is in USB transfer mode, and
audio will be disabled.
3. Your computer will recognize Ditto X2 Looper
as an external USB storage device. It will be
shown in the Finder (OS X) or Windows Ex-
plorer as a drive called “DITTO” containing a
folder called “TRACK”.
4. Copy your audio file (in AIFF or WAV format)
from your computer to Ditto X2 Looper by
dragging it to the “TRACK” folder of the “DIT-
TO” drive. Wait for the file transfer to finish.
5. Eject/unmount Ditto X2 Looper as described
in “Exporting Ditto X2 Looper loops to a com-
puter” (page 15).
The LOOP footswitch LED will flicker as the
loop is read.
6. Disconnect Ditto X2 Looper from your com-
puter.
The LOOP footswitch LED will stop blinking
orange and return to green, and audio will be
enabled again.
Importing MP3 files to
Ditto X2 Looper
Usually, you will want to import AIFF or WAV files
into Ditto X2 Looper: This will give you the high-
est possible audio quality, and no conversion is
required. However, you can also import MP3 files
with a 44.1 kHz sampling rate. Ditto X2 Looper
will convert an imported MP3 file to AIFF and
WAV format.
The procedure is the same, with the following
exceptions:
– Converting an MP3 file takes some time. Dur-
ing conversion, the LOOP footswitch LED will
flicker red. Converting a long (6 minute) MP3
file will take about 90 seconds.
– Importing tight/short MP3 loops with MP3
metadata will add a few milliseconds of si-
lence to the end of the loop. If you want to
ensure seamless, sample-accurate playback,
please use files in AIFF or WAV format.
Notes about working with
imported backing tracks
– Levels of imported backing tracks are re-
duced, so you can jam to these tracks and
hear yourself.
– Track/file names of imported loops/back-
ing tracks are irrelevant, as long as the suffix
(“.WAV” or “.AIF”) is correct.
– You only have to delete existing backing
tracks if you need to make room for new
tracks. If there are several tracks in the TRACK
folder, the last imported track will be used.
Balancing backing track
and current loop levels
What you are recording with Ditto X2 Looper is
called “the current loop”. If you store this current
loop (by using the Store / Backing track level
switch), or if you import a previously recorded
track from a computer as described in the previ-
ous section, this is a “backing track”.
You can set the volume for the current loop
and the backing track independently.
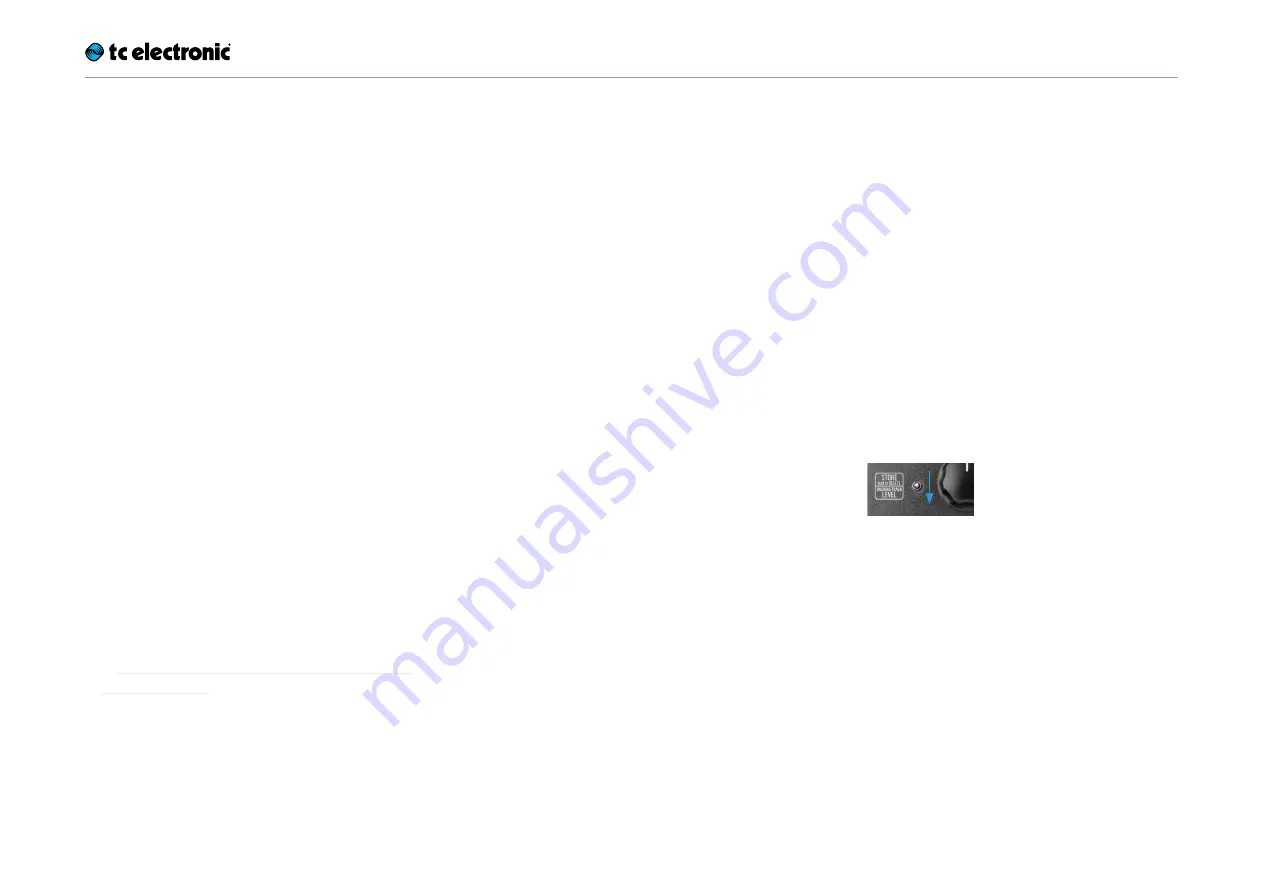
– To set the level of the
current loop,
turn the
LOOP LEVEL knob.
– To set the level of the stored
backing track,
turn the LOOP LEVEL knob while pulling the
Store / Backing track level switch towards
you.
The ability to control the volume of the current
loop and the backing track independently allows
you to control the mix very effectively.


