Chapter 2:
Loading Paper and Printing
2–33
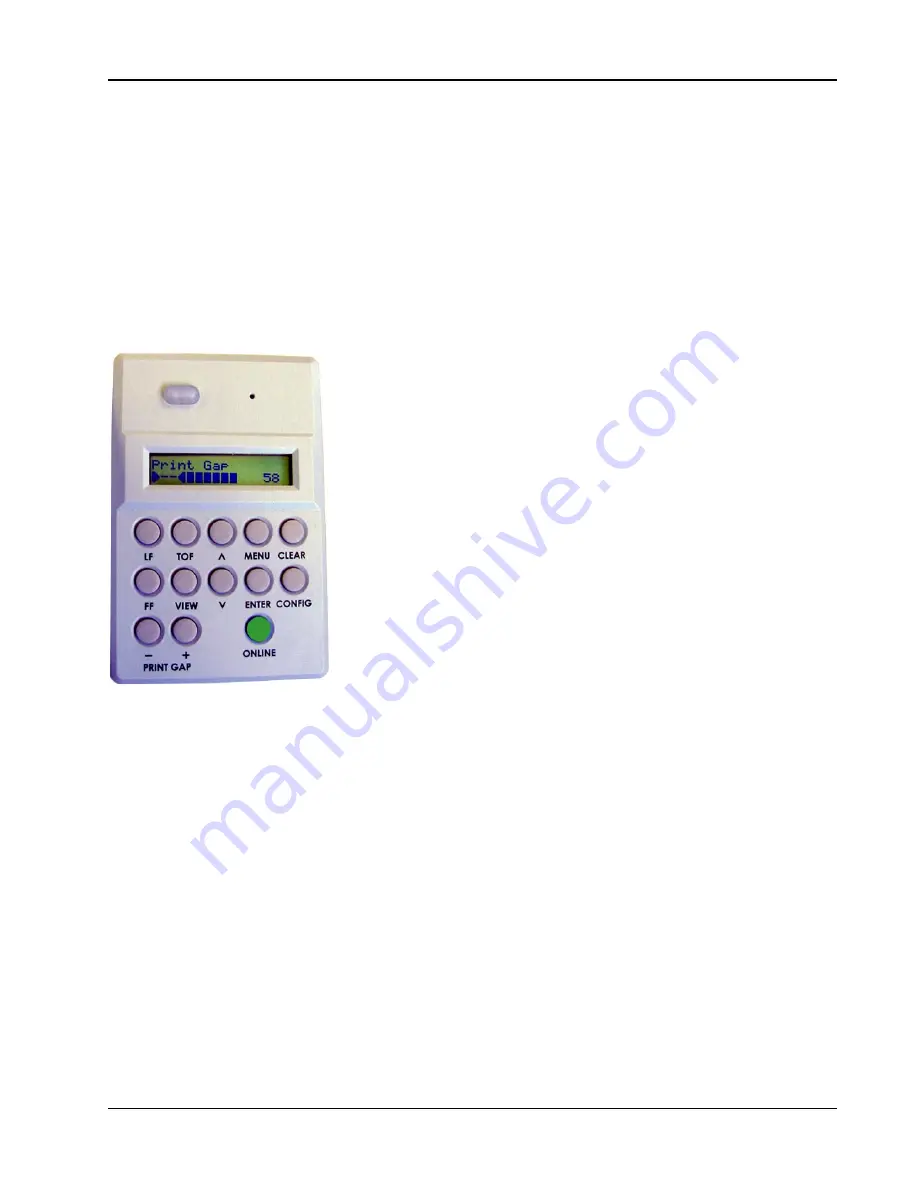
Figure 2 - 8. Typical display when adjusting Print Gap
If you prefer to manually set the Print Gap for the forms you will be using:
Set Print Gap Detect Mode to Manual
Use the Arrow and Enter keys to select Menu => Operator Menu => Print Gap =>
Mode => Manual.
Step 1. Manually Adjust Print Gap on Control Panel
Press one of the Print Gap keys on the Control Panel. This activates the Print Gap
adjustment display. The lower right region of the LCD shows a number
1
corre-
sponding to the current gap separating the hammer impactors from the platen.
Press the "+" or "-" Print Gap key to roughly match the setting to the
kind of paper that is loaded. This number will get larger or smaller
respectively. The range of allowed change is unrestricted over the
complete gap range.
2
For the 6306, typical values range from 54 to
110 for single-part through six-part forms; for the 6312, typical values
range from 52 to 105 for single-part through six-part forms. The lower
left region of the LCD provides a graphical indication of the adjust-
ment being made. There is a 5 second time-out: if no keys are pressed
the control panel display will revert to the prior menu and display.
The Print Gap keys may be pressed while printing is in progress,
allowing the operator to modify the print gap and immediately ob-
serve the effect it has upon print appearance.
Manually Setting Print Gap
1. This number is for general reference. The precise relationship between
the displayed number and physical distance is complex and beyond the scope
of this manual.
2. The control software will prevent selection of a print gap so small that it
would pinch the paper so tightly that it will bind within the mechanism.
Step 2. Run a Print Test
Press Clear. Make sure you're offline. Use the Arrow and Enter keys to select
Menu => Test Menu => Pattern => Print => Upper. Press Enter. This last action
begins running a print test. After a short while, press Enter to halt the test.
Examine what has been printed.
The print should be crisp and dark, with no smearing. The paper should move
smoothly through the print mechanism:
• If the print gap is open too far, the print may start fading out, especially
on the last sheet of a multi-part form.
• If the print gap is too narrow, the ribbon will start smearing ink on the
page, especially when the ribbon is moving and the paper is not. In
extreme cases, the shuttle may stop, and the paper may jam.
Summary of Contents for LGe06
Page 1: ...Operator Manual 1 LG Series Operator Manual Serial Parallel LAN...
Page 24: ...1 24 Operator Manual Blank Page...
Page 88: ...3 88 Operator Manual Blank Page...
Page 96: ...A 96 Operator Manual Blank Page...
Page 107: ...Blank Page...


