Tally Dascom DL-200
User Guide V1.3
55
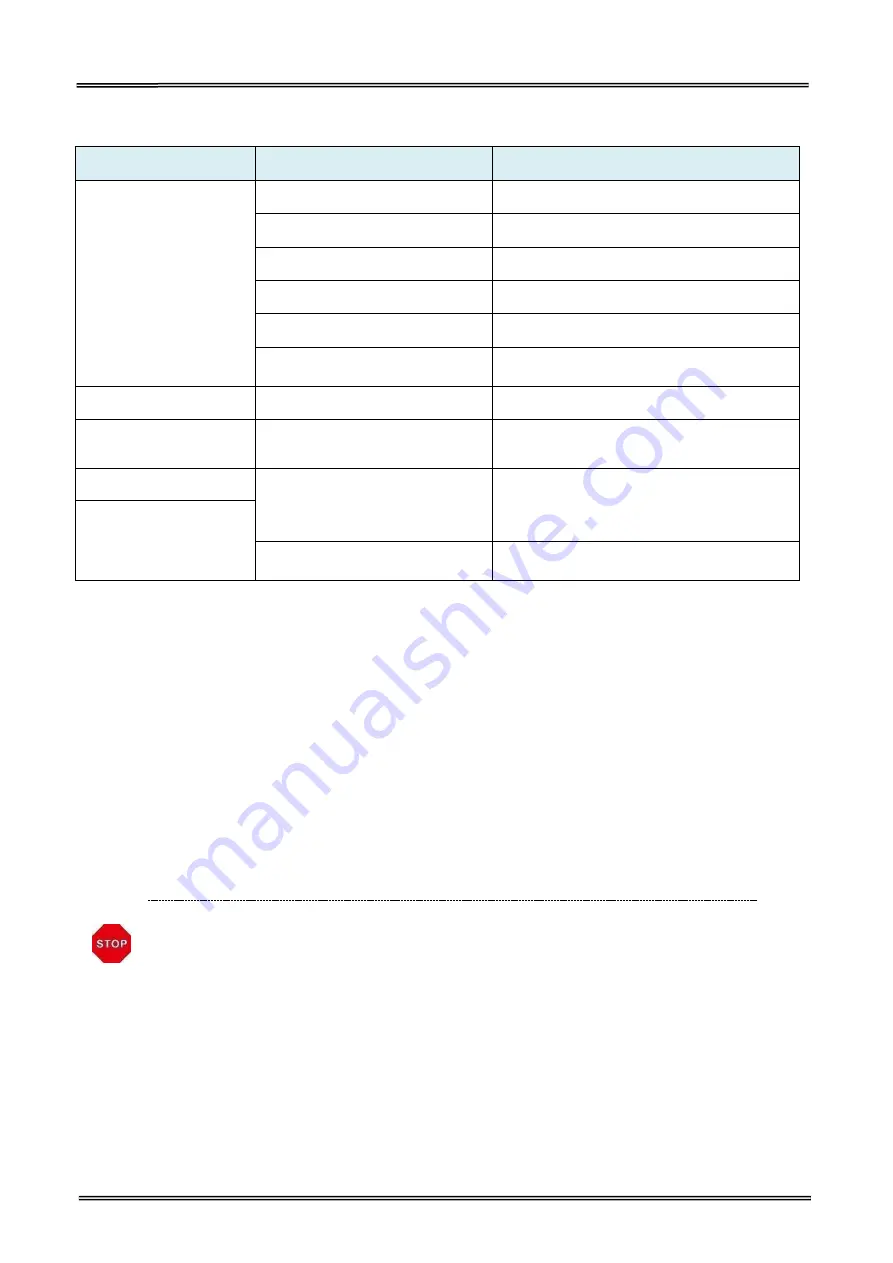
Printing Error
Condition
Possible Cause
What to do?
Blurred or spot printing
Incorrect media roll installation
Check media roll and re-load it properly
Media is out of specification
Use recommended media
Dirty thermal print head or platen
Clean print head or platen
Ribbon is out of specification
Use recommended ribbon
Low print density
Increase the print density (heat)
Print with Ribbon on Direct
Thermal paper
Remove ribon
Self-test fail
Hardware problem
Contact service representatives
Media jam
Label stuck
Check media path and clean jammed label,
refer to Chapter 3 Section 3.2
Printer skips labels
Label positioning problem or label
size setting exceeds the physical
size.
Execute label calibration (refer to Chapter 2
Section 2.1.2). If it doesn’t work, you have to
verify the label size setting is correct or not.
Printer feeds blank labels
Print without ribbon on transfer
thermal paper
Install ribbon
5.2 Resetting the Factory Default Values
Sometimes, resetting the printer to the factory defaults may solve some problems.
There are two methods to set to factory setting:
Method one: Hold down Feed Key and switch on printer till Power LED blinks four times, buzzer
beeps four times.
Method two: through setup tool, choose restore all setting on printer setup page.
5.3 Removing Jammed Label
Printhead may be hot, please do not touch!
(1) Turn printer off, open top cover and turn up print head mechanism.
(2) Remove the jammed label and ribbon, clean the print head with a cotton swab with alcohol in
case of ribbon paste on print head and cause poor print quality.
(3) Reload media.
(4) Reload ribbon and turn the ribbon adjustor for rewinding the sticky part.
Summary of Contents for DL-200
Page 1: ...User Manual DL 200 Label Barcode Printer ...
Page 39: ...Tally Dascom DL 200 User Guide V1 3 26 4 Click Yes 5 Click Next ...
Page 41: ...Tally Dascom DL 200 User Guide V1 3 28 8 Enter printer name Click Next 9 Click Finish ...
Page 42: ...Tally Dascom DL 200 User Guide V1 3 29 10 Restart the computer to complete the process ...
Page 45: ...Tally Dascom DL 200 User Guide V1 3 32 5 Click Install 6 Click Install ...
Page 46: ...Tally Dascom DL 200 User Guide V1 3 33 7 Installation complet Click Finish ...
Page 54: ...Tally Dascom DL 200 User Guide V1 3 41 4 Click the model name and enter Next to continue ...
Page 56: ...Tally Dascom DL 200 User Guide V1 3 43 7 Check the port type in this case it is COM4 ...
Page 58: ...Tally Dascom DL 200 User Guide V1 3 45 9 Then COM4 for the printer is checked ...
Page 96: ...Tally Dascom DL 200 User Guide V1 3 83 5 Activate the Peeler in the printer settings ...


