background image

pag.


5

Industrial PC - MONITOR COPILOT 21,5"

 Order Code 2E000xxx

May 2018 - Rev. 1.1

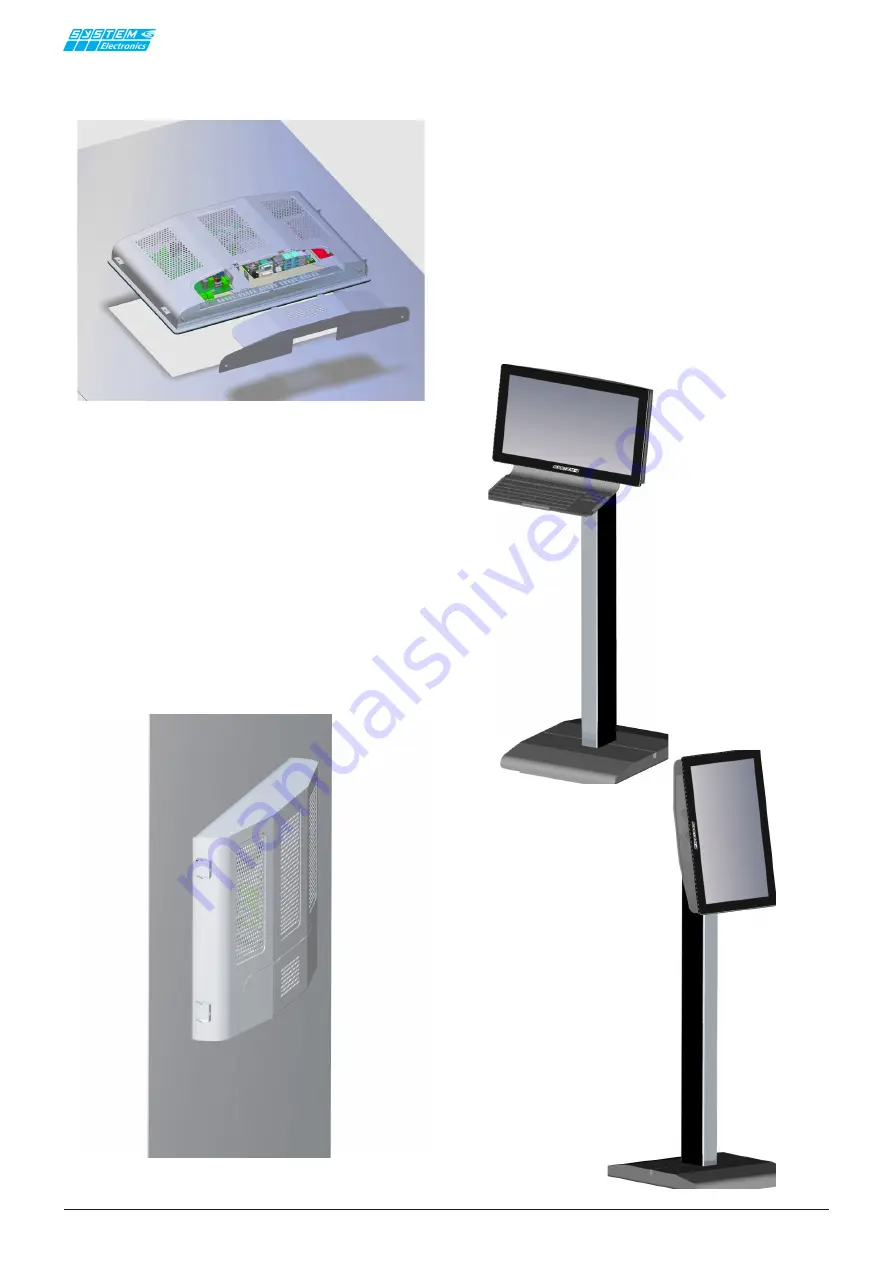
Figure 4.3.2: mounting Monitor Copilot 21.5" in the recessed 

version

Figure 4.3.3: Copilot 21.5" panel mounted monitor. 

Place the body of the 

Copilot 21.5" Monitor 

in the hole in the panel, engaging it from the bottom 

side. If the panel thickness is more than 1mm, remove 

the lower corner corner as well and reassemble it after 

placing the 

21.5" Copilot Monitor

 inside its housing. 

Secure the Monitor using the adjustable side 

blocks. 
-  

Wire the connection cables.

-  

Reassemble the top and bottom side panels 

using the screws provided.
 

Place the body of the Copilot 21.5" Monitor in the hole 

in the panel, engaging it from the bottom side. If the 

panel thickness is more than 1mm, remove the lower 

corner corner as well and reassemble it after placing the 

21.5" Copilot Monitor inside its housing. 

4.4 Foot mounting option

The ground mounting accessory is available. The foot 

can be fixed to the floor and allows the passage of cables 

inside the joint.

The floor-standing foot allows 90' rotation of the 

Copilot 

21.5''

 Monitor to view operator interfaces or images/

movies that require a portrait-oriented view.

Summary of Contents for 2E000208

Page 1: ...4 3 Panel mounting 4 4 4 Mounting option with foot 5 5 Touch screen operation and calibration 6 5 1 Touch screen calibration 6 5 2 Default settings of the touch parameters 6 6 Configuration and Menu...

Page 2: ...YSTEM Ceramics S p A Div Electronics reserves the right to make changes of any kind to the technical specifications at any time and without notice The in formation contained in this documentation is b...

Page 3: ...r also connect the video cable by attaching its fasteners to the connector of the video card It is recommended that the lower steel door of the monitor be removed to connect the cables that will be ro...

Page 4: ...cables inside from the rear center hole The Copilot 21 5 Monitor can be attached to the arm using the M6 screws provided In case the screws need to be replaced to fit the used arm be careful not to ex...

Page 5: ...djustable side blocks Wire the connection cables Reassemble the top and bottom side panels using the screws provided Place the body of the Copilot 21 5 Monitor in the hole in the panel engaging it fro...

Page 6: ...calibration procedures as it is already optimized during production If there is a need to optimize touch screen calibration follow the procedure below 5 Touch screen 6 Configuration and Menu To access...

Page 7: ...A2 Differential Positive Signal 3 TMDS DATA2 Shield Shield Shield for TMDS Channel 2 4 NC Not connected 5 NC Not connected 6 DDC Clock The Data Line for the DDC Interface 7 DDC Data The Clock Line for...

Page 8: ...e1 Blue analog input 4 GND Ground 5 GND Ground 6 GND Ground 7 GND Ground 8 GND Ground 9 NC Not connected 10 GND Ground 11 GND Ground 12 DSDA DDC SDA 13 HSYNC Horizontal Sync 14 VSYNC Vertical Sync 15...

Page 9: ...of this end of life equipment is organized and man aged by the manufacturer Users who wish to dispose of this equipment should contact the manufactur er and follow the manufacturer s system to allow...

Reviews: