Smart innovation!
QUICK START GUIDE
TURNING THE CTOUCH INTERACTIVE DISPLAY ON OR OFF
1. Plug the power cord into an AC power outlet.
2. Press Power Switch on the CTOUCH interactive display.
3. Now the CTOUCH is in standby mode. Wait a moment until the power indicator lights up, then press
to turn
on the CTOUCH interactive display.
NOTE:
Be sure to wait for a few seconds before pressing button. If you promptly press button then the CTOUCH
interactive display may not respond or act wrongly.
4. Press button again to turn off the CTOUCH and put the display in standby mode.
5. To cut off the power completely, press Power Switch on the back of the CTOUCH .
NOTE:
If the CTOUCH interactive display does not receive a displaying signal for a certain time, the CTOUCH goes into
standby mode.
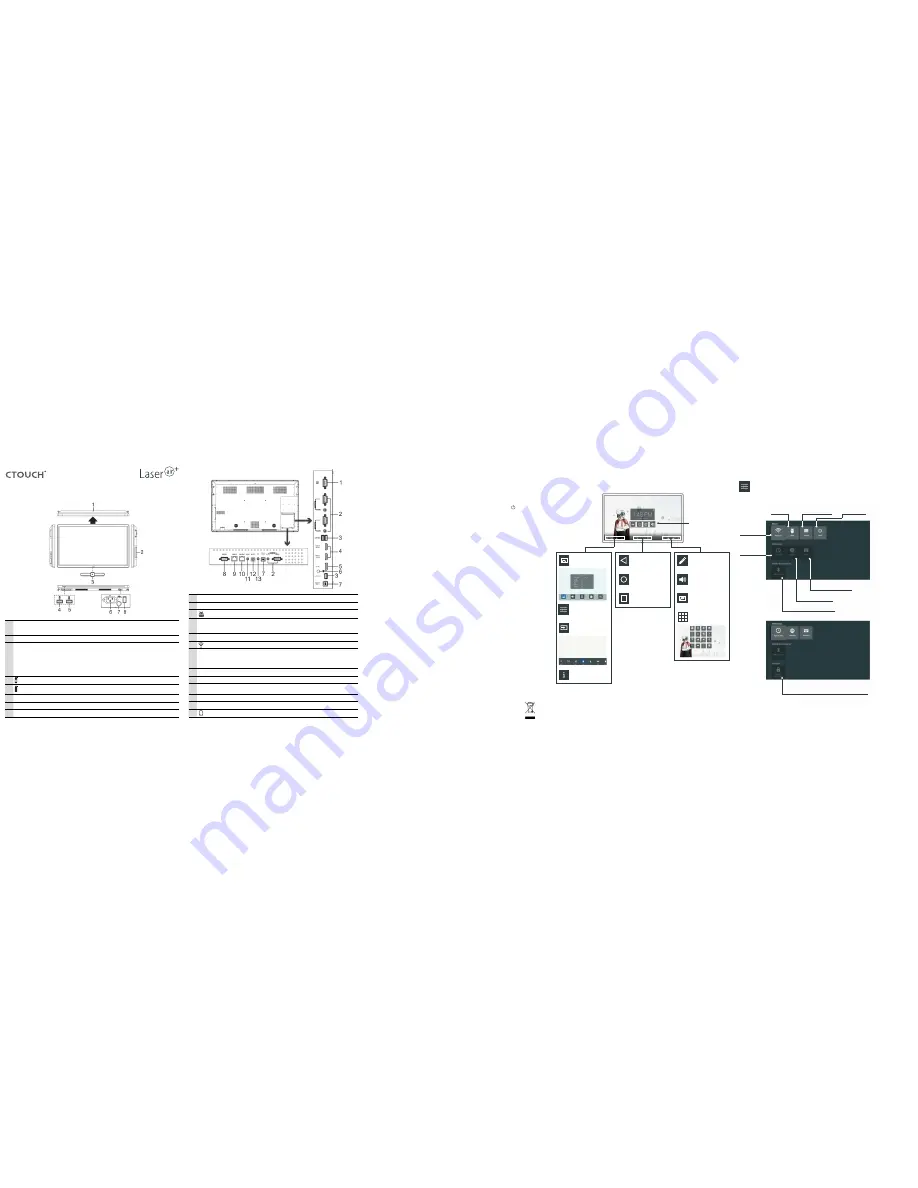
CONNECTIONS
• When connecting an external device to the CTOUCH interactive display, make sure that the CTOUCH and the
external device are turned off.
• Check the plugs at the ends of the cables to make sure that they are the correct type before plugging them into
the jacks on the CTOUCH interactive display.
• Make sure that all plugs are securely inserted into the jacks. Loose connections can result in image or color
problems.
• The illustration of the external device may be different depending on your model.
• Refer to the operating manual of the external device as well.
NOTE:
For an overview of the possible external connections, please refer to the CTOUCH user manual!!
1
USB(2.0)(for camera)
This port is connected to PC when current source is PC (internal Easy air PC), but is changed
to Android if current source is Android Launcher.
NOTE:
Please open the dust cover before being used.
2
Internal PC module slot
Insert the CTOUCH Easy air PC module (Optional).
3
Power LED
Remote control sensor
Power
Red: In standby mode.
White: In power on mode.
Aim the remote control towards this spot on the CTOUCH interactive display.
Switch the CTOUCH interactive display power on or off.
NOTE:
When the CTOUCH interactive display is turn on, press to display the navigation bar,
if this button is pressed about two seconds to turn off the CTOUCH and put the
display in standby mode.
4
USB port for CTOUCH Android Launcher.
5
USB for Easy air PC module.
NOTE:
If no Easy air PC, the USB port has no function.
6
AC IN
Plug the AC cord into this jack .(AC 100-240V 50/60Hz).
7
Fuse
12A 250V.
8
Power Switch
Push to (I) to connect the power, push to (O) to cut off the power.
PC
1
VGA OUT
Output for the currently selected VGA IN 1/2/3 signal.
2
VGA IN 1/2/3
Connect the video/audio for a computer to these ports.
3
USB2.0/3.0
Connect USB devices to these ports.
4
HDMI1/2 IN
HDMI1(MHL): Connect an MHL - enabled device such as a cell phone to this jack to view
the external device’s screen on your screen.
HDMI2(ARC): Connect an ARC-enabled home theater receiver to this jack.
5
DP (Display Port) Input
Connect an external device to DP out jack.
6
(Antenna)
Wi-Fi antenna.
7
TOUCH OUT1/2
Output the touch for external devices connected to HDMIx, DP or
VGAx port which support touch system.
NOTE:
By default TOUCH OUT 2 has priority over TOUCH OUT 1, this can be altered in the
menu.
8
RS232
For control and monitoring screen via RS232 protocol.
9
WAN IN
The built-in router input port. Connect to the external network.
10
LAN OUT
The built-in router output port. Connection to another computer or other Internet
enabled devices.
11
AV IN
Input port for composite video.
12
S/PDIF digital audio OUT
Connect an optical audio cable.
13
Connect a 3.5 mm Mini Jack. The CTOUCH interactive display is the current audio output.
OPERATING THE NAVIGATION BAR
SYSTEM SETTINGS
Slide up from the bottom
of the screen center by
two or more fingers open
the Navigation Bar
Display menu
Setting menu
Source menu
User Manual
Previous screen
Homepage
(Android Interface)
Application history
Annotation
Volume bar
Turn off the display
Applications list
Shortcuts of favorite
application
NOTES:
1. The layout of menu may vary upon different models.
2. Design and specifications are subject to change without notice.
Show all apps
Display System Storage
Display information
Network Setting
Set date and time
NOTE:
To manually
set date and time,
you should toggle
“Automatic date &
time” to OFF.
Automatic search for Bluetooth devices
To set on-screen language
To set default input method
To set Android keyboard(AOSP)
To set Security and Restrictions
Allow installation of apps from sources other than the Play Store
ENVIRONMENTAL PROTECTION
Waste electrical products should not be disposed of with household waste. Please recycle where facilities
exist. Check with your Local Authority or retailer for recycling advice.


