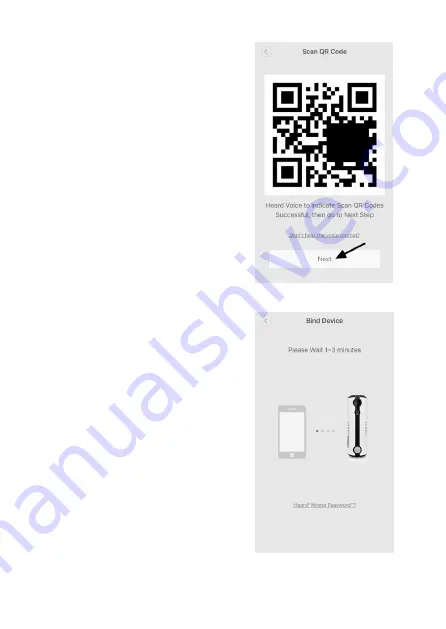
• On the next screen you will see the QR code for
configuring the Wi-Fi settings (see right-hand im-
age).
• Hold the QR code in front of the camera lens (2).
The distance between your smartphone and the
lens should be at least 10 cm (at least 30 cm for
tablets).
The screen brightness will be automatically adjust-
ed to maximum to ensure that the QR code can be
read by the camera.
• Slowly adjust the distance between your smart-
phone and the lens until the QR code has been
detected.
• You will hear “Scanning successful” when the QR
code has been read.
• Touch “Next”.
Pairing the camera with the app (Wi-Fi and 3G)
• Your phone will search for the camera and pair it
with the app.
The camera must be connected to the Internet in
order for pairing to complete. Once pairing is com-
plete, the LED indicator will flash blue (Wi-Fi) or
yellow (3G).
49
Summary of Contents for 1533808
Page 7: ...6 Produktübersicht a Kamera 7 ...
Page 25: ...9 Bedienung a Übersicht über die Kamera A1 A2 A3 A4 A5 A6 A7 A8 A10 A9 A14 A13 A12 A11 25 ...
Page 31: ... Geben Sie noch Ihr Kennwort ein und bestätigen Sie mit OK 31 ...
Page 34: ...b USB Steckernetzteil Betriebsspannung 100 240 V AC 50 60 Hz max 300 mA Ausgang 5 V DC 2 A 34 ...
Page 40: ...6 Product overview a Camera 40 ...
Page 58: ...9 Operation a In app options A1 A2 A3 A4 A5 A6 A7 A8 A10 A9 A14 A13 A12 A11 58 ...
Page 64: ... Enter the password and touch OK to confirm 64 ...
Page 73: ...6 Aperçu du produit a Caméra 73 ...
Page 91: ...9 Utilisation a Aperçu de la caméra A1 A2 A3 A4 A5 A6 A7 A8 A10 A9 A14 A13 A12 A11 91 ...
Page 97: ... Tapez de nouveau votre mot de passe et confir mez par OK 97 ...
Page 106: ...6 Productoverzicht a Camera 106 ...
Page 124: ...9 Bediening a Overzicht van de camera A1 A2 A3 A4 A5 A6 A7 A8 A10 A9 A14 A13 A12 A11 124 ...
Page 130: ... Vul nog het wachtwoord in en bevestig met OK 130 ...
Page 133: ...b USB stekkervoeding Bedrijfsspanning 100 240 V AC 50 60 Hz max 300 mA Uitgang 5 V DC 2 A 133 ...
Page 134: ...134 ...
Page 135: ...135 ...


