


23
AD
VANCED
C
ONFIGURA
TION
EN
ADVANCED CONFIGURATION
IP Channel
Ch:
The channel number that the camera is connected to.
Name:
Shows the name of the camera associated with the
channel.
IP Address:
The IP address assigned to the camera.
MAC Address:
The Media Access Control address. This is a
unique code which nothing else should share.
Status:
Whether the camera is
Previewing
(it’s up and running,
and you can see it displayed on Live View) or
Offline
.
The Edit Screen
To scan for cameras:
• Click the
Scan
button to generate a list of all cameras that
your NVR can detect.
To add cameras:
• From the
Channel
drop-down list, select an available
channel to which you want to assign a camera. A channel
is available if its associated
IP Address
box is
blank
. You
can also check out the
Channel
column in the detected
camera list window on the top half of the screen - if a
camera’s been assigned to a channel, the associated
channel number will be shown which means this channel
has been taken up.
• Then, select a camera from the detected camera list
window, that you want added to the channel. When
you’re finished, click the
Apply
button to save the new
configuration.
Note:
The NVR auto-populates the
username and password fields with camera defaults.
• Note:
A camera that has already been assigned to a
channel cannot be added again to another channel
because the NVR does not allow identical channels to
be displayed. If there is a particular channel in which
you want to display a camera, you will have to delete this
camera from it’s existing channel first.
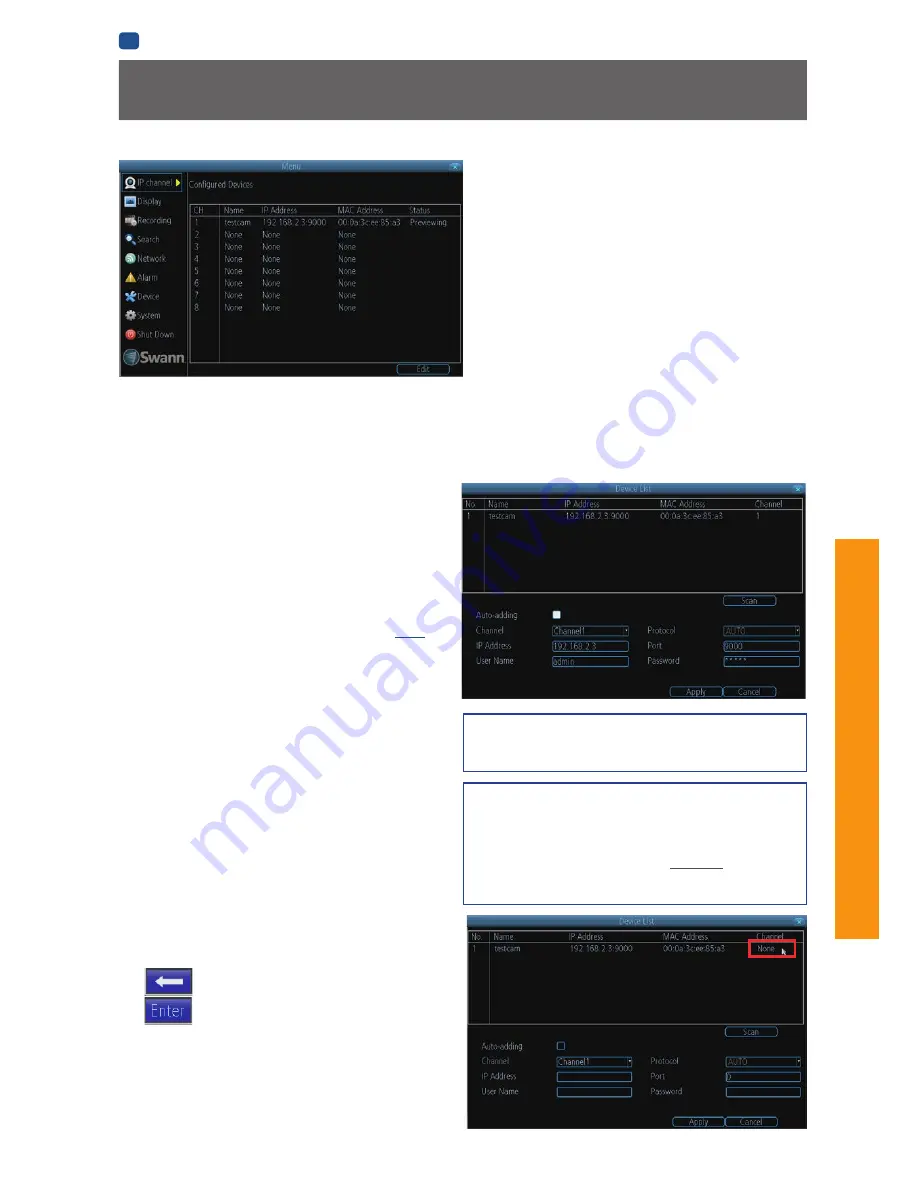
To delete cameras:
• From the
Channel
drop-down list, select a channel that’s
currently associated to a camera.
• Click the
IP Address
box. Using the virtual keyboard, click
until the IP address box is blank and then click
.
• When you’re finished, click the
Apply
button to save
the new configuration. Click the
Scan
button to refresh
the camera list window. You will notice in the
Channel
column that the channel associated to the deleted camera
appears as
None
(see picture on the right).
The
IP Channel
menu enables you to view specific information
about cameras that are currently connected to your NVR such
as channel number, IP address and status.
On the
IP Channel: Edit
screen, you can also:
• scan for cameras that the NVR is able to detect - both
directly connected as well as those on the same network
(i.e., same router) as the NVR.
Note:
Cameras on the same
network must be compatible with the NVR.
• add cameras to any available channels,
• delete cameras from their existing channels..
Auto-adding?
Swann Camera Default Account Configuration
This option is enabled by default,. Your NVR will
automatically display video from cameras it has detected.
If you intend to manually add or delete cameras on your
NVR Live View display, you must
de-select
this option.
Make sure you click the
Apply
button to save the change.
Username:
admin
Password:
12345


