B
ASIC
SETUP
EN
BASIC SETUP
20
Live View Monitoring
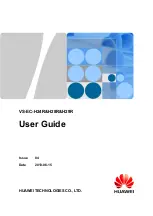
1
Menu:
Opens the main menu.
2
Single Camera View:
Shows images from one camera in full-screen.
3
Four-Camera (2 x 2) View:
Divides the screen into four viewing windows, each showing images from one camera.
4
Next Camera(s):
Cycles the cameras displayed in viewing mode.
5
PIP:
Picture-in-picture. Allows you to view two channels at once, with one full screen and the other as a small overlay.
6
Manual Record:
Initiates manual recording.
7
Run Startup Wizard:
Runs the initial startup wizard.
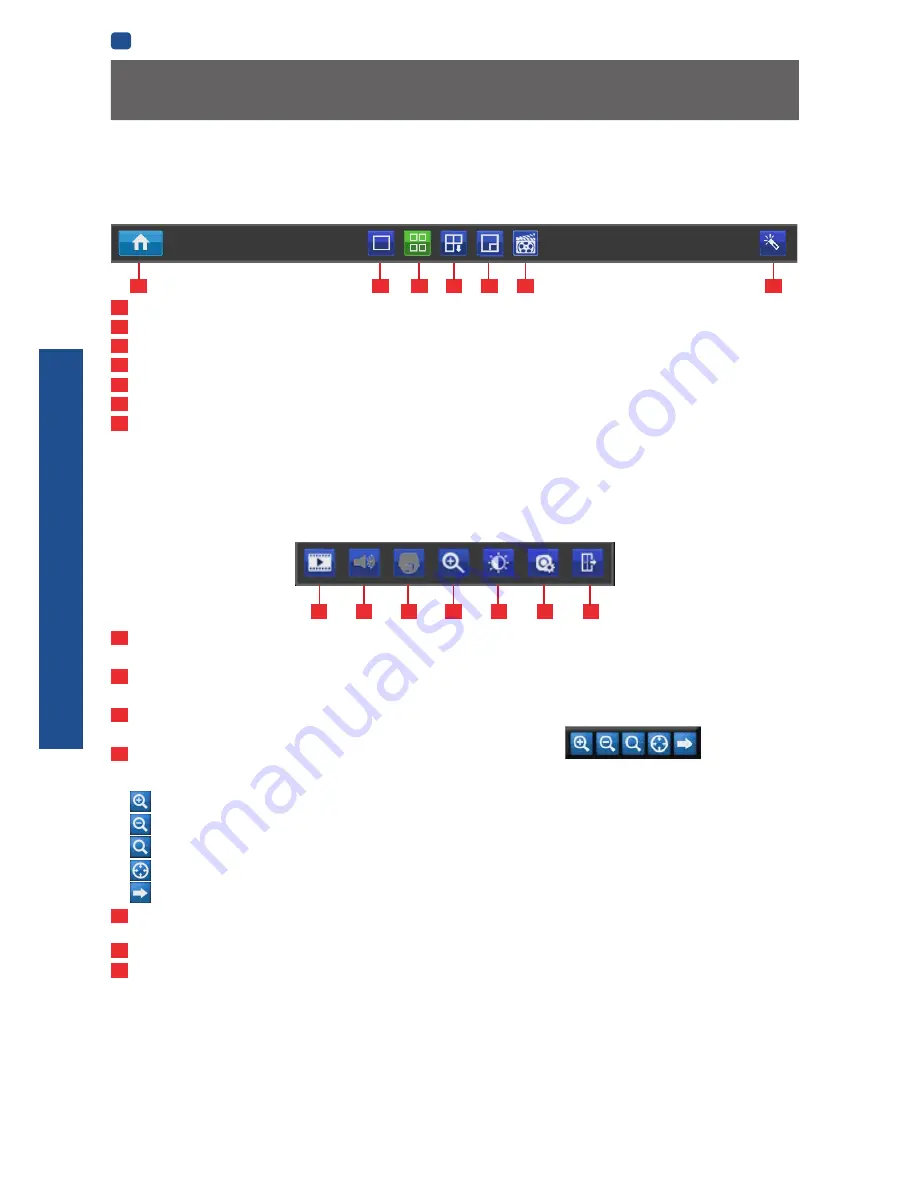
1
Playback:
Opens the
“Search: Playback”
menu.
2
Audio:
Requires Audio Enabled IP Camera and is not currently supported.
3
PTZ Control Menu:
Opens the PTZ control
menu (requires PTZ IP Camera) and is not currently supported.
4
Digital Zoom In:
Displays the selected video channel in full screen and shows the
Digital Zoom
control panel.
Click:
to zoom in.
to zoom out.
to draw a box over an area of the video that you want to zoom in on.
to restore zoom back to default setting.
to exit Digital Zoom mode.
5
Image Setting:
Displays the selected video channel in full screen and shows the
Image Settings
window for you to change
the brightness, contrast, saturation and hue. For more details, see Image Settings in
“Display: Camera” on page 24.
6
Camera Setting:
Opens the
“Display: Camera”
menu.
7
Exit:
Closes the toolbar.
Menu Bar
• To open, right click with the mouse on the live view screen.
1
2
3
4
5
6
7
Quick Camera Toolbar
• To access the Quick Camera Toolbar, left click the USB mouse once on one of the live video channels available.
Note: Unavailable functions are greyed out.
1
4
5
6
7
Shutting Down & Rebooting
If you want to shut down or reboot the NVR, or simply log out of the user account you’re logged in as, access the Shutdown menu
which is accessible via the main menu.
To ensure the integrity of your data and recordings, always select
Shut Down
when powering off the NVR.
2
3