SVS-VISTEK
Getting Started
10
software. In most cases this will be the software delivered with your frame
grabber. Assuming an Euresys framegrabber as an example, these are the
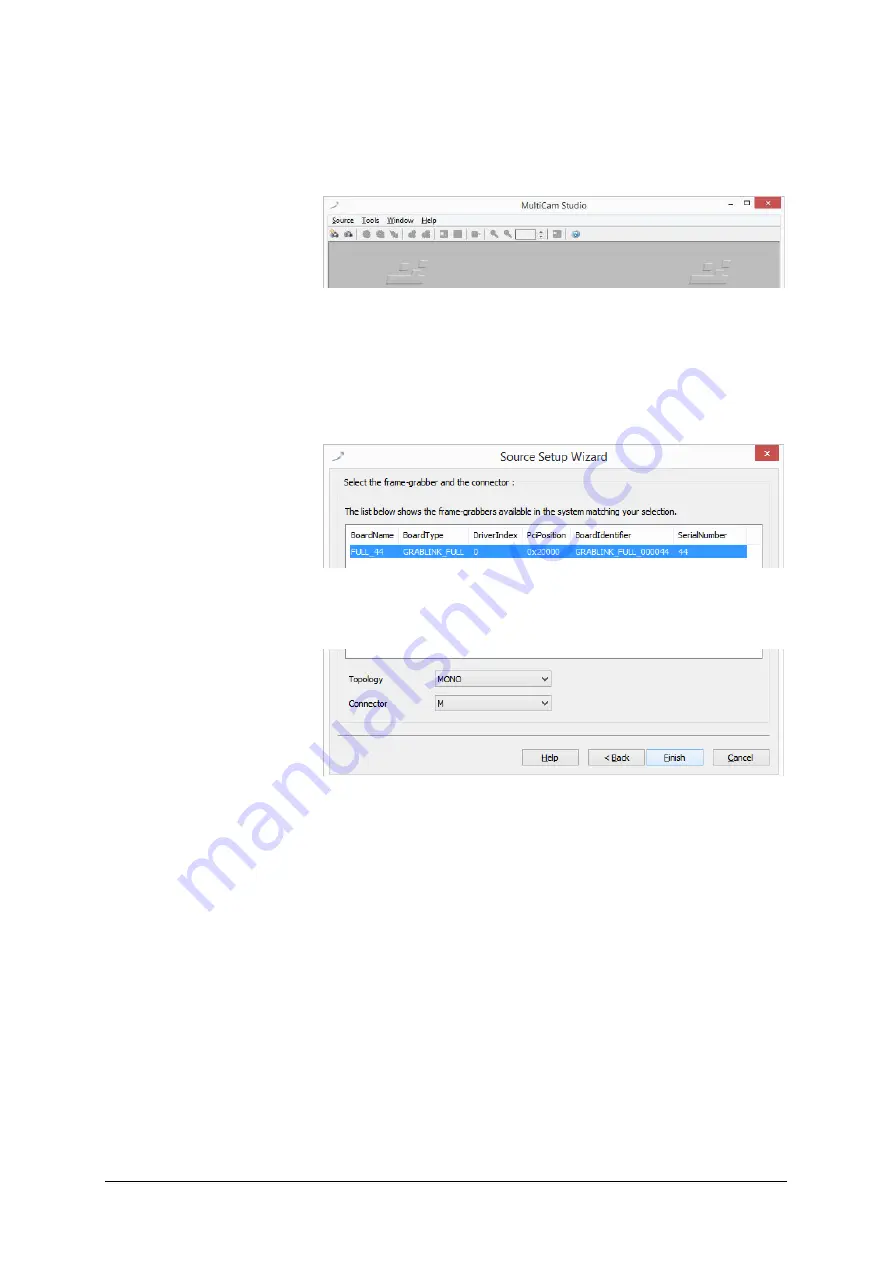
steps for MultiCam Studio to display a camera image.
Run Multicam Studio.
>
Add a new “source” to the application
>
Choose “Camera Link industrial Camera…”
>
Click “next”
>
In the list of camera vendors choose
“SVS-VISTEK“ and the camera you want to view.
>
Select frame grabber and connector
>
For “Topology” values refer to the Euresys documentation. At
first: stay with “Mono” for topology
>
Choose your connector configuration
>
click “Finish”
According to your GenICam configuration, you should see the camera’s
image displayed.
For further information on Euresys Multicam Studio refer to the Euresys
documentation.
3.4.3
Update firmware
Some features may not have been implemented in your camera at the
time of selling. For updating your camera firmware to the most recent
version, you need to download the firmware upgrade tool “CL
FirmwareUpdater” and the firmware file (download it from website, login
area) matching your camera model.
Summary of Contents for HR Series
Page 1: ...2 06 2019 Manual HR Camera Link hr25 hr29 hr43 hr120 ...
Page 5: ...SVS VISTEK Safety Messages Contents of Camera Set 5 ...
Page 14: ...SVS VISTEK Connectors 14 ...
Page 64: ...SVS VISTEK Feature description 64 will reflect as following ...
Page 85: ...SVS VISTEK Dimensions 85 8 1 hr25 CL ...
Page 86: ...SVS VISTEK Dimensions 86 ...
Page 87: ...SVS VISTEK Dimensions 87 ...
Page 88: ...SVS VISTEK Dimensions 88 8 2 hr29 CL ...
Page 89: ...SVS VISTEK Dimensions 89 ...
Page 90: ...SVS VISTEK Dimensions 90 ...
Page 91: ...SVS VISTEK Dimensions 91 8 3 hr43 CL ...
Page 92: ...SVS VISTEK Dimensions 92 ...
Page 93: ...SVS VISTEK Dimensions 93 ...
Page 95: ...SVS VISTEK Dimensions 95 ...
Page 96: ...SVS VISTEK Dimensions 96 ...


