Chapter 6: Advanced Chassis Setup
6-9
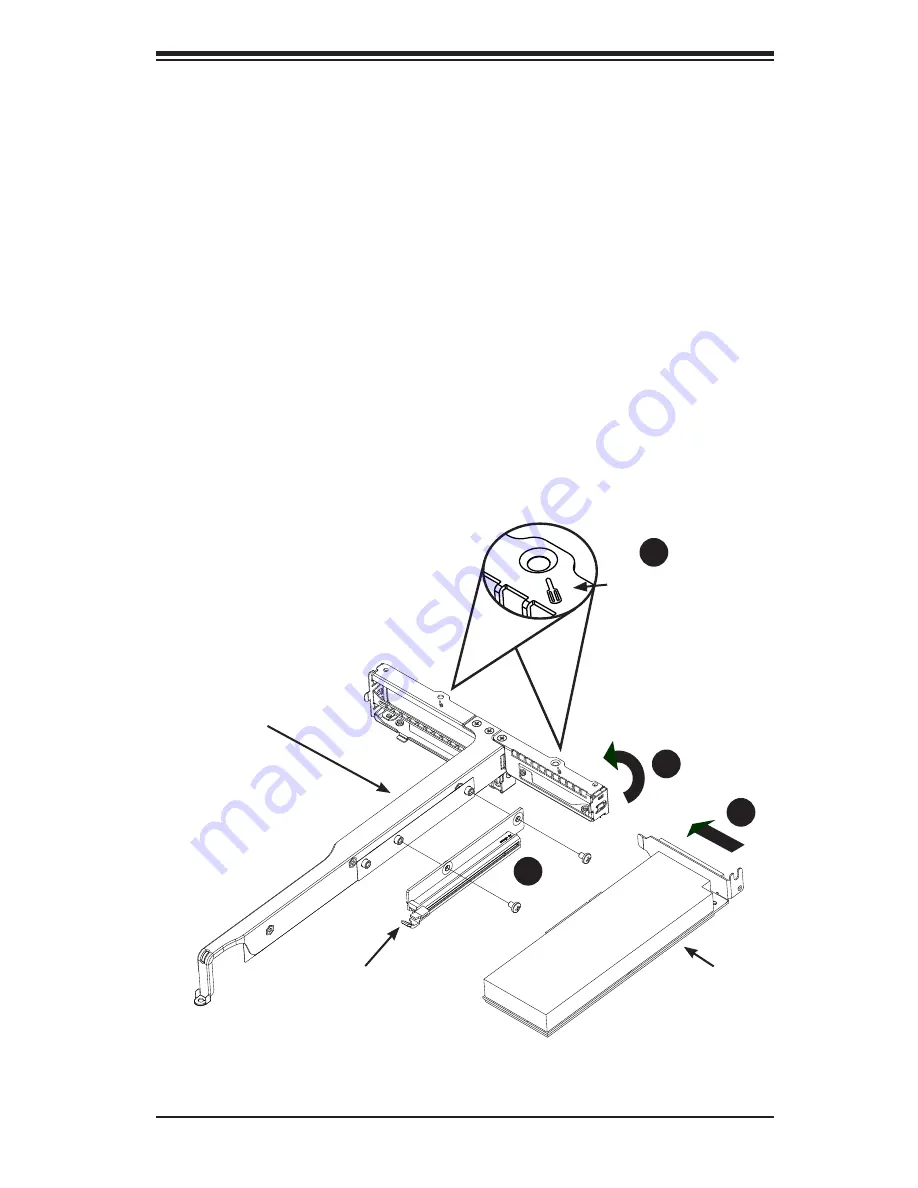
Figure 6-8. Installing the Riser and Expansion Cards in the Bracket
Installing Expansion Cards
1. Remove the riser card bracket from the chassis by unscrewing only those screws
inidcated by the screwdriver icon as illustrated in Figure 6-8.
2. Lift the riser card bracket from the chassis.
3. Install the riser card on the bracket using the two screws provided.
4. Open the latch on the end of the bracket.
5. Install the expansion card or GPU by sliding the card into the appropriate slot in
the riser card and then close the bracket latch over the end of it.
6. Install the entire assembly into the appropriate slot on the motherboard while
aligning the bracket in the rear of the chassis.
Important Note for Kepler GPUs:
Note the airflow arrow on top of the GPU cards.
Both cards should have this arrow pointing toward the Tesla logo.
1
3
1
4
1
6
Screwdriver
Icon
1
1
Riser Card Bracket
Riser Card
Low Profile
Expansion Card
Summary of Contents for SUPERSERVER 1018GR-T
Page 1: ...SUPER USER S MANUAL Revision 1 0 SUPERSERVER 1018GR T...
Page 14: ...1 6 SUPERSERVER 1018GR T User s Manual Notes...
Page 24: ...SUPERSERVER 1018GR T User s Manual 2 10 Notes...
Page 48: ...4 20 SUPERSERVER 1018GR T User s Manual Notes...
Page 136: ...A 2 SUPERSERVER 1018GR T User s Manual Notes...
Page 140: ...B 4 SUPERSERVER 1018GR T User s Manual Notes...


