Chapter 2: Installation
2-5
Installation
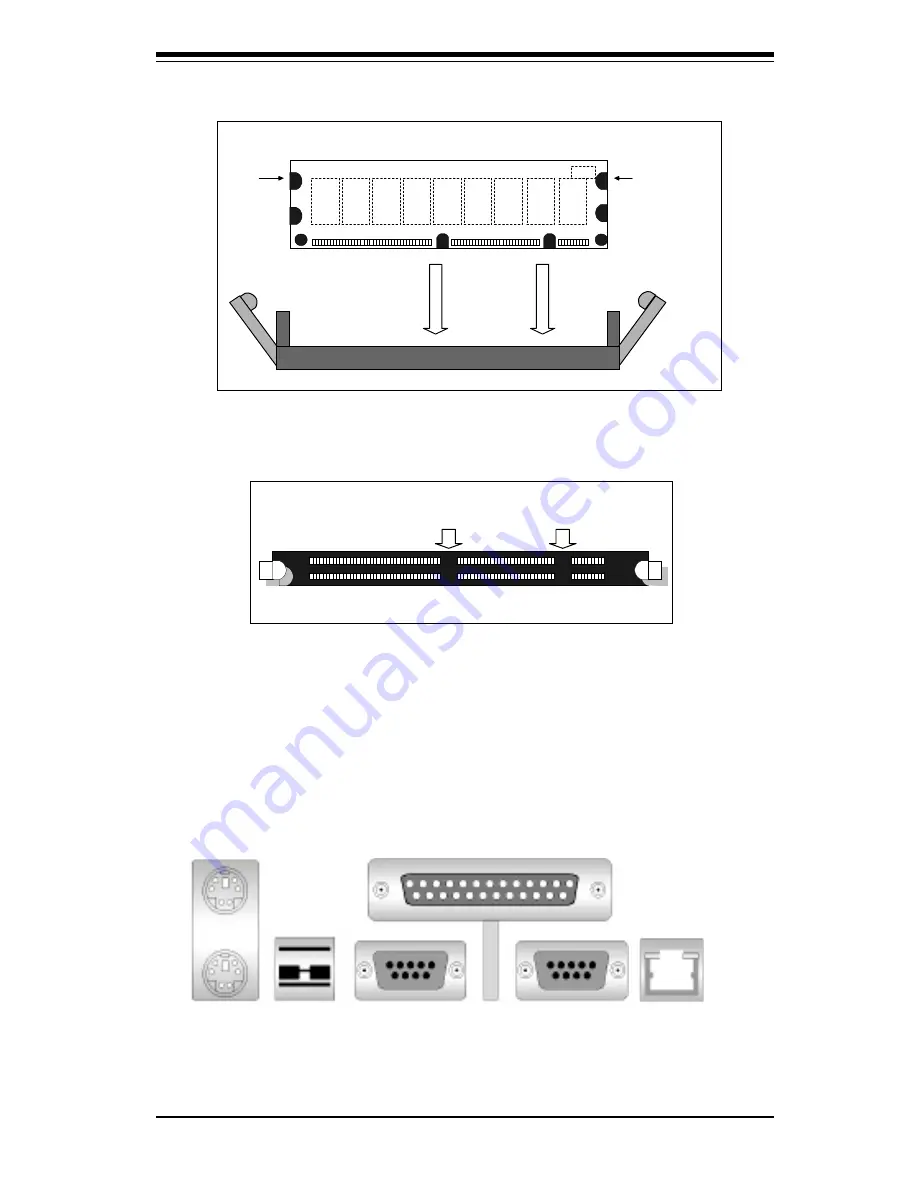
Top View of DIMM Slot
To Remove:
Use your thumbs to gently push near the edge of both ends of
the module. This should release it from the slot.
2-4
Port/Control Panel Connector Locations
The I/O ports are color coded in conformance with the PC 99 specification.
See Figure 2-3 below for the colors and locations of the various I/O ports.
Parallel Port
(Burgundy)
COM1 COM2*
Keyboard
(Purple)
Mouse
(Green)
USB
Ports
(Black)
Figure 2-3a. I/O Port Locations and Definitions (370DE6)
Ethernet
Port
(Black)
Figure 2-2. Side View of DIMM Installation into Slot
To Install: Insert module vertically and press down until it
snaps into place. Pay attention to the notches.
Note: Notches
should align
with the
receptive points
on the slot
DIMM Slot
D I M M
PC100
Notches
PC100
Notches
(Turquoise)
Summary of Contents for Super 370DE6
Page 1: ...SUPER 370DE6 SUPER 370DER SUPER 370DEI USER S MANUAL Revision 2 0 SUPER...
Page 7: ...Notes SUPER 370DE6 370DER 370DEI User s Manual viii...
Page 10: ...Chapter 1 Introduction 1 3 Introduction Notes...
Page 11: ...SUPER 370DE6 370DER 370DEI User s Manual 1 4 Introduction SUPER 370DE6 SECTION...
Page 12: ...Chapter 1 Introduction 1 5 Introduction SUPER 370DE6 Figure 1 1 SUPER 370DE6 Image...
Page 15: ...SUPER 370DE6 370DER 370DEI User s Manual 1 8 Introduction SUPER 370DER SECTION...
Page 16: ...Chapter 1 Introduction 1 9 Introduction SUPER 370DER Figure 1 2 SUPER 370DER Image...
Page 21: ...SUPER 370DE6 370DER 370DEI User s Manual 1 14 Introduction SUPER 370DEI SECTION...
Page 22: ...Chapter 1 Introduction 1 15 Introduction SUPER 370DEI Figure 1 2 SUPER 370DEI Image...
Page 27: ...SUPER 370DE6 370DER 370DEI User s Manual 1 20 Introduction GENERAL SECTION...
Page 62: ...3 6 SUPER 370DE6 370DER 370DEI User s Manual Troubleshooting Notes...
Page 104: ...SUPER 370DE6 370DER 370DEI User s Manual B 10 APPENDIX B Notes...


