SunFounder Pironman
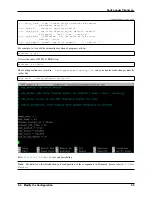
sudo nano
/
opt
/
pironman
/
ws2812_RGB
.
py
Press
Ctrl+X
->
Y
->
Enter
to save and exit editing.
Run it.
sudo python3
/
opt
/
pironman
/
ws2812_RGB
.
py
6.6 Power Button
Note:
The power button is connected to GPIO26, if you want to change it to another pin, please refer to
The power button can be used to wake up the OLED screen or to turn the Pironman off.
• Upon power-up, the OLED screen displays for 60 seconds before going into sleep mode. Using the power
button, you can wake up the OLED screen again later.
• You have 2 ways to get the Pironman to shut down.
1. Force Shutdown
Pressing and holding the power button for 10 seconds will let the Pironman power cut, but this
method may damage the Raspberry Pi’s files or leave some changes unsaved.
2. Safe Shutdown
There is also a way to safely turn off the Pironman by pressing and holding the power button for
2 seconds after configuring it.
6.7 IR Receiver
Note:
The IR receiver is connected to GPIO13, if you want to change it to another pin, please refer to
Before you can use IR receiver, you need to test its connection and install the relevant module.
1. Use the following command to test, if there is a display device then the configuration is successful.
sudo ls
/
dev
|
grep lirc
2. Install the
lirc
module.
sudo apt
-
get install lirc
-
y
3. Run the following command, and if you press a key on the remote controller, the code of the corresponding key
will be printed.
mode2
-
d
/
dev
/
lirc0
32
Chapter 6. 6. About Hardware
Summary of Contents for Pironman
Page 1: ...SunFounder Pironman www sunfounder com Nov 01 2022 ...
Page 2: ......
Page 4: ...ii ...
Page 6: ...SunFounder Pironman 2 CONTENTS ...
Page 10: ...SunFounder Pironman 6 Chapter 2 2 Component List and Assembly Instructions ...
Page 17: ...SunFounder Pironman 13 ...
Page 18: ...SunFounder Pironman 14 Chapter 3 3 Installing the OS ...
Page 30: ...SunFounder Pironman 26 Chapter 5 5 Set up the Pironman ...
Page 33: ...SunFounder Pironman 6 2 Main Board About the Jumper Caps 6 2 Main Board 29 ...
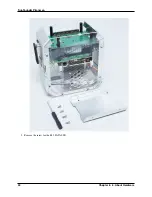
Page 38: ...SunFounder Pironman 2 Remove the screw for the M 2 SATA SSD 34 Chapter 6 6 About Hardware ...
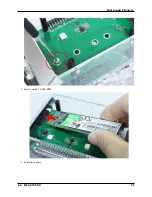
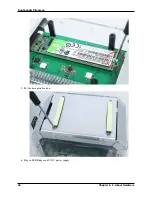
Page 39: ...SunFounder Pironman 3 Insert your M 2 SATA SSD 4 Screwed in place 6 8 M 2 SATA SSD 35 ...
Page 46: ...SunFounder Pironman Step 4 Double click the connection just created 42 Chapter 7 7 Appendix ...
Page 66: ...SunFounder Pironman 2 Select Samba SMB Server 3 Select Install 62 Chapter 7 7 Appendix ...

