7-inch Touch Screen
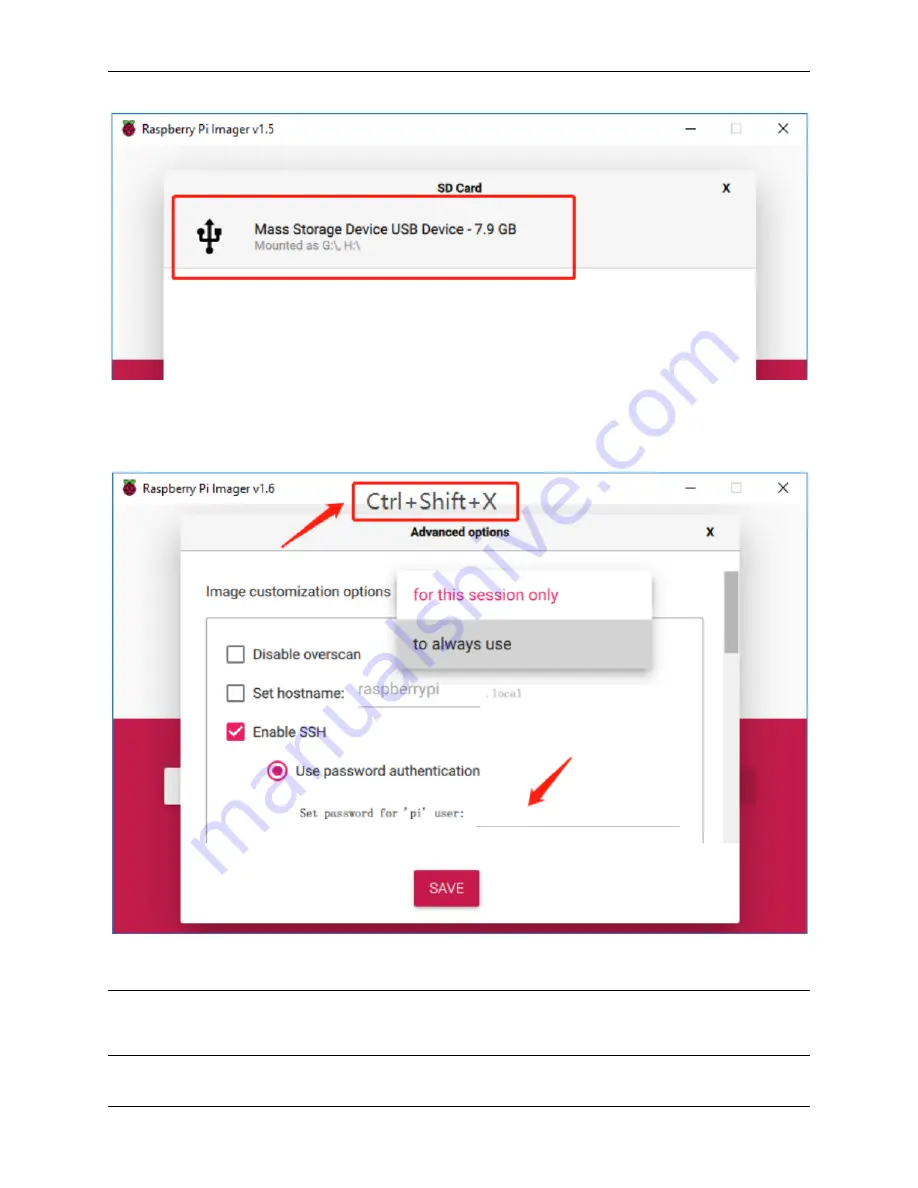
Step 6
Press
Ctrl+Shift+X
to open the
Advanced options
page to enable SSH and configure wifi, these 2 items must be set,
the others depend on your choice . You can choose to always use this image customization options.
Then scroll down to complete the wifi configuration and click SAVE.
Note:
wifi country
should be set the two-letter ISO/IEC alpha2 code for the country in which you are using
your Raspberry Pi, please refer to the following link:
https://en.wikipedia.org/wiki/ISO_3166-1_alpha-2#Officially_
7
Summary of Contents for 7-inch Touch Screen
Page 1: ...7 inch Touch Screen www sunfounder com Jul 15 2021 ...
Page 2: ......
Page 4: ...ii ...
Page 6: ...7 inch Touch Screen 2 CONTENTS ...
Page 7: ...3 ...
Page 8: ...7 inch Touch Screen CHAPTER ONE PACKING LIST 4 Chapter 1 Packing List ...
Page 14: ...7 inch Touch Screen 10 Chapter 2 Install the Raspberry Pi OS ...
Page 15: ...CHAPTER THREE QUICK GUIDE 1 Plug the HDMI cable 2 Wire up the USB cable 11 ...
Page 17: ...7 inch Touch Screen 13 ...
Page 18: ...7 inch Touch Screen 14 Chapter 3 Quick Guide ...
Page 19: ...CHAPTER FOUR BUTTON PORT 15 ...
Page 20: ...7 inch Touch Screen 16 Chapter 4 Button Port ...
Page 23: ...CHAPTER SIX ON SCREEN SETTINGS 19 ...
Page 24: ...7 inch Touch Screen 6 1 Menu Item Descriptions 20 Chapter 6 On Screen Settings ...
Page 36: ...7 inch Touch Screen 32 Chapter 8 Product Features ...


