S CLASS™ 2 cutter
User’s Manual
Detailed Operation
4-15
4.3.1.16
Media sensor setup
The media sensor setup option is a useful routine to check whether the front and rear media
sensors are functioning properly and whether the switching levels of these sensors are set
correctly.
1.
Press
or
to select the sensor that will be tested.
2.
Put a piece of media half on the chosen sensor and under the two outer pinch rollers.
Press
. There are five levels of sensitivity to choose from.
3.
Use
or
to change the sensitivity level.
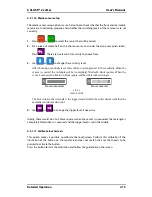
After choosing a sensitivity level, there will be a rectangle next to the sensitivity. When the
sensor is covered the rectangle will be (completely) filled with black squares. When the
senor is uncovered, (almost) no black squares will be visible in the rectangle.
Sensor uncovered
Sensor covered
FIG 4-5
4-5
SENSOR SETUP
The blue stripe in the rectangle is the trigger level at which the cutter decides whether the
machine contains media or not.
4.
Use
or
to change the trigger level, if necessary.
Ideally, there would be 0 to 2 black squares when the sensor is uncovered, the rectangle is
completely filled when it is covered, and the trigger level is set in the middle.
4.3.1.17
Calibrate touchscreen
This option makes it possible to calibrate the touchscreen. Perform this calibration if the
illustration of the button on the touchscreen does not match the area that needs to be
pressed to activate the button.
Press the button to start the calibration and follow the guidelines on the screen.
Back sensor
Front sensor
Back
S1
S1
Summary of Contents for S Class 2 OPOS-CAM
Page 1: ...User s Manual Rev 3b...


