21
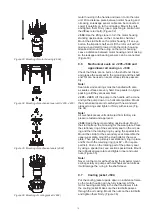
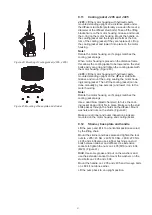
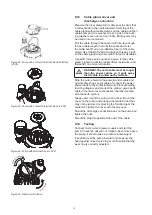
9.11 Cooling jacket J 205 and J 405
J 205:
Lift the motor housing with hydraulic parts
mounted standing upright on a distance piece under
the diffuser stud bolts (preferably a wooden frame at a
diameter of the diffuser stud bolts). Take off the lifting
bracket/wire on the motor housing. Grease and mount
the o-ring on the motor housing. Mount the handle on
the cooling jacket and the long stud bolts at the bot-
tom of the cooling jacket (if they are replaced). Lift up
the cooling jacket and lower it into place on the motor
housing.
Note!
Rotate the motor housing so it’s plugs matches the
cooling jacket plugs.
When motor housing is placed on the distance frame
this allows the cooling jacket to be lowered so the stud
bolts easily can grip and tighten the cooling jacket with
the motor housing. (Figure 40)
J 405:
Lift the motor housing with hydraulic parts
mounted standing upright on the diffuser stud bolts.
Grease and mount the o-ring sealing the motor hous-
ing/cooling jacket. Then lift the cooling jacket (can be
done manually by two persons) and lower it on to the
motor housing.
Note!
Rotate the motor housing so it’s plugs matches the
cooling jacket plugs.
Use a dead blow (plastic hammer) to force the cool-
ing jacket down until it fits in place. Make sure the stud
bolts passes through the holes on the diffuser. Mount
washers and nuts on the studs. (Figure 40)
Make sure all inner and outer inspection plugs are
mounted on the motor housing and cooling jacket
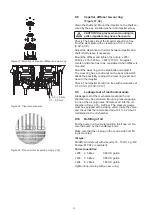
9.12 Strainer, base plate and handle
Lift the pump and tilt it to a horizontal position secured
by the lifting chain.
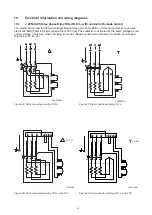
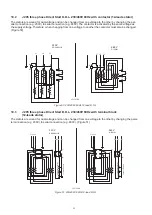
Mount the strainer and base plate and tighten the lock
nuts to J 205= 45 Nm, J 405=140 Nm, J 604=273 Nm.
J 405 and J 604 also uses rubber bushings on stud
bolts between strainer and diffuser. Use extension
sockets to tighten the nuts on J 405 (M16) and J 604
(M20). (Figure 41)
Hint!
Use some grease and put on the washers and
use the extension socket to mount the washers on the
stud bolts on J 405 and J 604.
Mount the handle on J 205 and J 405 and two eye bolts
on J 604 if not done earlier.
Lift the pump back to an upright position.
Figure 40: Mounting of cooling jacket (J 205, J 405)
Figure 41: Mounting of base plate and strainer
Summary of Contents for J 205
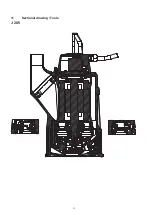
Page 30: ...30 11 Sectional drawing Tools J 205 ...
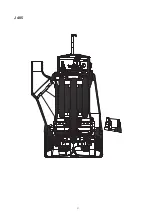
Page 31: ...31 J 405 ...
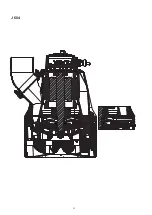
Page 32: ...32 J 604 ...
Page 37: ...37 ...


