28
WIRELESS CONNECTIVITY
Once the IP Camera is correctly configured for wired access using the IP Camera Tool software, it is possible to set it
up for wireless connectivity.
To set up wireless connectivity:
1.
Log in to the IP Camera’s web-based interface via Internet Explorer.
Refer to section “
Web-Based Management
” (page 23) for instructions on how to do this.
2.
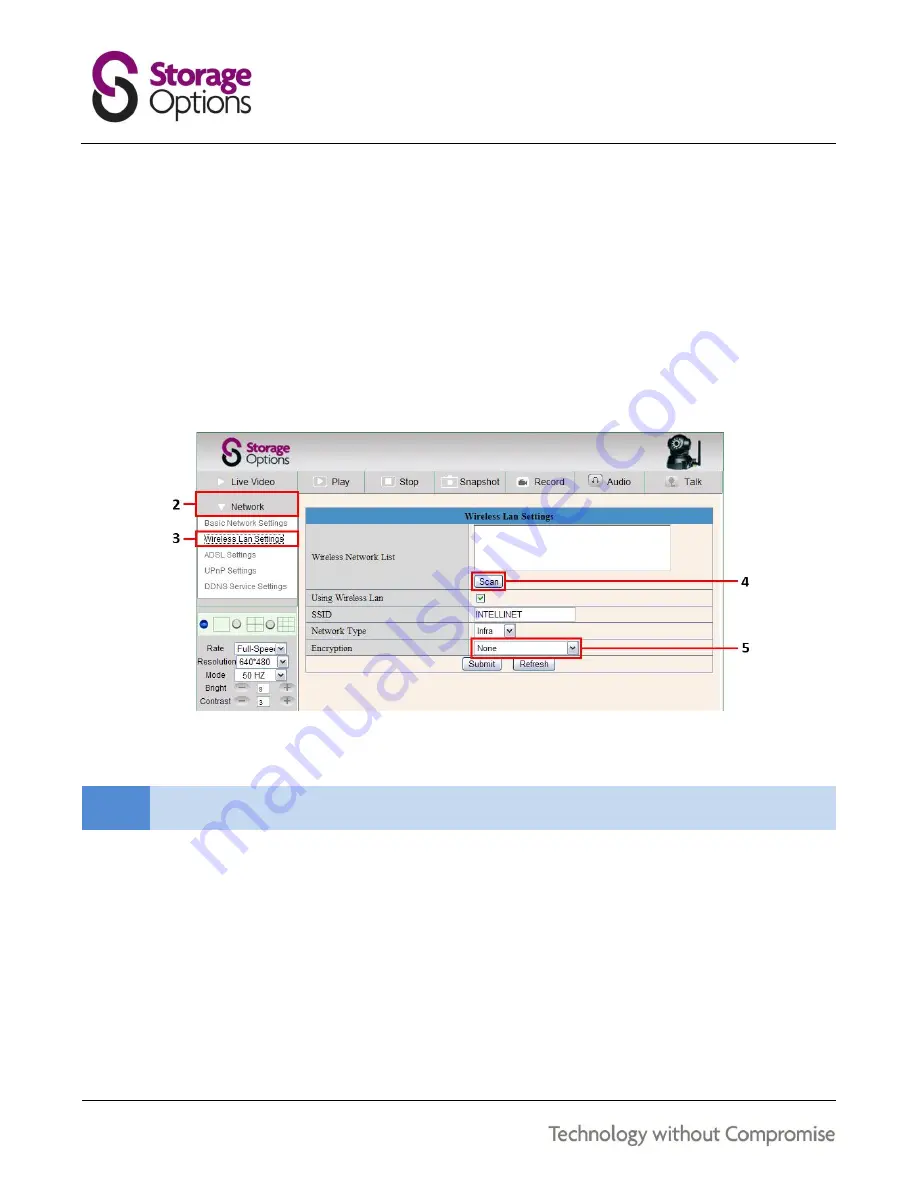
Click “Network” on the Settings Menu Panel to open the configuration options.
3.
From the drop-down menu which appears, click “Wireless LAN Settings”.
4.
Click “Scan” to scan for nearby wireless networks. You may need to click “Scan” twice to see any results.
Select your wireless network from the list.
NOTE
If your wireless network is not broadcasting an SSID, you can enter it manually in the “SSID” field.
5.
Select the wireless encryption type used by your router from the Encryption option.
6.
Underneath, a field will appear for your wireless password. Input the password here, and then click the
“Submit” button.
7.
The IP Camera will restart. Please wait at least 2 minutes for it to power up. During this time the LED will
flash and the lens will cruise through its pan and tilt mode.
8.
Once the IP Camera stops moving, remove the network cable. The IP Camera will now be accessible
wirelessly from the IP Camera Tool or IP Camera Client software.


