EYE
Cam
17
8.6 – SCHEDULED RECORDING
It is possible to set the IP Camera to record according to a defined schedule, rather than continuously. The computer
with IP Camera Client software installed must be on at the scheduled time and have enough free Hard Disk Drive
(HDD) space to complete the recording.
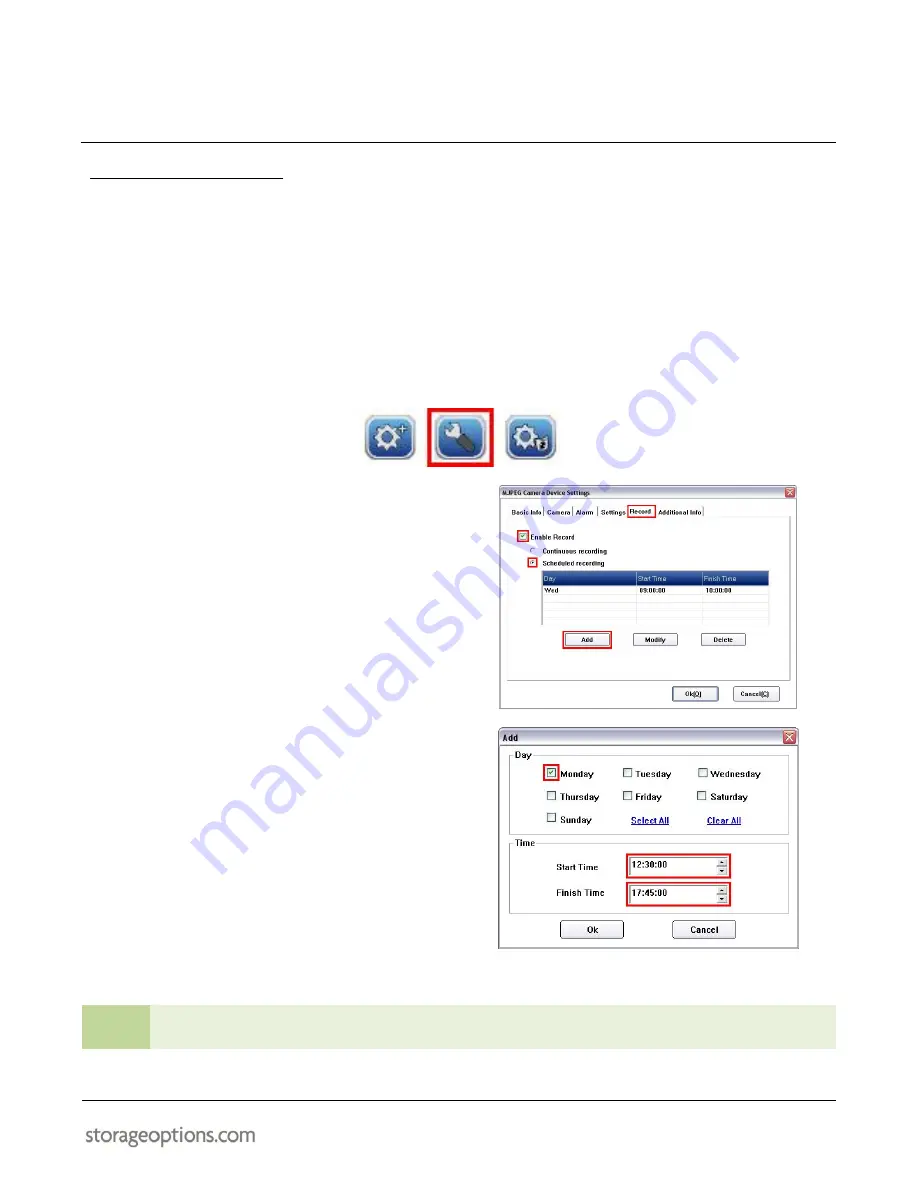
To set up a schedule:
7.
Select the camera you wish to record by clicking on the title above the video window. It will switch from
green to white to indicate it is the currently selected camera.
8.
Click the “Device Settings” button, which opens a configuration window.
9.
Click the “Record” tab.
10.
Make sure the “Enable Record” checkbox is
ticked.
11.
Click “Scheduled recording”.
12.
Click “Add” to create a schedule.
13.
In the window that opens, select the day(s) of
the week you want the IP Camera to do
scheduled recording.
14.
Use the number keys or up / down buttons to
select start and stop times.
15.
Click “OK” to save.
16.
Click “OK” on the “MJPEG Add Device” window
to save the new settings.
In the example (above), video from the IP Camera will be recorded every Monday from 12:30pm to 5:45pm.
TIP
Use one schedule for all days or set different start / stop times per day by adding more schedules
e.g. a different schedule for each day.


