20
8.10 – CUSTOM CRUISE PATHS
A custom cruise path can be created so that the IP Camera moves from point to point
To create a custom cruise path:
1.
Click the
icon, and then on the context menu that appears, click “Settings”.
2.
In the “Cruise List” window, click “Add”.
3.
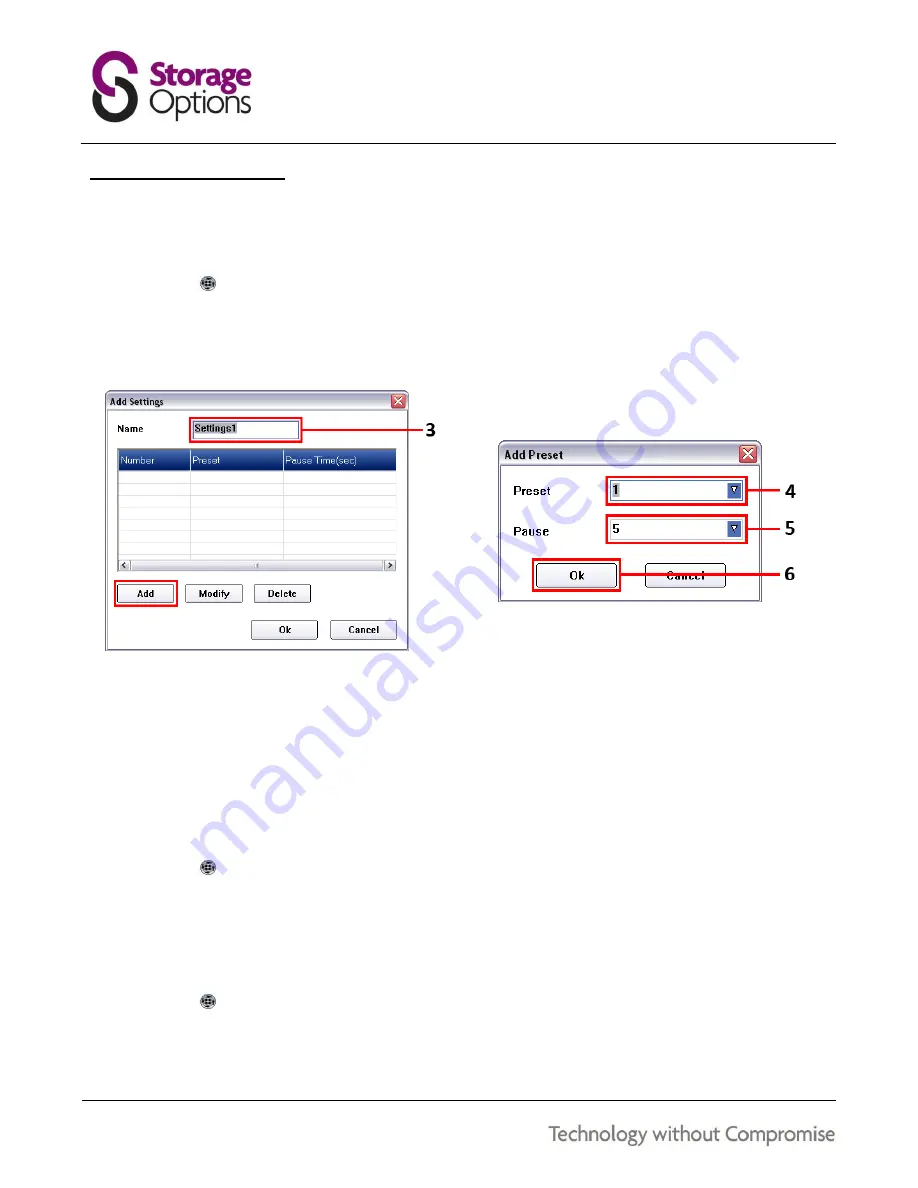
A new window will appear. Give your custom cruise path a name (e.g. Settings1), then click “Add”.
4.
Choose a position number 1 – 9, as set in section “
8.9 – Preset Positions
” (page 19).
5.
Choose the length of time (in seconds) that the camera should stay in that position, before moving on.
6.
Click “OK” to save this preset. You can add more positions to the path list in the same way.
7.
Click “OK” to save the path list, then click “OK” on the “MJPEG Device Settings” window to save.
To start a custom cruise path:
1.
Click the
icon. A context menu will appear and it will feature the name you gave the cruise path above.
2.
Click the name to start that custom cruise path. The IP Camera will move to the first position on the list and
continue through the set path.
To stop a custom cruise path:
1.
Click the
icon. A context menu will appear.
2.
Click the “Stop Cruise” option. The IP Camera will stop moving.


