5
Mixer Deck Functions
12) Jog/Shuttle Wheel
This wheel is used in conjunction with the
SCRATCH button described in #11. In
Jog/Shuttle mode, rotating the wheel clockwise
advances the track, counterclockwise reverses
the track. In Pitch/Bend mode, clockwise
increases the pitch, counterclockwise slows the
pitch. In scratch mode, quickly alternating
back/forth simulates the vinyl scratch action on
DJ turntables. This function works with CD’s as
well as MP3 files.
13) Cue Button
Pressing the CUE button will cause the playing
track to revert back to the position in which
play was started.
14) Play/Pause >II Button
Pressing this button will toggle between play
and pause modes on the CD and USB drive.
When in PLAY mode, the button lights blue,
when in PAUSE, it blinks blue on/off.
15) Direct Access Buttons 0-9
These can be used to directly select a track to
play, or to record on a playlist. This is especially
useful when using USB drives with a large
number of tracks stored.
16) LCD Display
Blue backlit display provides a wealth of
information on the tracks being played. When a
playlist is active, It displays the 1~20 track
number in the lower left corner. While playing
CD’s or MP3’s it displays the overall track
number in the upper left corner. The top right
corner shows track time, with selectable played,
elapsed or total time modes. Immediately
beneath this time display is a bargraph showing
relative time remaining in the track being
played. This enables the DJ to have a visual idea
of how far into the track they are. The bargraph
will blink when less than 30 seconds remain on
the track. Middle right shows the +/-
percentage of the pitch bend. In normal mode,
the display will read 0.0.
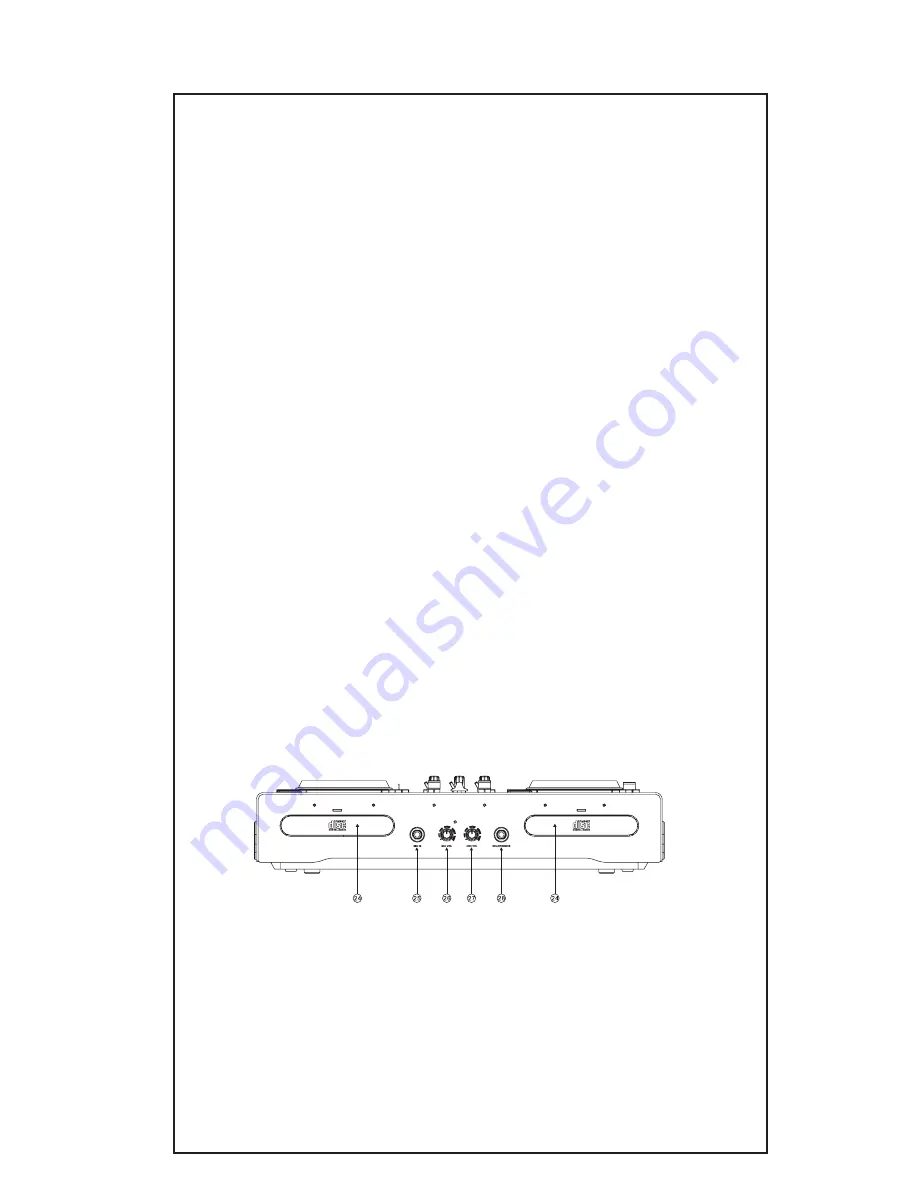
Front View
17) Slide Pitch Control
Sliding this control down and up either
increases or decreases the pitch and speed of
the track being played. The range of this slide
control is selectable from +/-4%, 8% or 16%, see
item #21. The actual pitch amount is displayed
on the middle right of the LCD display.
18) Re-Loop Button
See #18 and #19 for better understanding of
this function. When the Loop-Out button is
pressed a second time, the loop stops playing
and regular play resumes, however the loop
remains stored. Pressing the Re-Loop button
will restart the same loop, from any other point
in the track. Once the track ends, or if you skip
to another track, the loop will be erased.
19) Loop-In Button
Pressing this button sets the start point of a
sample loop, from the playing track.
20) Loop-Out Button
Pressing this button sets the end point of a
sample loop, from the playing track. Once this is
pressed the unit will continually repeat the
loop. Pressing the Loop-Out button will resume
normal play, but the loop starting point remains
stored. Pressing the Loop-Out button again will
set a new end point.
21) Pitch Bend Select
Pressing the PITCH button will toggle the Slide
Pitch Control between the three pitch/bend
ranges, +/-4%, 8% or 16%.
22) Pitch Bend (-) Button
Pressing and holding this button will decrease
the speed and pitch of the track playing. Once
released, the pitch will return to a normal rate.
23) Pitch Bend (+) Button
Pressing and holding this button will increase
the speed and pitch of the track playing. Once
released, the pitch will return to a normal rate.
24) CD Tray
For loading standard CD, CD-R and CD-RW discs.
The tray is opened by pressing the red EJECT
button on the top of console. Note that if the
CD in the tray is playing, it must be paused prior
to ejecting. While playing, the EJECT button is
inoperative. Pressing the EJECT button again
will close the drawer. Also, this button only
operated while the CH1 or CH2 Input Toggle
Switch (see next page) are in the CD position.
25) DJ Microphone Input
The MIC IN jack accepts standard dynamic
unbalanced microphones with ¼” plug.
26) Mic Level Control
Adjusts the microphone level, relative to the
music mix.
27) Cue Level Control
This adjusts the CUE level of the headphones.
More explanation of this can be found on the
next page under the CUE/PGM mixing control
28) Headphone Output
For connection of standard stereo headphones
with ¼” plug.
Summary of Contents for 555-19520
Page 2: ...2...


