48
749.082 | Z02 | 2015-02-03
EN
8
Locally displaying data on the digital picture frame
The IFA router can also send the graphics via the integrated WLAN interface to a WLAN capable digital
picture frame. The following steps describe the procedure for configuring the picture frame:
1. Commissioning for the first time
When starting the digital picture frame for the first time, please see the Kodak EasyShare W820
user guide "Getting started".
2. Language selection
See the user guide for the Kodak EasyShare W820 "Getting started", setting the language. Once the
language has been selected, the digital picture frame will start looking for wireless networks.
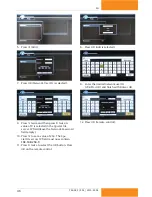
3.
Wireless network
All available wireless networks will be displayed. Select the network "TK RW2 Net" and confirm with
"OK".
4. Safety check
The system performs a safety check. The picture frame indicates that the network is not secured
since the delivery status of the remote display is without any preset encryption.
There is no factory preset encryption because no security-relevant information is being transmit-
ted. The message box is closed by selecting "Finish". If you want to encrypt image data, proceed as
described in 9.2.11, p. 53.
5. Confirming the network connection
A successful connection to the wireless network "TK RW2 Net" is confirmed. The digital picture
frame is now asking to install the EasyShare software on the IFA router.
Prompt the installation with "Search now".
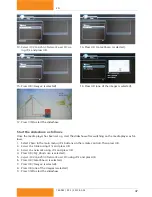
6. Detected devices
The detected devices are listed. Select "SolarShare" and complete the installation with "FINISHED".
7. Setup completed successfully
The successful installation is confirmed again.
The confirmation can be closed from the menu window "[Home]".
8. Home
You will see the home page of the setup. To enable the display of the system images, select "Images
and videos".
9. Images and videos
Available images / videos are displayed. Select "SolarShare" and confirm with "OK".
10. SolarShare contents
The contents of "SolarShare" are displayed as thumbnails. The contents consist of the system image
with the current temperature values and the daily diagram.
Either a single image can be displayed or a slideshow can be started.
11. Single image display
For the single image display, simply select the desired image and confirm with "OK".
This opens the selected image permanently, e.g. the system image.
12. Slideshow
The slideshow is started from the menu window "[Start]". The system image and the daily diagram
are displayed alternately in 5-second intervals.
You can also embed your own images in the slideshow; (see Section 11, p. 57). The default dura-
tion of the image display is 5 seconds but it can be changed in the setup window of the picture
frame.

