


8
This will make it difficult to remove the
appliance from the aperture in future,
particularly if it needs to be serviced.
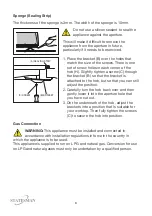
Sponge (Sealing Strip)
The thickness of the sponge is 3mm. The width of the sponge is 10mm.
(A) SEALING STRIP
(C)S CREW
(B)B RACKET
Do not use a silicon sealant to seal the
appliance against the aperture.
1. Place the bracket (B) over the holes that
match the size of the screws. There is one
set of screw holes in each corner of the
hob (H). Slightly tighten a screw (C) through
the bracket (B) so that the bracket is
attached to the hob, but so that you can still
adjust the position.
2. Carefully turn the hob back over and then
gently lower it into the aperture hole that
you have cut out.
3. On the underneath of the hob, adjust the
brackets into a position that is suitable for
your worktop. Then fully tighten the screws
(C) to secure the hob into position.
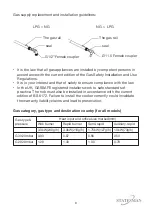
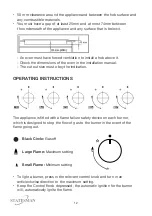
Gas Connection
WARNING: This appliance must be installed and connected in
accordance with installation regulations in force in the country in
which the appliance is to be used.
This appliance is supplied to run on LPG and natural gas. Conversion for use
on LPG and natural gases must only be undertaken by a qualified person.