COMMISSIONING
Burner Set-up
1.
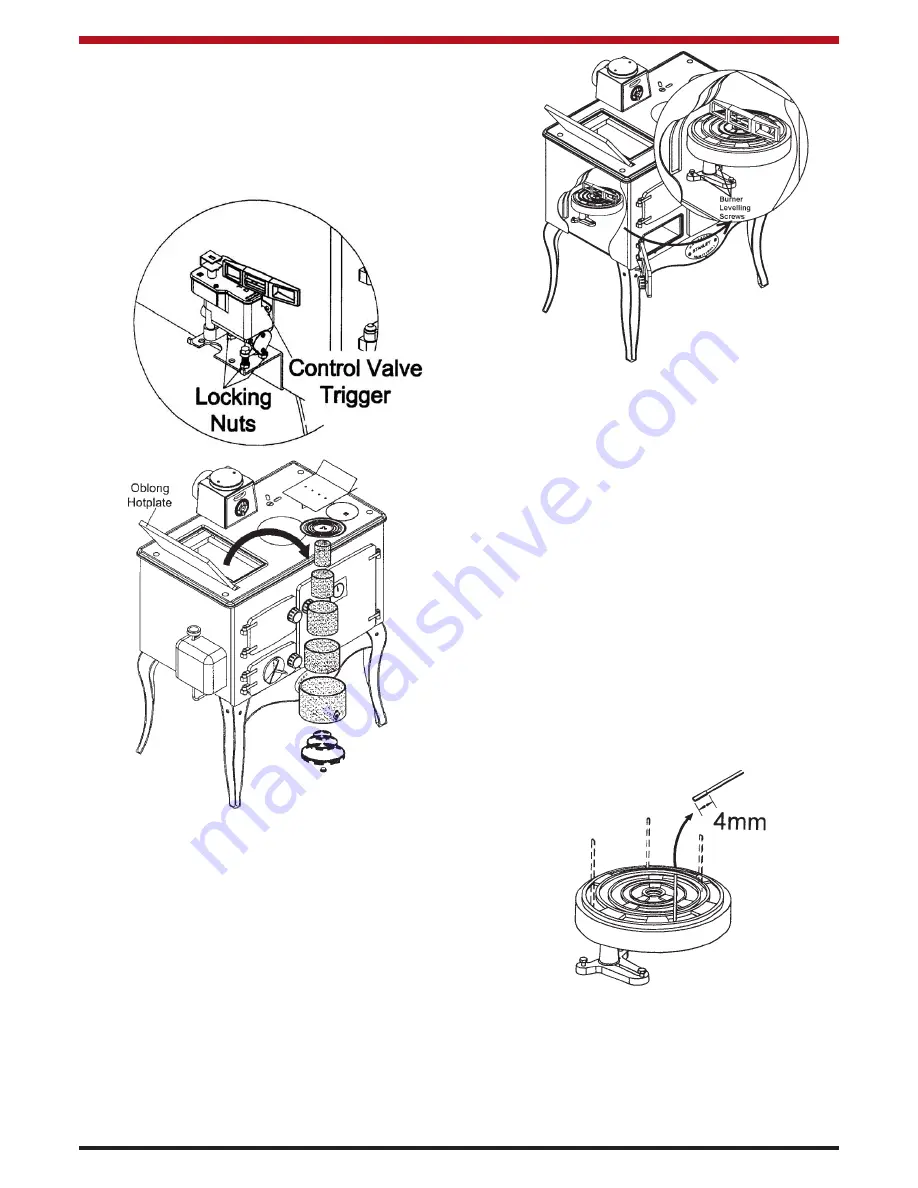
Using a spirit level, check that the control
valve is level in all directions. Adjust the
locking nuts on the valve legs if levelling is
necessary. (See Fig.20).
Fig..20
Fig.21
2.
Check that the burner is level in all direc-
tions. If levelling is necessary remove the
fire valve phial from the fire valve bracket
and place it to one side of burner compart-
ment. Loosen the 1/4” bolt, holding down
the burner stand. The level is adjusted by
adjusting the three M8 bolts on the base of
the burner stand (See Fig. 22). Re-tighten
the 1/4” bolt when finished adjusting the
M8 bolts.
Fig.22
13
3.
Push the control valve trigger up to set the
valve (See Fig.20). Turn the control knob
to 6 for 10 minutes to commence filling the
burner. If oil does not flow to the central
reservoir after 5 minutes, it may be neces-
sary to bleed the oil line at the elbow con-
nector in the burner compartment.
4.
Check the oil in the burner rings. The oil
level should be 4mm. (See Fig. 23). If the
level is greater than required, the control
valve should be lowered. The control valve
bracket can be moved up and down by loos-
ening the M4 lock nuts. If the level is less
than required, the control valve should be
raised until the oil level is correct. Each time
an adjustment is made, the oil in the central
reservoir and burner rings should be soaked
up with absorbent paper and the filling
process repeated.
Note:
Do not check oil depth adjacent to fuel ports.
Fig.23
5.
After any adjustments to the control valve,
check that it is level in all directions.
6.
Once the oil depth and burner level are set,
the burner can be re-assembled. Refer to
Burner Assembly section.
7.
Attach the control spindle to the control valve
using the M8 lock nut, and place the oil con-
trol valve cover in place over the valve.


