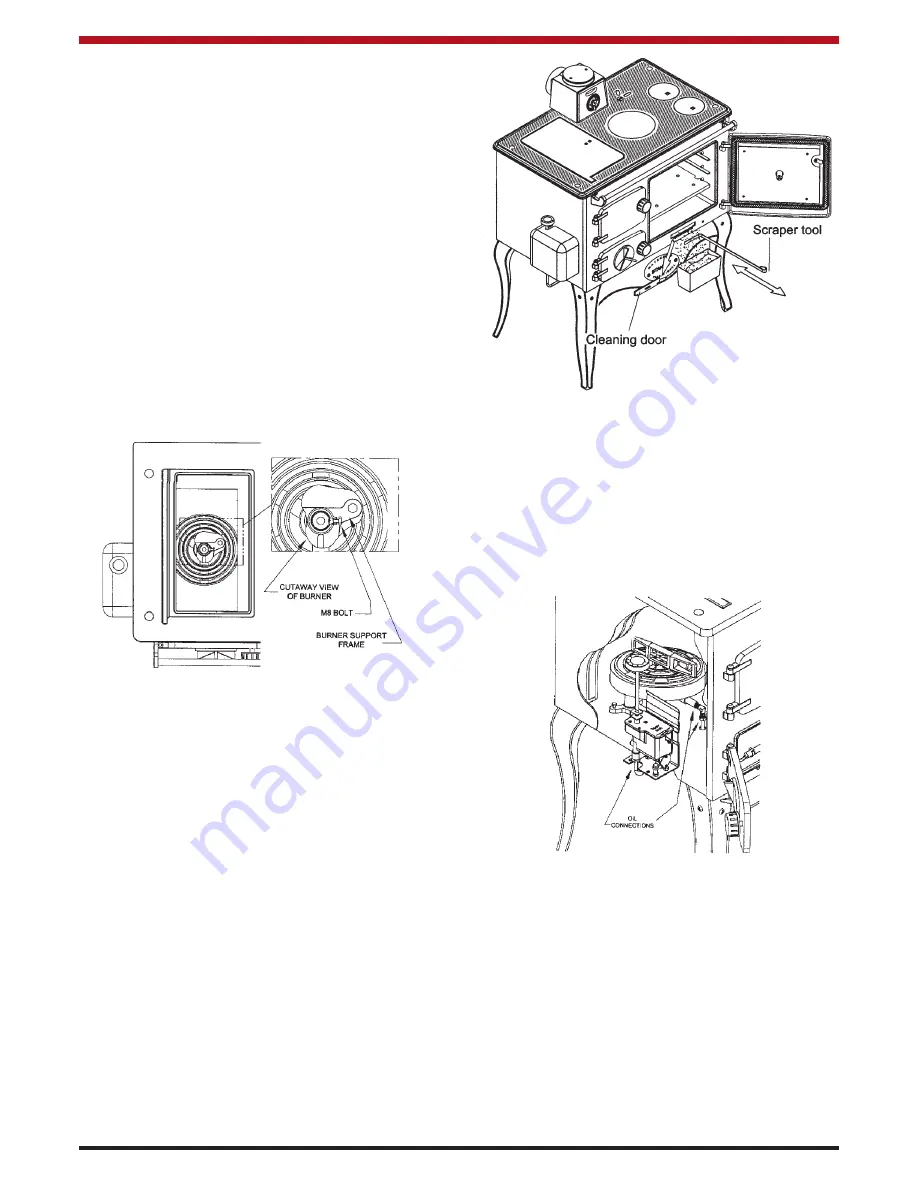
Fig.31
Fig.33
16
Fig.32
1.
Open the oblong hotplate and remove the
burner shells, wicks, centre well cap, baf-
fle and burner lid from the fire box.
2.
Open the ashpit door and place the fire
valve phial to one side of the burner com-
partment, so that the burner base can be
accessed. Remove the air distribution baffle.
3.
Disconnect the oil line from the burner and
remove the burner from the firebox by undo-
ing the M8 bolt on the side of the burner sup-
port frame (See Fig.31).
4.
Remove any dirt from the burner rings and
ensure that the ports between the rings are
clear.
5.
Remove the simmering plate and cleaning
cups and brush any soot deposits into the
firebox.
Vacuum any dirt from the firebox base and if
necessary, clean the viewing glass.
6.
Remove the base cleaning door and rake the
deposits, from underneath the oven through
the cooker front into a container using the
scraper tool. (See Fig.32).
7.
Open the bonnet door and check for any soot
deposits in the flue. If there is evidence of
substantial soot build-up, the flue may need
to be cleaned.
8.
Replace the burner in the firebox and recon-
nect the oil line to the burner.
9.
Check that the burner and oil control valve
are level in all directions. Check all oil con-
nections to ensure that there are no leaks.
(See Fig.33).
10.
Turn the control valve to 6 to fill the burner.
Check that the correct level of oil is present.
(See Commissioning Section.)
11.
Fit new wicks in the burner rings, ensuring
that the cut-outs in the wicks line up with the
fuel ports between the burner rings. (The
wicks should be replaced every time the
cooker is serviced).
12.
Fit the burner assembly as described in the
Burner Assembly Section.
13.
Reposition the fire valve phial. Close the
ashpit door.
14.
Light the stove and check the flame pattern
(See Commissioning Section).
Flexible oil lines should be inspected at each
and every service visit. There are varying types
of line with guarantee periods between 1 and 5
years. It is important in the interest of safety that
flexible lines are changed at regular intervals.
Inspect for date code stamp and if the line is out
of its guarantee period or shows signs of being
kinked or damaged, replace immediately.


