Stanford Research Systems
UGA Series Universal Gas Analyzers
Quick Start
xii
• Click ‘OK’ button.
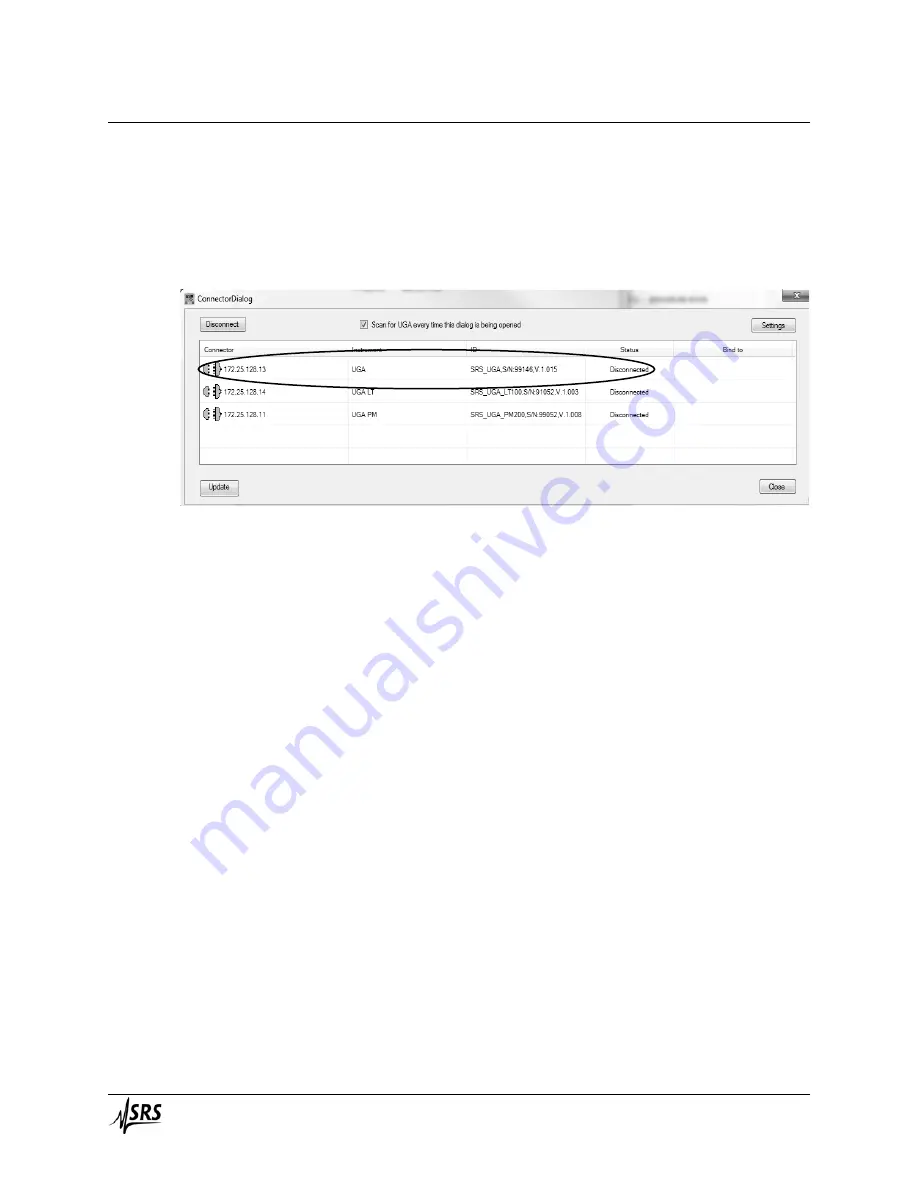
• Click on the ‘Main’ tab, and select ‘Connect’. The following ‘Con
-
nectorDialog’ window will appear. If no instrument name or ID is
visible under the connector immediately, hit ‘Update’ button sev
-
eral times to see the available resource.
• The software will now show available resource(s). Select the ap-
propriate Ethernet port and click the ‘Connect’ button. In the exam
-
ple screenshot above, the UGA is found on the IP of 172.25.128.13.
The instrument is indicated as ‘UGA’ precisely.
• After the proper port changes status to ‘Connected’ (the icon
turns green), close the ‘ConnectorDialog’ window. The title bar of
the software indicates the present connection.
• In the UGA software (See screenshot on the next page), click the
green ‘Start’ button (Top right window) to start UGA and wait until
the current status becomes the ready state. (Current Mode indica
-
tor becomes solid green and the word of ‘Ready’ is shown.) It will
take about 5 minutes to reach this state. When ready, your screen
should look similar to the one illustrated below.
If wanted, click ‘Reading’ tap beside the ‘Operation’ tap in the right
bottom sub-window. A user can see all kinds of UGA running data;
Pressure, TP, and Temperature.
If the system fails to reach at the Ready state, please refer to the sec
-
tion of 2.2.2.4 of this manual.


