Enviro Maintenance Manual 2004
Compressor Maintenance
Do not, at any time lubricate any of the parts with oil, grease, or petroleum products nor clean with acids,
caustics or chlorinated solvents. Be very careful to keep the diaphragm from contacting any petroleum
product of hydrocarbons. It can affect the service life of the pump.
To clean or replace the filters and/or rubber gasket, remove the fi ve screws in the top of the unit. The filters
and gaskets are located beneath this top plate. Remove the filters and wash then in a solvent and/or blow
off with air and replace. The gasket may be cleaned with water. Replace the filters in proper positi on and
replace the gasket. Note that the gasket and top plate will fit in one position only.
To replace the diaphragm, remove the socket cap screws from the head of the pump. The diaphragm is
held in place by two Philip head screws. Remove screws, retainer plate, and diaphragm. The diaphragm
will fit in any position on the connecting rod. Replace the plate and the two Phillips head screws. Torque to
30 inch-pounds on DOA and DAA.
Caution:
Do not raise any burrs or nicks on the heads of these screws. These burrs could cause damage
to the inlet valve.
For replacing the inlet and outlet valve, remove the slotted machine screw that holds each valve in place.
The stainless steel inlet and outlet valves are interchangeable. Clean them with water. When replacing the
outlet valve, place the new valve in location and note there is a retaining bar near the machine screw hole.
This retaining bar holds the valve in position. When replacing the inlet valve, note that the valve holder is
marked with an X in one corner. This X should be in the lower right hand corner toward the inlet of the air
chamber. Replace the head and tighten the socket head screws to 90-100 inch-pounds or torque on DOA
and DAA.
Do not attempt to replace the connecting rod or motor bearings. If after cleaning the unit
and/or installing a new service kit, the unit still does not operate properly, contact your
representative, the factory, or return the pump to one of our authorized Service Centers.
IF YOUR PUMP IS EQUIPPED WITH PLASTIC PLUGS IN THE EXHAUST AND/OR
INTAKE POTS, REMOVE BEFORE STARTING THE UNIT
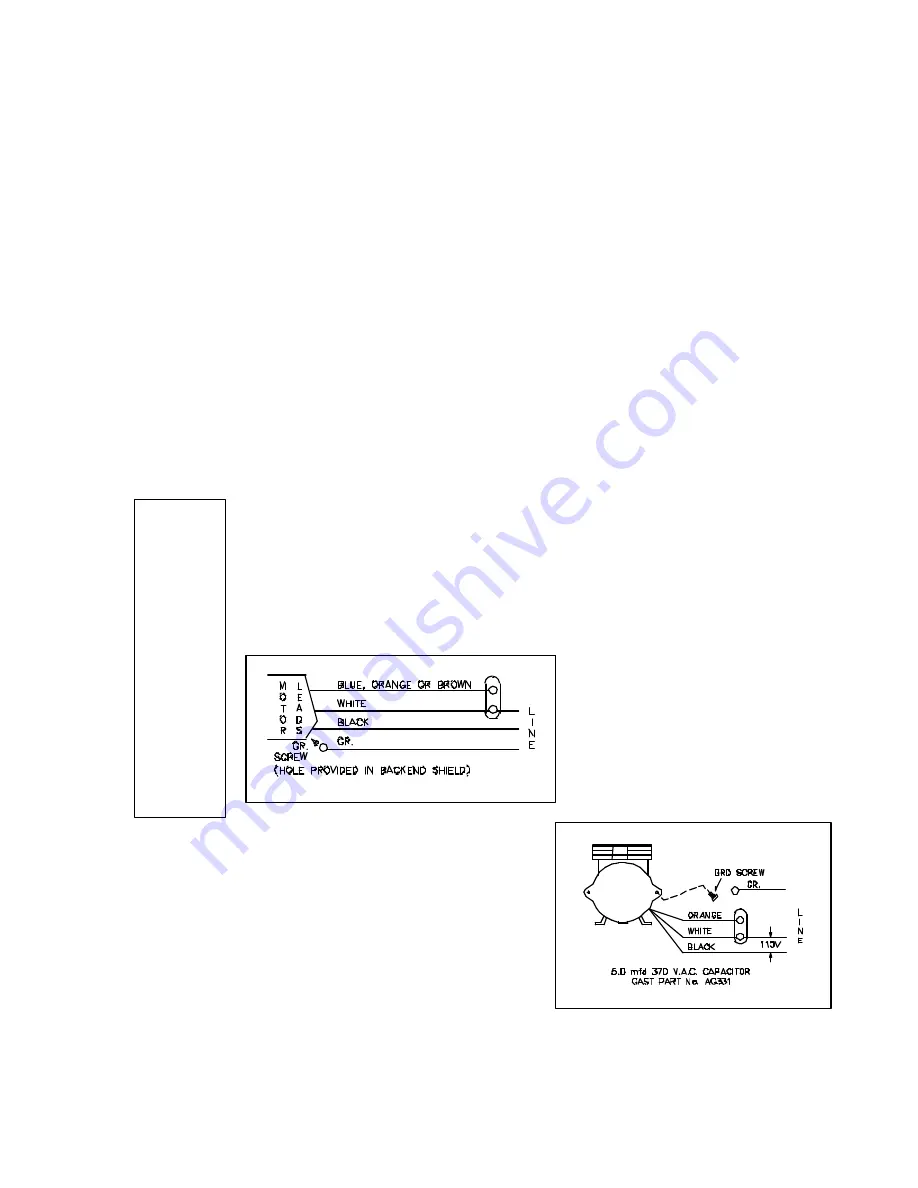
Wiring Information
For any permanent split
capacitor motor, which has four
(4) leads is as follows:
Brown leads to capacitor.
Black-leads to Power Source.
For any permanent split capacitor for DOA & DAA motor,
which has three (3) leads is as follows:
IMPORTANT NOTICE:
DO NOT AT ANY TIME ATTEMPT TO REMOVE THE CONNECTING ROD
OR COMPLETELY DISASSEMBLE THE PUMP. IF IT DOES NOT GIVE
YOU THE PROPER SERVICE EVEN AFTER INSTALLING A NEW
SERVICE KIT, PLEASE RETURN IT TO ONE OF THE AUTHORIZED
SERVICE CENTERS
WARNING -
The motor is
thermally
protected
and can
automaticall
y restart
when the
protector
resets.
ALWAYS
disconnect
KES fan
power
source
before
servicing.
Summary of Contents for KES Enviro
Page 2: ......
Page 4: ......
Page 15: ...Enviro Maintenance Manual 2004 RPD10 Face Plate Figure 19 RPW10 Face Plate Figure 20...


