-41-
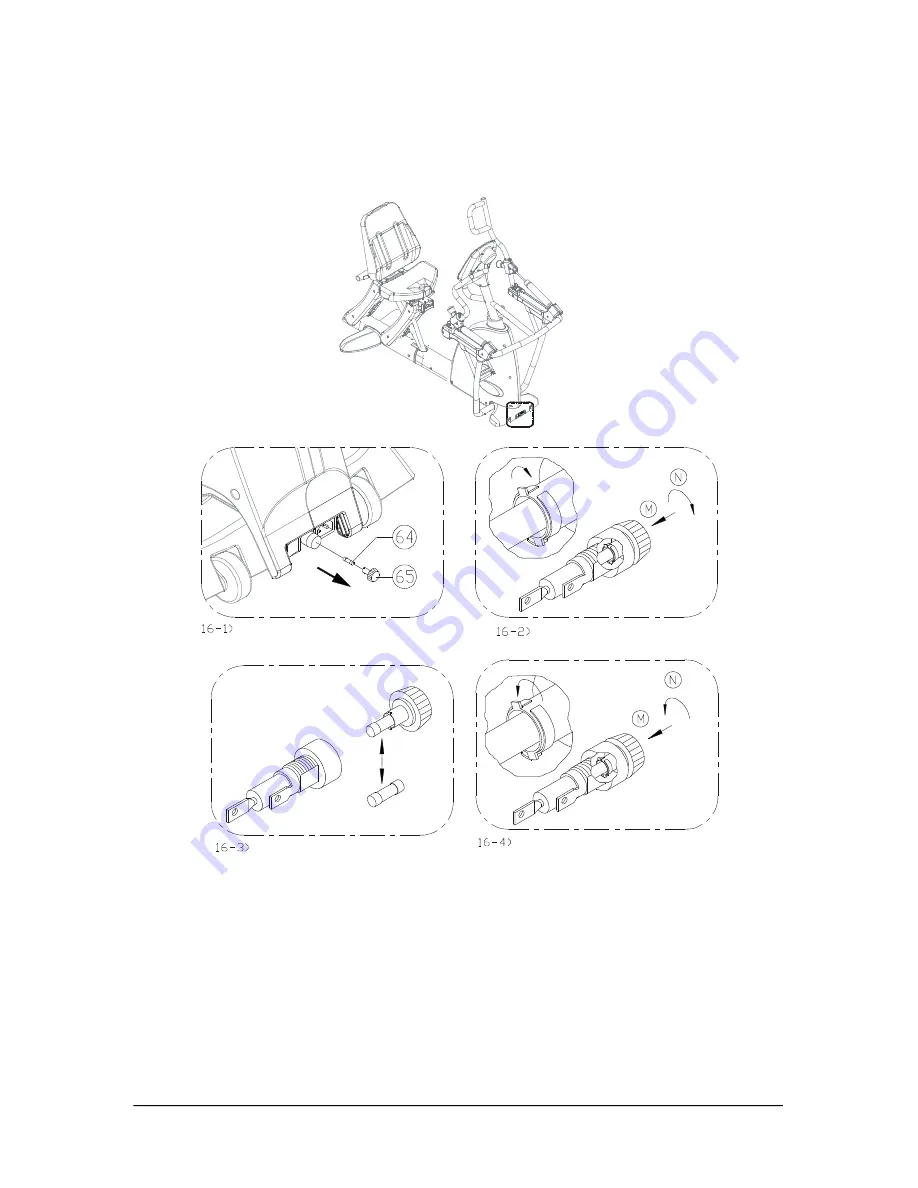
7.2.2 INSPECTING AND REPLACING THE FUSE
If the power supply is good, the power cord is connected properly, and the product
on/off switch is in the "on" position, but the on/off switch and the display do not light,
the fuse may be burnt. Follow instructions below to inspect and replace the fuse.
16-1. Prepare to replace the fuse. Fuse (64) and fuse holder (65) are shown above.
16-2. Push the fuse holder (65) with fuse (64) in toward the unit. Then turn the fuse
holder counterclockwise. Remove the fuse and fuse holder.
16-3. Inspect the fuse. If it is broken, it makes an electrical open; the on/off switch on
the product will not light up; the product cannot operate. If the fuse is not broken;
it has continuity; inspect your wall power supply.
16-4. Install a good fuse into the fuse holder. Insert the fuse and fuse holder (M) into
the product as indicated. Rotate the fuse holder clockwise (N) to secure it in place.
Put the gas spring (shock)(24) onto the right support tube and use the clevis pin
(80) and R-shaped cotter (or hitch) pin (81) to secure it.


