8530 Shatterbox
Page 19 of 28
SPEX SamplePrep LLC January 2010
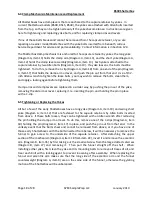
6.6 Replacing the Rubber Columns
To replace the rubber columns (Diagram A, item 7) first remove the older columns by removing
the retaining screws (Diagram A, item 26) that hold them, and pulling the old columns from
their sockets. Then place the new columns in those sockets and check and adjust the clearance
between the eccentric and coupling arms as mentioned above. Once the correct clearance is
established, drill holes through the new columns to allow insertion of the retaining pins.
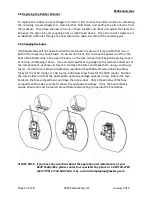
6.6 Changing the Fuses
If the Shatterbox will not operate when the start button is pressed, it is possible that one or
both of the fuses may have blown. To access the fuses, first remove the power cord from the
back of the Shatterbox. Then open the door on the fuse compartment by gently prying it open
at the top and flipping it down. Use a small screwdriver to gently pry the red fuse holder out of
the compartment, as shown in Figure 3. Remove the fuses and check them using a continuity
tester. If either fuse is blown or defective, replace both with 3AG 10-amp, 230V slow-blow
fuses for the 115V model, or 3AG 5-amp, 230V slow-blow fuses for the 230V model. Position
the fuse holder such that the appropriate operating voltage appears on top. Return the fuse
holder to the fuse compartment and close the access door. Check the window of the fuse
compartment to make sure that it shows the appropriate voltage. If not, the fuse holder is
upside down and must be turned around before attempting to operate the Shatterbox.
PLEASE NOTE:
If you have any questions about the operation and maintenance of your
8530 Shatterbox, please contact our specialists by phone at 1-800 LAB-SPEX
(522-7739) or 732-549-7144, or by e-mail at [email protected].


