background image

8530 Shatterbox 

Page 17 of 28 

SPEX SamplePrep LLC                                   January 2010 

6.0 MAINTENANCE 
 
6.1 Shatterbox Part Numbers


Following  these  written  instructions  are  a  parts  list  and  diagrams  (pages  22-24)  of  the 
Shatterbox  mechanism and  cabinet.    Note  that all  SPEX  parts have  5-digit  inventory  numbers 
that  must  be  used  to  order  them.    However,  most  of  these  parts  also  have  1-digit  or  2-digit 
numbers  that  correspond  to  the  part's  position  in  an  engineering  drawing.    Example:    the 
screws, which hold the columns in place, are part no. 26 in Diagram A, but must be ordered as 
SPEX Part No

50619.  


6.2 Cleaning the Shatterbox


Depending  on  how  dusty  the  working  environment  is  it  may  be  necessary  to  clean  the 
Shatterbox regularly.  The clamp and capsule retainer should be vacuumed or wiped off.   Any 
spilled powders or liquids should be wiped up immediately with a slightly damp cotton cloth after 
every use. This should minimize the buildup of any powders, mold/mildew, or unsightly gunk over 
the life of the unit. To clean the Shatterbox mechanism, remove the access panel on the back of 
the cabinet (after unplugging the mill) and vacuum the exposed surfaces.  
 
For a properly functioning Cam-Action Clamp, it is 

absolutely necessary

 that the lever assembly 

roller  rotates  smoothly  (Diagram  A,  Item  13).  Clean  off  any  excess  dust  or  dirt  from  the  outer 
segments of the clamp, with special attention being placed on the hinge sections and on the roller. 
It may be necessary to  oil the hinge and  the  roller from time  to time.  If the  roller locks  up, the 
clamp can be easily damaged. 
 

NOTE:  It is important to unplug the unit from its power source before beginning any cleanup 

or maintenance work that is to be performed on the mill.


6.3 Replacing Drive Belts


Special compound O-rings are used as drive belts (Diagram B, Item 34).  When a drive belt fails, 
all four drive belts should be replaced by SPEX part no. 51793.  (Neoprene O-rings will not 
work.)  Before installing new drive belts, check the clearance between the hubs of the coupling 
arm and eccentric arm (Diagram B, Items 28 and 35, respectively); the gap should be between 
1/16 inch and 1/8 inch (1.5 mm to 3 mm).  If it is more or less than that, loosen the lock screws 
on the collar of the coupling arm with a 1/8-inch Allen wrench, adjust the clearance by moving 
the coupling arm up or down on the motor shaft, then tighten the lock screws.   
 
Visually inspect the coupling arm and eccentric arm to make sure they are parallel, and not 
bent; if they are damaged, they should be replaced. 
 
Install the new drive belts in a diamond pattern, two up and two down as in Diagram B.  Spin 
the funnel (Diagram A, item 23) by hand to make sure the two arms spin together freely, and 
the drive belts are parallel. 


Summary of Contents for ENCLOSED SHATTERBOX 8530

Page 1: ...erty St Metuchen NJ 08840 732 623 0465 www spexsampleprep com 8530 ENCLOSED SHATTERBOX OPERATING MANUAL For 8530 115 and 8530 230 Shatterbox with Serial Numbers 07000 and higher this manual is Part No...

Page 2: ...5 1 Grinding Containers 13 6 0 Maintenance 17 6 1 Shatterbox Part Numbers 17 6 2 Cleaning the Shatterbox 17 6 3 Replacing Drive Belts 17 6 4 Clamp Mechanism Maintenance and Replacement 18 6 5 Tighten...

Page 3: ...ntainers are available in hardened steel tungsten carbide alumina ceramic and zirconia ceramic The full range of Shatterbox grinding containers is described in detail in the SPEX Handbook of Sample Pr...

Page 4: ...7 7 two prong plug supplied NOTE Operator is responsible for supplying alternate line cord plug if required Fuses 115V 60Hz version 10 amp slow blow fuse in inlet module 230V 50Hz version 5 amp slow...

Page 5: ...ace Check the power switch which is on the back of the cabinet next to the electrical inlet Diagram C Item 48 this switch should be in the off position the 0 should be pushed in when the power cord is...

Page 6: ...arms properly separated tighten the setscrews use a 1 8 Allen wrench As re installing the access panel note the electrical inlet on off switch and the fuse holder on the left side of the access panel...

Page 7: ...S CLAMP A CONTAINER IN PLACE WHEN RUNNING THE SHATTERBOX 2 DO NOT OVERTIGHTEN THE CLAMP 3 DO NOT OPEN THE LID UNTIL THE LID LATCH IS DISENGAGED 4 ALWAYS UNPLUG THE MILL BEFORE OPENING THE CABINET ACCE...

Page 8: ...ertightening the clamp can damage it Such damage is not covered by the warranty The different parts of the clamp are illustrated in Diagram A To use the clamp first swing the clamp arm to the left sid...

Page 9: ...will light up The timer can now be programmed Pressing this switch to the off position 0 will switch off power to the mill 4 5 2 Digital Timer The timer includes a minutes seconds numerical display p...

Page 10: ...ts 2 55 2 50 2 45 etc Every time power is turned off and back on the timer will revert to the 3 00 default setting To keep another timer setting leave the power on If power is not interrupted the time...

Page 11: ...stay latched After 5 seconds the original timer setting will re appear and the lid latch will release To have the mill pause during a run and retain the timer setting push the pause button The motor...

Page 12: ...lement s from the container Clamp the container into the capsule retainer Make sure that the friction disc is properly placed and the grinding container is firmly seated If the clamp is properly adjus...

Page 13: ...f and tungsten carbide for the small amounts of Ti Ta and Nb present Performance is also important the denser the grinding container material the more rapid the grinding Tungsten carbide is the denses...

Page 14: ...a Large 8521 Large Hardened Steel grinding container with puck and ring Typical sample capacity 60 100 grams sample volume range 30 120 ml The sample volume ranges given above are estimates not absolu...

Page 15: ...amp causing damage to both the mill and container 5 1 4 Emptying and Cleaning the Grinding Container The grinding container is usually emptied by brushing out the ground sample Typically a technician...

Page 16: ...ner it will get Particle size can almost always be lowered further by reducing the sample size or lengthening the grinding time or both Dry grinding is relatively efficient for most brittle materials...

Page 17: ...hly Diagram A Item 13 Clean off any excess dust or dirt from the outer segments of the clamp with special attention being placed on the hinge sections and on the roller It may be necessary to oil the...

Page 18: ...p levers are replaced in a similar way by pushing the pin out of the yoke removing the old arm or lever replacing it re inserting the pin and holding the pin in place with a C clip 6 5 Tightening or R...

Page 19: ...the door on the fuse compartment by gently prying it open at the top and flipping it down Use a small screwdriver to gently pry the red fuse holder out of the compartment as shown in Figure 3 Remove t...

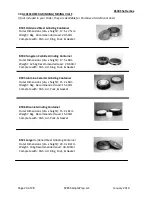
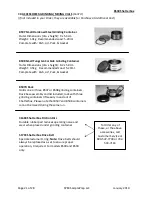
Page 20: ...uter Dimensions dia x height 17 5 x 8cm Weight 12 5kg Recommended Load 20 60ml Complete with Dish Lid Ring Puck Gasket 8505 Alumina Ceramic Grinding Container Outer Dimensions dia x height 15 2 x 8cm...

Page 21: ...lete with Dish Lid Puck Gasket 8507R Rack Holds one or three 8507 or 8508 grinding containers Rack base assembly and lid included rack with three grinding containers lifts easily in and out of Shatter...

Page 22: ...of 28 SPEX SamplePrep LLC January 2010 This page contains restricted content To download the full unabridged version of this manual please visit our website at www spexsampleprep com or call Customer...

Page 23: ...of 28 SPEX SamplePrep LLC January 2010 This page contains restricted content To download the full unabridged version of this manual please visit our website at www spexsampleprep com or call Customer...

Page 24: ...of 28 SPEX SamplePrep LLC January 2010 This page contains restricted content To download the full unabridged version of this manual please visit our website at www spexsampleprep com or call Customer...

Page 25: ...of 28 SPEX SamplePrep LLC January 2010 This page contains restricted content To download the full unabridged version of this manual please visit our website at www spexsampleprep com or call Customer...

Page 26: ...of 28 SPEX SamplePrep LLC January 2010 This page contains restricted content To download the full unabridged version of this manual please visit our website at www spexsampleprep com or call Customer...

Page 27: ...of 28 SPEX SamplePrep LLC January 2010 This page contains restricted content To download the full unabridged version of this manual please visit our website at www spexsampleprep com or call Customer...

Page 28: ...site www spexsampleprep com E mail sampleprep spexcsp com In Europe please contact our European Headquarters at SPEX CertiPrep Ltd 2 Dalston Gardens Stanmore Middlesex HA7 1BQ United Kingdom Tel 44 0...

Reviews: